Overview
Roles and permissions are how Spendflo controls who sees what and who can act on it. The model is built around three connected ideas:
- Roles — define who a user is (Admin, CFO, Finance Manager, Procurement Executive, etc.). Every user has exactly one role. Roles are mutually exclusive.
- Action Permissions — define what the user can do on each module (View, Manage, or No Access). Set by the role; can be customized via custom roles.
- Data Access Scope — define which records the user can see (Own, Department, Subsidiary, or All). Layered on top of the role.
Roles answer “what kind of user is this?” Permissions answer “what can they touch?” Data scope answers “and which records?” The three combine to form effective access.
On top of all that, Permission Groups offer admins a way to grant additional, granular feature-level access without changing someone’s role or creating role explosion. They’re additive, optional, and stack on top of whatever role the user already has.
Who is this for?
End Users
- To understand what your role means, why you can or can’t see certain modules, and how data scoping affects what records appear.
Admins
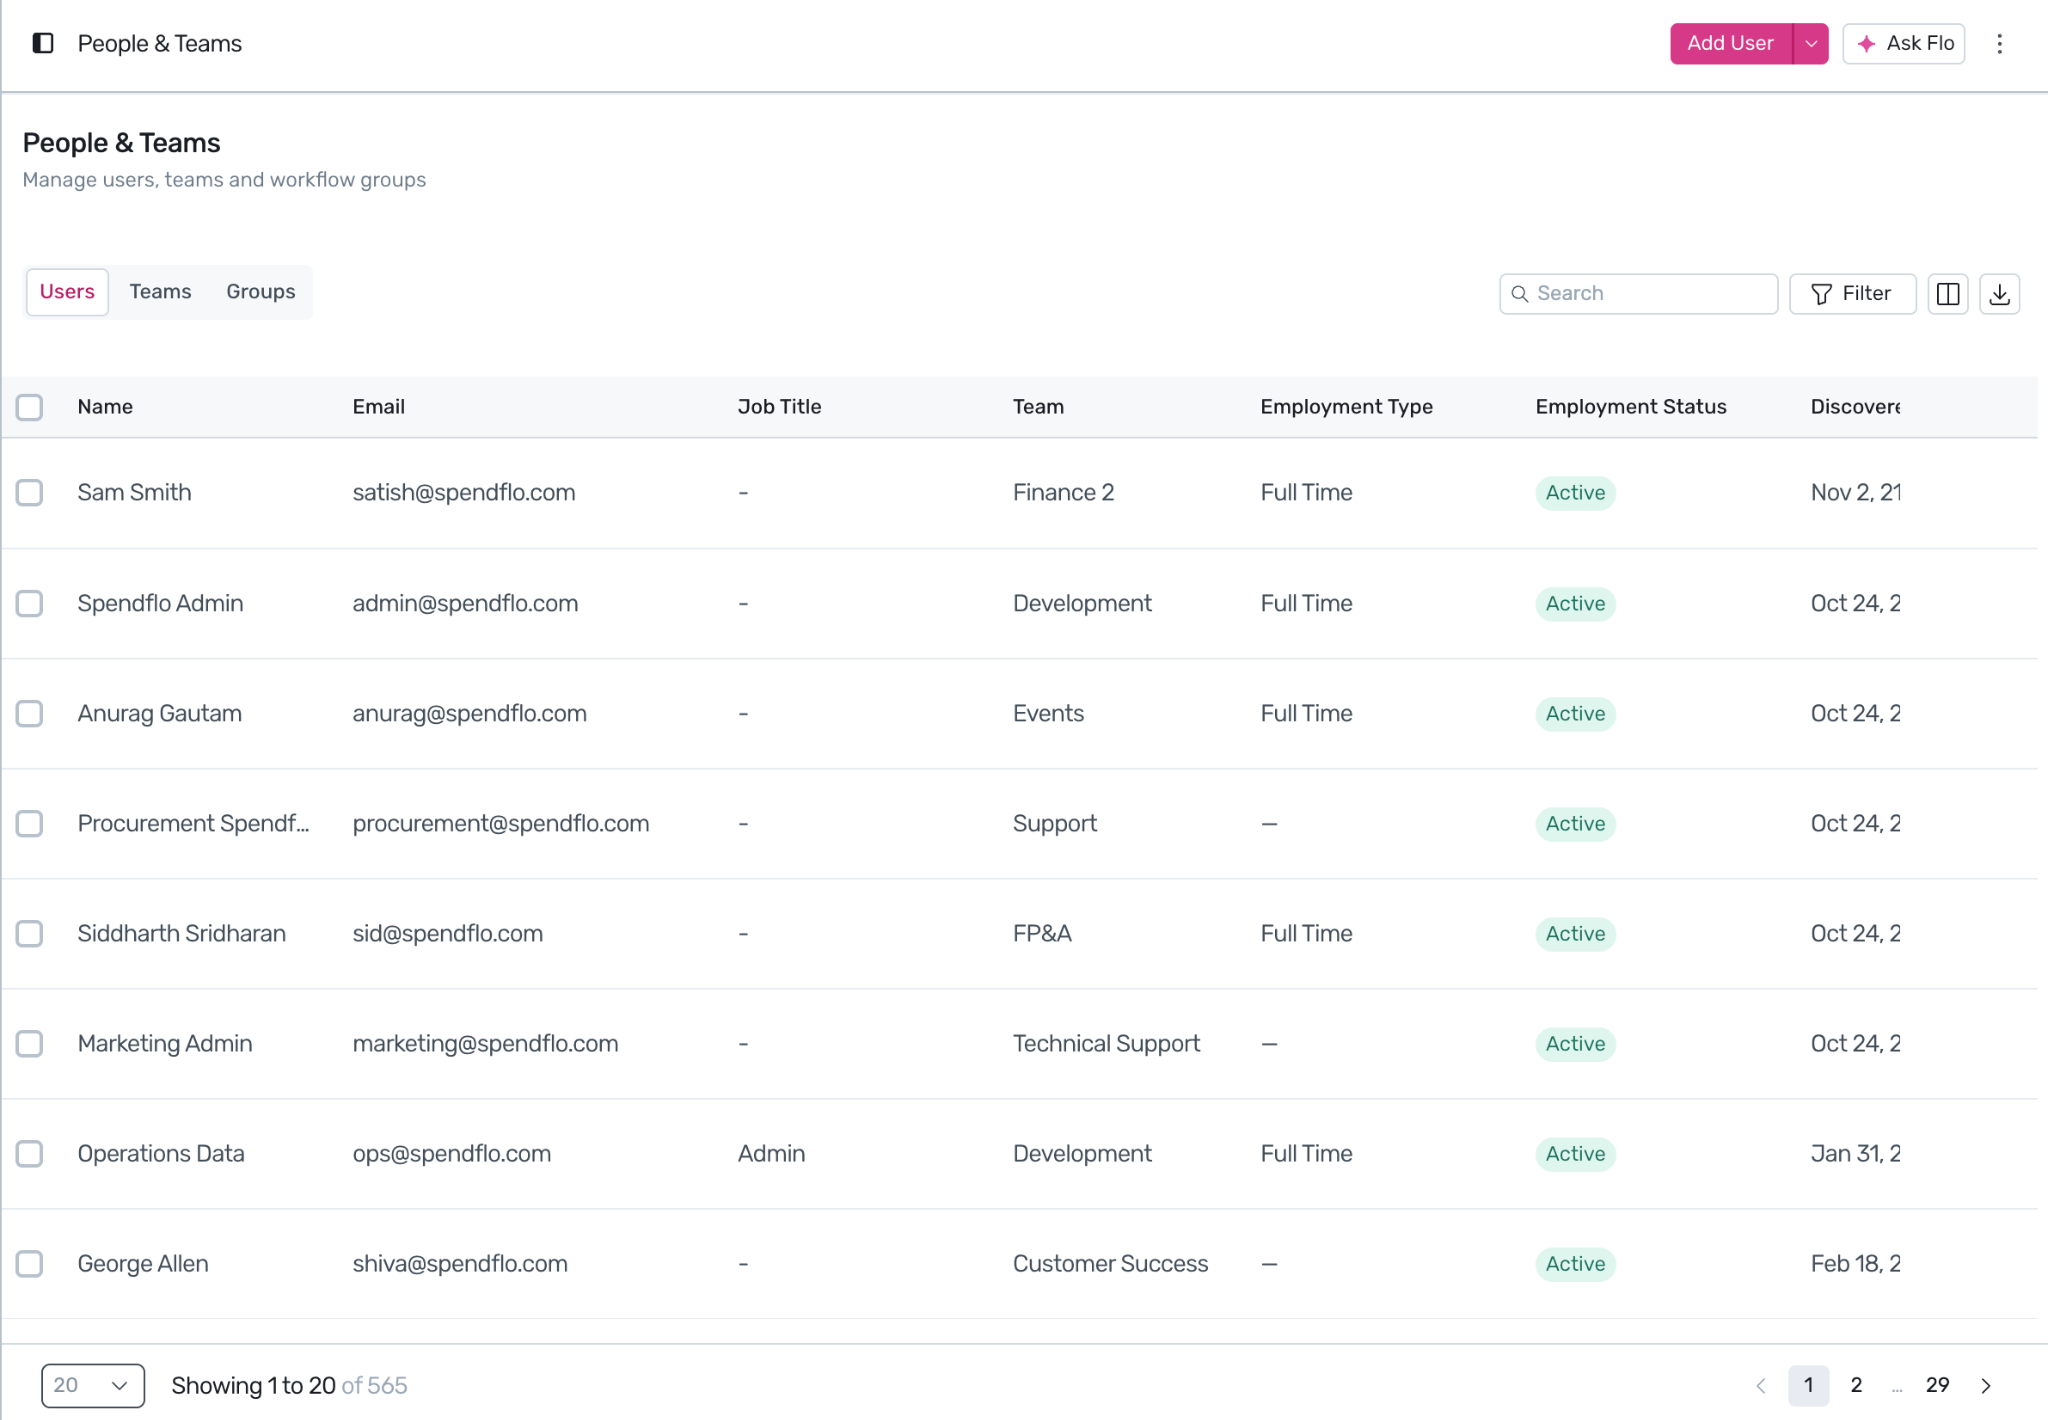
- To configure roles, build custom roles, assign data scopes, manage permission groups, and run the full user lifecycle (invite → active → paused/locked → deleted).
Security / Compliance
- To audit who has access to what, justify access for SOX / ISO 27001 / SOC 2, and design least-privilege configurations.
Admin Only sections describe configuration surfaces that only Administrators (and Super Administrators) can access.
Key Concepts & Terminology
Role A named bundle of action permissions and a default data access scope. Every Spendflo user has exactly one role. Roles are mutually exclusive — a user cannot hold two roles simultaneously.
Pre-defined Role A role shipped by Spendflo that cannot be edited or deleted. Thirteen pre-defined roles cover the common archetypes — Admin, CFO, Finance Manager, etc. (Full list below.)
Custom Role A role your admin creates to match a function your pre-defined roles don’t cover (e.g., Procurement Analyst with read-only Vendors + read/write Renewals). Customizable name, description, per-module permissions, and default data scope.
Action Permission What a user can do on a given module. Three levels: No Access, View (read-only), Manage (read + write).
Manage The write tier of an action permission. Includes view, edit, action-taking (approve, reject, complete), and — on certain modules — delete.
Data Access Scope The slice of records the action permission applies to. Four levels:
- Own — only records the user created or is explicitly assigned to.
- Department — all records belonging to the user’s assigned department.
- Subsidiary — all records tied to the user’s subsidiary, or to a manually selected set of subsidiaries.
- All — every record in the org.
Subsidiary Scope — Granular Selection When data scope is set to Subsidiary, admins can pick either “My Subsidiary” (just the user’s own assignment) or “Select Subsidiaries” (a manually chosen list — supports regional / multi-entity roles).
Permission Group A bundle of granular, additive feature-level permissions on top of a role. A user can be assigned multiple permission groups; permissions combine using a combine-and-allow model (a permission is granted if any assigned group grants it).
Universal Permission Permissions every user has regardless of role: Notifications, Flo AI, Home page, Help Center.
Department The organizational unit a user belongs to. Drives data scoping for department-level roles. Synced from your HRMS when integrated; otherwise managed manually.
Subsidiary A legal entity within your organization. Synced from your GL (NetSuite, QuickBooks, Sage Intacct, Xero) when integrated; otherwise managed manually. Drives data scoping for subsidiary-level roles.
User Lifecycle States
- Invited — invite sent, not yet accepted. No platform access.
- Invite Expired — invite was not accepted within the configured window.
- Active — accepted invite. Full access per role and scope.
- Paused — admin temporarily suspended login. Profile preserved.
- Locked — admin locked for security reasons. Manual unlock required.
- Deleted — removed from the platform. Historical data retained.
Spendflo ID The system-generated, immutable internal identifier on every user record. The primary key for everything — requests, comments, approvals, audit logs. Persists across email changes, name changes, and role changes.
Feature Areas
1. The 13 Pre-defined Roles
Spendflo ships with thirteen pre-defined roles. They cover the most common procurement, finance, IT, security, and admin archetypes. Pre-defined roles cannot be edited or deleted.
| Role | What they’re built for |
|---|---|
| Super Administrator | Platform-level admin. Exclusive access to Super Admin Settings. Cannot use operational modules. Reserved for Spendflo platform management. |
| Administrator | The standard admin role. Full access to every module — users, roles, settings, requests, vendors, agreements, the full P2P flow, reports. |
| CFO | Org-wide visibility. Read access to spend, contracts, renewals, requests, PO, invoices, bills, bill payments. No user management or settings access. |
| Finance Manager | Owner of payables. Manage POs, invoices, bills, bill payments. View spend across the org. |
| Finance Executive | Read-only on spend, requests, contracts, POs, invoices, bills, bill payments. |
| Procurement Manager | Owner of procurement. Manage vendors, agreements, requests, renewals, assessments, workflows, POs. |
| Procurement Executive | Initiates and tracks procurement work. Manage requests + view contracts and renewals. |
| Spend Owner | Owns specific vendor or spend categories. Manage assigned vendors and approve related requests. |
| Legal | View contracts + add comments. View vendors and assessments. No write outside comments. |
| IT Administrator | IT-side admin. Manage integrations, applications, user provisioning, workflows. |
| IT Manager | Manage IT-owned applications + view related spend, requests, agreements. |
| InfoSec | Read-only on vendor security assessments and compliance data. |
| Department Owner | Owns their department’s spend, applications, and requests. Scoped automatically to their department. |
Universal permissions
Regardless of role, every user can access:
- Notifications — all notifications they’re a recipient of
- Flo AI — the Flo AI assistant
- Home page — their personalized landing page
- Help Center — this knowledge base
Super Admin–only permissions
Only Super Administrator and Administrator can View / Manage Super Admin Settings.
2. The Permission Matrix
The matrix below defines the default permission set for each pre-defined role. Custom roles can be configured with any combination of these.
| Permission | Super Admin | Admin | CFO | Fin Mgr | Fin Exec | Pro Mgr | Pro Exec | Spend Owner | Legal | IT Admin | IT Mgr | InfoSec | Dept Owner | Roles with it |
|---|---|---|---|---|---|---|---|---|---|---|---|---|---|---|
| Requests | ||||||||||||||
| View Requests | · | ✓ | ✓ | · | ✓ | ✓ | ✓ | ✓ | ✓ | ✓ | · | · | ✓ | 9 |
| Manage Requests | · | ✓ | · | · | · | ✓ | ✓ | ✓ | · | ✓ | ✓ | · | ✓ | 7 |
| Licenses & Pricing | ||||||||||||||
| View Licenses | · | ✓ | ✓ | ✓ | ✓ | ✓ | ✓ | ✓ | ✓ | ✓ | ✓ | ✓ | ✓ | 12 |
| View Pricing Intel | · | ✓ | ✓ | · | ✓ | ✓ | ✓ | ✓ | · | ✓ | ✓ | · | ✓ | 9 |
| Vendors, Renewals & Assessments | ||||||||||||||
| View Vendors | · | ✓ | ✓ | · | ✓ | ✓ | ✓ | ✓ | ✓ | ✓ | ✓ | ✓ | ✓ | 11 |
| View Renewals | · | ✓ | ✓ | · | ✓ | ✓ | ✓ | ✓ | ✓ | ✓ | ✓ | · | ✓ | 10 |
| Manage Renewals | · | ✓ | · | · | · | ✓ | · | ✓ | · | ✓ | ✓ | · | · | 5 |
| View Assessments | · | ✓ | ✓ | · | · | ✓ | ✓ | ✓ | ✓ | ✓ | ✓ | ✓ | ✓ | 10 |
| Manage Assessments | · | ✓ | · | · | · | ✓ | · | · | · | ✓ | · | · | · | 3 |
| Purchase Orders | ||||||||||||||
| View Purchase Orders | · | ✓ | ✓ | ✓ | ✓ | ✓ | ✓ | ✓ | ✓ | ✓ | ✓ | · | ✓ | 11 |
| Manage Purchase Orders | · | ✓ | · | ✓ | · | ✓ | ✓ | · | · | · | · | · | · | 4 |
| Invoices, Bills & Payments | ||||||||||||||
| View Invoices | · | ✓ | ✓ | ✓ | ✓ | ✓ | ✓ | ✓ | · | · | · | · | · | 7 |
| Manage Invoices | · | ✓ | · | ✓ | · | · | · | · | · | · | · | · | · | 2 |
| View Bills | · | ✓ | ✓ | ✓ | · | · | · | · | · | · | · | · | · | 3 |
| Manage Bills | · | ✓ | · | ✓ | · | · | · | · | · | · | · | · | · | 2 |
| View Bill Payments | · | ✓ | ✓ | ✓ | · | · | · | · | · | · | · | · | · | 3 |
| Manage Bill Payments | · | ✓ | · | ✓ | · | · | · | · | · | · | · | · | · | 2 |
| Reports | ||||||||||||||
| View Reports | · | ✓ | ✓ | ✓ | ✓ | ✓ | ✓ | · | ✓ | ✓ | · | · | ✓ | 9 |
| Settings | ||||||||||||||
| View Settings | · | ✓ | · | · | · | ✓ | · | · | · | ✓ | ✓ | · | · | 4 |
| Manage Settings | · | ✓ | · | · | · | · | · | · | · | · | · | · | · | 1 |
| Manage User Settings | · | ✓ | · | · | · | · | · | · | · | ✓ | · | · | · | 2 |
| View Super Admin Settings | ✓ | ✓ | · | · | · | · | · | · | · | · | · | · | · | 2 |
| Manage Super Admin Settings | ✓ | ✓ | · | · | · | · | · | · | · | · | · | · | · | 2 |
| Workflows & Automation | ||||||||||||||
| View Workflows | · | ✓ | ✓ | ✓ | ✓ | ✓ | ✓ | ✓ | ✓ | ✓ | · | · | ✓ | 10 |
| Manage Workflows | · | ✓ | · | · | · | ✓ | · | · | · | ✓ | · | · | · | 3 |
| View Custom Agents | · | ✓ | ✓ | · | ✓ | · | · | · | ✓ | ✓ | · | · | · | 5 |
| Manage Custom Agents | · | ✓ | · | · | · | · | · | · | · | ✓ | · | · | · | 2 |
Custom roles can mix and match any of the above permissions plus the four universal permissions, with any data access scope.
3. Data Access Scope
Permissions answer what a user can do; scope answers which records they can do it on. The two combine to form effective access.
The four scopes
| Scope | What the user sees |
|---|---|
| Own | Only records they created or are explicitly assigned to (e.g., requests they raised, vendors they own) |
| Department | All records belonging to their assigned department |
| Subsidiary | All records tied to their subsidiary, or a manually selected set of subsidiaries |
| All | All records across the entire organization |
How scope combines with permissions
| Role / setup | Action | Scope | Net effect |
|---|---|---|---|
| Procurement Executive | Manage Requests | Own | Can create and edit only their own requests |
| Finance Manager | View Bills | Department | Can see every Bill in their department; cannot edit |
| Spend Owner | Manage Requests | Subsidiary | Can approve and close requests within their subsidiary |
| CFO | View Spend | All | Read-only across the entire org |
| Administrator | Manage everything | All | Full edit across everything |
Subsidiary scope — granular selection
When the data scope is Subsidiary, admins choose between:
- My Subsidiary — only the subsidiary on the user’s profile. Used for entity-local roles (e.g., a Finance Manager in the US entity).
- Select Subsidiaries — a manually chosen set of one or more subsidiaries. Used for cross-entity roles (e.g., a regional APAC Finance lead covering Japan + Singapore + Australia entities) without granting global access.
Scope vs. permission groups
Scope and permission groups solve different problems:
- Scope restricts the set of records a user can see for any module they have access to.
- Permission groups grant additional features on top of a role, but they do not widen the data scope.
A permission group can give a user access to Manage Renewals — but the user will still only see renewals within their existing data scope (Own / Department / Subsidiary / All).
4. Custom Roles
ADMIN ONLY
What is it?
A role you create to match a function the pre-defined roles don’t cover. Same permission model and same data-scope model as pre-defined roles — you just pick which permissions are on, which are off, and what the default scope is.
Where to find it
Settings → Roles → + Add Role.
Step-by-step — Creating a custom role
- Settings → Roles → + Add Role.
- Enter a Role Name (mandatory, unique).
- Enter a Description (mandatory) — what is this role for?
- For each module, set the permission level: No Access, View, or Manage. Default is No Access.
- Choose the Default Data Access Scope for the role: Own / Department / Subsidiary / All. (Per-user overrides are still allowed.)
- Click Save Role. The role is immediately available for assignment.
Editing a custom role
Open Settings → Roles → [Role] and edit any field. Changes apply immediately to every user currently assigned to it.
Deleting a custom role
A custom role can only be deleted when no active users are assigned to it. Spendflo blocks the delete and prompts you to reassign affected users to another role first.
Once all users are reassigned, the confirmation prompt reads:
“This role has no active users. Deleting it is permanent and cannot be undone. Do you want to proceed?”
5. Permission Groups
ADMIN ONLY
What is it?
Permission Groups are granular, feature-level, additive access bundles you can layer on top of a user’s role. Unlike roles (fixed and mutually exclusive), a user can be assigned multiple permission groups, and permissions combine using a combine-and-allow model — if any assigned group grants a permission, the user gets it.
Why use them
- Grant a specific feature (e.g., the ability to export Vendor lists to CSV) without changing the user’s role.
- Combine permissions across functional areas (a Legal Reviewer who also needs Renewals visibility).
- Model real-world responsibilities where a single person wears two hats.
- Reduce security risk caused by over-permissioning (“just make them an Admin”).
Where to find it
Settings → Organization Settings → Permission Groups.
The page lists every group, the number of users assigned, the last modified timestamp, and Edit/Delete CTAs.
What a Permission Group contains
- A unique name and description (both mandatory).
- A set of Scopes — the modules and pages the group affects.
- An Access Level for each scope — No Access, Read, Write (edit / take action), or Delete (where applicable).
Step-by-step — Creating a Permission Group
- Settings → Organization Settings → Permission Groups → + Add Permission Group.
- Enter Group Name and Description (both mandatory).
- Configure permissions grouped by system area:
- Requests & Approvals
- Vendor Management
- Dashboards & Insights
- Company Settings
- Security & Integrations
- For each permission, choose the appropriate model:
- Edit / View / None
- Yes / No
- Click Save. The group is immediately available for assignment from the Users table.
Editing and deleting
- Custom permission groups can be edited at any time. Updates apply immediately to all assigned users.
- Deletion shows a confirmation that lists the count of affected users; on confirm, the group is removed from those users and any permissions granted by that group are revoked.
- System-defined permission groups (shipped by Spendflo) cannot be deleted.
Assignment
From Settings → Users, open a user and pick one or more permission groups from the multi-select. The Default permission group is always applied — you cannot remove it.
Changes take effect immediately. Removing a group instantly removes the permissions it granted (without touching anything granted by another assigned group).
Permission evaluation rules
- A user gets all permissions granted by any assigned group. Permissions are never subtracted by another group.
- If the same permission appears at different levels across groups, the higherlevel wins:
- Edit overrides View
- View overrides None
- A group that grants full admin access gives the user unrestricted access, regardless of other groups.
Example. A user is assigned:
- Finance Group → View Vendors
- Procurement Group → Edit Vendors
Result: the user can edit vendors.
Where Permission Groups are not enough
Permission Groups widen feature access. They do not widen data scope. A user with Department scope who’s added to a “Manage Vendors” permission group can still only edit vendors in their department.
6. Departments & Subsidiaries
Departments
ADMIN ONLY
A department is an organizational unit that scopes data for department-level roles. Configurable under Settings → Organization Settings → Departments.
| Field | Description |
|---|---|
| Name | Department name. Mandatory. |
| Description | Optional. |
| HRMS Sync | When an HRMS integration is active, departments seed and stay in sync automatically. |
| User Assignment | Each user is assigned to one department at a time. |
| Access Impact | Users with Department data scope see only records belonging to their assigned department. |
Subsidiaries
ADMIN ONLY
A subsidiary is a legal entity within your organization. Configurable under Settings → Organization Settings → Subsidiaries.
| Field | Description |
|---|---|
| GL Sync | Subsidiaries auto-create and stay in sync from your connected GL (NetSuite / Sage Intacct / Xero / QuickBooks). |
| Manual Creation | Supported if no GL is connected. |
| User Assignment | A user can be assigned to one or more subsidiaries. |
| Access Impact | Users with Subsidiary data scope see only records tied to their assigned subsidiaries. |
7. The User Lifecycle
ADMIN ONLY
Lifecycle states
Invited  ──▶  [Accepted]  ──▶  Active  ⇄  Paused
   │                              │
   ▼                              ▼
Invite Expired               Locked  ──▶  Active (unlocked)
                                  │
                                  ▼
Deleted| State | Description |
|---|---|
| Invited | Invite sent, not yet accepted. No platform access. |
| Invite Expired | Invite was not accepted within the configured window. Link is invalid. |
| Active | User has accepted and has full access per role + scope. |
| Paused | Login temporarily suspended. Profile and data preserved. Cannot log in until reinstated. |
| Locked | Administratively locked for security reasons. Manual unlock only. |
| Deleted | Removed from the platform. Access revoked. Historical data retained. |
HRMS / IdP termination triggers a direct transition to Deleted.
Inviting a user
- Settings → Users → + Add User.
- Enter First Name, Last Name, Email, and pick a Role (all mandatory). Department and Subsidiary are optional at invite.
- Click Send Invite.
- The user is set to Invited; an invite email is dispatched.
Configurable invite expiry
The expiry window for invites is configured org-wide under Settings → Organization Settings → Security → Invite Expiry. No Spendflo-imposed default. On expiry, the state moves to Invite Expired and the link becomes invalid.
Resend Invite generates a new link and resets the timer. Only one active invite link exists per user at a time — resending invalidates the previous one.
Pausing a user
Used for extended leaves or temporary suspensions. From the user’s row, click the … menu → Pause. Login is suspended; the role, scope, and data settings are preserved. Reinstate from the same menu at any time.
Locking a user
Used for security-triggered actions. Click … → Lock. Distinct from Pause (which is operational). Manual unlock required.
Deleting a user — single
Before a user can be deleted, all their owned items must be reassigned. Items that require reassignment:
- Open requests they created
- Pending approvals in their queue
- Owned contracts (where they are the named contract owner)
- Owned vendors / applications
Reassignment rules:
- The transfer target must have the same role as the departing user.
- The transfer target must have access to the same department and subsidiary.
- Spendflo surfaces a filtered list of eligible users during the reassignment step.
- If no eligible user exists, ownership falls back to a Platform Admin.
Confirmation prompt:
“You are about to permanently remove [Name] from Spendflo. All ownership has been transferred. This action cannot be undone. Their historical data will be retained. Do you want to proceed?”
Deleting users — bulk
For large-scale offboarding (acquisitions, team-wide changes), bulk deletion uses a per-group transfer model instead of per-user.
- Select the users to delete.
- Choose a grouping dimension: Department / Subsidiary / Department + Subsidiary / Role / Title.
- System groups the selected users by that dimension.
- For each group, pick one transfer target. Eligibility = matching access.
- If no eligible target exists for a group, all owned items fall to Platform Admin.
- Confirm and delete.
Example — grouped by Department + Subsidiary:
| Group | Users Deleted | Transfer To |
|---|---|---|
| Marketing / APAC | 120 | Jane Doe (Marketing Lead, APAC) |
| Finance / US | 45 | Platform Admin (no eligible user) |
| Engineering / Global | 200 | Rahul Sharma (Engineering Lead) |
Data retention post-deletion
Deleting a user does not delete their records. Requests, comments, approvals, and audit log entries are retained and attributed as “[Name] (Deactivated)” wherever the name appears. The retention period follows your organization’s configured policy.
Re-hire flow
When a previously deleted user is re-invited using an email address linked to their deactivated record, Spendflo reactivates the existing user record rather than creating a new one. The system detects the email match automatically (email uniqueness is enforced across active and inactive addresses) and prompts:
“This email is linked to a deactivated user [Name]. Would you like to reactivate them instead?”
Access after re-hire is governed by the new role and scope assigned at re-invitation — not by what the user had before.
| What’s visible after re-hire | Yes / No / Depends |
|---|---|
| Records they personally created in their previous tenure | Yes (always linked to identity) |
| Items reassigned during offboarding | No (must be explicitly re-assigned) |
| Department-level records | Depends on new role and scope |
| Subsidiary-level records | Depends on new role and subsidiary assignment |
8. The User Identity Model
Why this matters
A user’s email may change (acquisition, marriage, rebrand), but their data, audit history, and ownership relationships should not. Spendflo separates identity from email so the record never breaks.
Spendflo ID
System-generated, immutable identifier assigned when the user record is created. The primary key for everything in the system — requests, contracts, approvals, comments, audit logs. Persists through email changes, name changes, and role changes. Used as the reference key for bulk operations (e.g., bulk email upload).
External identifiers
| Identifier | Set By | Purpose |
|---|---|---|
| HRMS ID | HRMS-driven provisioning | Stable key to match HRMS updates (including email changes) back to the Spendflo record, independent of email. |
| SCIM ID | SCIM provisioning | Used for IdP authentication. Distinct from HRMS ID — SCIM handles auth, HRMS handles data. A user can carry both if both integrations are active. |
Email address management
| Rule | Behavior |
|---|---|
| Multiple active emails | A user can have more than one. Can log in with any active email. |
| Primary email | Exactly one is always Primary. Receives all outbound notifications. Cannot be deactivated until a new primary is set. |
| Deactivation only | Emails can never be deleted from a profile — only deactivated. Preserves audit history. |
| System-wide uniqueness | An email must be unique across the entire system, active or inactive. Two users cannot hold the same email. |
Re-hire detection at invite
If an admin attempts to invite a user with an email that already exists:
- If active on another user → hard block with an error.
- If inactive on a deactivated user → Spendflo prompts: “This email is linked to a deactivated user [Name]. Would you like to reactivate them instead?”
This prevents silent duplicate records and routes the admin into the re-hire flow.
Bulk email update
For large-scale email changes — acquisitions, domain rebrands — admins can upload a CSV to add, activate, or deactivate emails in bulk.
CSV format: spendflo_id, email, action where action is add / activate / deactivate.
Row-level rules:
| Action | Behavior |
|---|---|
add | Adds the email as active. Fails if the email exists anywhere in the system. |
activate | Activates an existing inactive email on that user. Fails if not found on the user. |
deactivate | Deactivates an active email. Fails if it’s the user’s only active email, or if it’s the primary. |
Upload flow: upload → system validates and shows a preview with row-level errors → admin reviews and confirms → system processes and returns a summary.
9. Who Can Configure What
ADMIN ONLY
| Setting | Administrator | Other Roles |
|---|---|---|
| Settings → Users (invite/edit/delete) | ✓ | — |
| Settings → Roles (create/edit/delete custom roles) | ✓ | — |
| Settings → Permission Groups | ✓ | — |
| Settings → Departments / Subsidiaries | ✓ | — |
| Bulk operations (bulk role edit, bulk delete, bulk email update) | ✓ | — |
| Invite Expiry config | ✓ | — |
| Email address management | ✓ | — |
| View own profile | ✓ | ✓ |
Only IT Administrator carries the Manage User Settings permission in addition to Administrator. Otherwise, no non-admin role has access to user / role configuration.
FAQs
Q: What’s the difference between a Role and a Permission Group?
A Role defines who the user is — and a user has exactly one role at a time. A Permission Group is an additive bundle of feature-level permissions you layer on top of a role; a user can be assigned multiple groups. Roles are mutually exclusive; permission groups are flexible and stacking.
Q: If two permission groups grant conflicting access, which wins?
The higher level. Edit beats View beats None. Permissions are never subtracted by another group.
Q: A user needs to see one extra module that their role doesn’t include. Should I change their role or add a permission group?
Use a permission group. Changing the role affects more than just that one module and may grant access you don’t want. Permission groups are designed exactly for this scenario.
Q: Can a Finance Manager see all bills across the company?
Depends on their data scope. With All scope, yes. With Department scope, they only see bills tied to their department. The role gives the permission; scope determines which records.
Q: A user changed departments. Do I need to re-issue their permissions?
No. The role and permission groups stay the same. Just update the Department field on the user. If the role’s data scope is set to Department, their visible data shifts automatically to the new department.
Q: Can a Spend Owner approve any request?
Only requests within their data scope. By default, Spend Owner is Subsidiary-scoped — they approve within their subsidiary. The matrix above shows that Spend Owner has Manage Requests permission; the scope dictates which requests.
Q: How do I figure out why a user can’t access something they should?
Three-step audit:- Check their Role in the Users table — does it carry the permission?
- Check their Data Access Scope — is it narrow enough to exclude the record?
- Check their Permission Groups — is there a group that grants the missing piece, or is it missing?
Q: What if an admin leaves and we need to delete them, but they own a lot of records?
Use the single-delete reassignment flow. Spendflo will surface a filtered list of eligible transfer targets (matching role + access). If no eligible user exists, ownership defaults to another Platform Admin.
Q: Can a user be a member of two subsidiaries?
Yes. A user can be assigned to one or more subsidiaries. Combined with Subsidiary data scope, this lets you build regional roles.
Q: We use SSO. How does that interact with roles?
SSO is authentication only — it controls whether a user can log in. Roles control what they can do once authenticated. Configure SSO under Settings → Organization Settings → Security & SSO (admin-only). Role assignment is still managed inside Spendflo.
Q: Can a Department Owner see records from other departments?
By default no — their data scope is Department. An admin can override the scope per user (e.g., grant Subsidiary scope to a Department Owner of a larger team).
Q: I deleted a custom role by accident. Can I restore it?
Custom roles can only be deleted when no active users are assigned — and the deletion is permanent. There’s no soft-delete or restore. If you need it back, recreate it.
Q: A bulk delete grouped by Role left some users without an eligible transfer target. What now?
Those groups fall back to Platform Admin. You’ll be informed of this in the confirmation step before the deletion finalizes. Platform Admins can then reassign ownership to the right person at their leisure.
Q: Can I see who has access to a specific record?
Indirectly — by checking who carries the permission for that module and whose data scope includes the record. Reverse-lookup (per-record access list) is on the roadmap.
Troubleshooting
“I can’t find a user in the Users table.”
They may be in a state other than Active. Filter by Status = All to surface Invited, Paused, Locked, and Deleted users.
“An invited user says they can’t log in.”
- Check that the invite hasn’t expired (status = Invite Expired).
- Confirm the email on their record matches what they’re trying to log in with.
- If your org uses SSO, confirm they’ve been added to the Spendflo SSO group in your IdP.
- If none of the above, resend the invite.
“A user is missing a module that their role should give them.”
- Check the permission matrix above — does the role actually grant View / Manage for that module?
- If yes, confirm no permission group is in conflict (none can subtract, but a missing group could mean a feature the user expected isn’t enabled).
- Confirm data scope isn’t the cause — they may have the permission but no records in scope.
“I’m getting blocked from deleting a custom role.”
You must reassign all active users to another role first. Open Settings → Roles → [Role] to see the user count, then bulk-edit users to a different role. Once zero active users remain, deletion is allowed.
“Bulk email upload keeps failing on certain rows.”
Most common causes:
spendflo_idmistyped or not foundaddfor an email that already exists somewhere in the system (active or inactive)deactivatefor the user’s only active email — set a new primary firstdeactivateon the user’s primary email — designate a new primary first
The system returns per-row errors so you can fix the CSV and re-upload only the failed rows.
“HRMS just terminated a user but their open requests are unattributed.”
HRMS / IdP-triggered deletion moves the user straight to Deleted with no intermediate Paused state. Open items are flagged to a Platform Admin for reassignment, and the admin receives a notification. Reassign from the user’s record before the audit cycle.
“Two admins are editing the same user record and we keep overwriting each other.”
Last-write-wins. There is no conflict modal in V1. Coordinate offline or use comments on the user record to flag intent.
“My organization’s structure doesn’t match the pre-defined roles.”
Build a custom role. Most companies layer 2–5 custom roles on top of the pre-defined ones (e.g., Procurement Analyst, Legal Reviewer, AP Specialist). Keep custom-role count manageable — admins should be able to explain every role they create.
“A user with Subsidiary scope says they can’t see a record that should be in their subsidiary.”
Verify the record’s subsidiary matches one of the user’s assigned subsidiaries. If the record is unassigned to any subsidiary, Subsidiary-scoped users won’t see it; consider assigning a subsidiary to the record or temporarily granting the user All scope.
Related Docs
- Your First Login: Account Setup and Navigation — the user-facing onboarding doc.
- Vendors — vendor master.
- Agreements — contracts.
- Requests & Workflows — request creation, intake fields, approval flows.
- Invoices, Bills & Bill Payments — the P2P pillar.
- Admin Settings → Integrations — HRMS / GL / SCIM integrations that drive identity, department, and subsidiary sync.
Was this article helpful?
That’s Great!
Thank you for your feedback
Sorry! We couldn't be helpful
Thank you for your feedback
Feedback sent
We appreciate your effort and will try to fix the article