Submitting a procurement request in Spendflo initiates an automated, end-to-end workflow designed to streamline approvals, compliance checks, and integrations. Rather than manually coordinating between finance, legal, infosec, and ERP systems, Spendflo orchestrates these processes in parallel and sequential stages. To learn more about the foundations of requests.
Once you submit a request, you are redirected to the Request Details page. This centralized hub allows you to track the real-time status of approvals, view associated documents, and monitor integration steps. For a complete overview of this page.
Step-by-Step Procurement and Onboarding Workflow
The following steps outline the complete lifecycle of a procurement request, from initial submission to final signature collection.
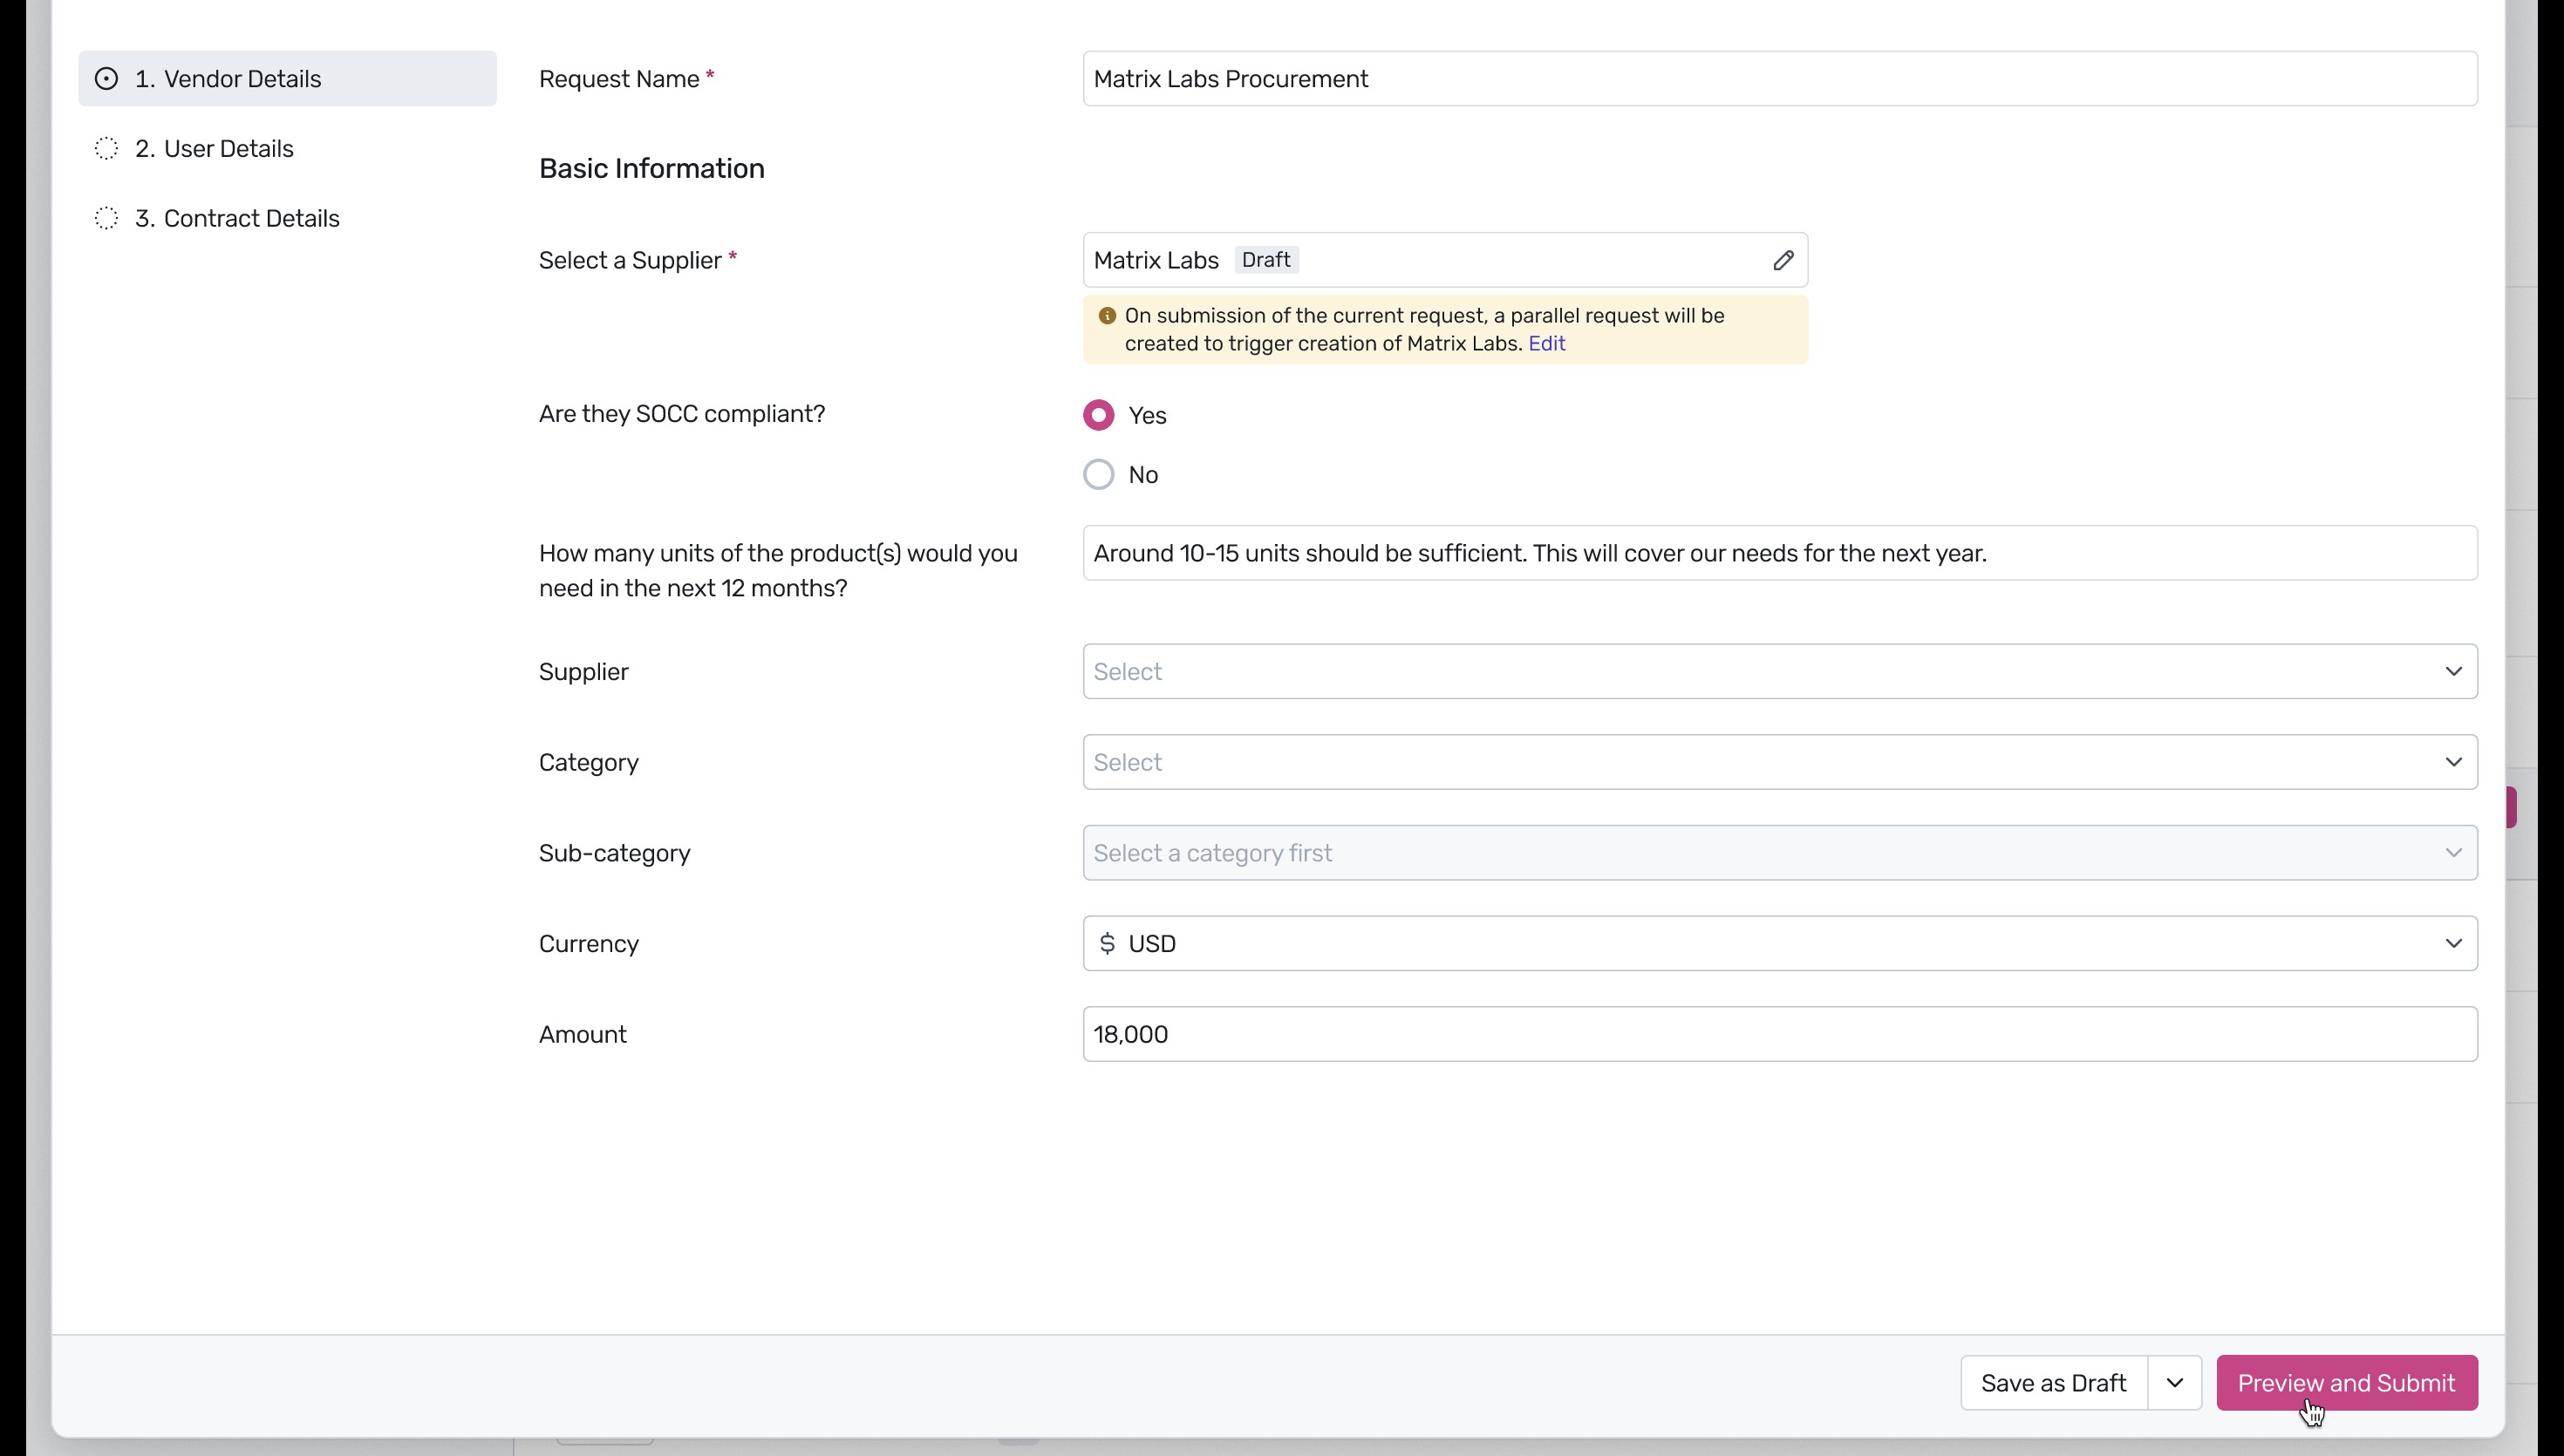
To initiate a new procurement request, fill out the Vendor Details form. Enter the request name, select the supplier, confirm SOCC compliance, specify the quantity needed, and input the total amount. Submitting this request automatically triggers a parallel request for supplier onboarding. Once all details are filled out, click Preview and Submit.
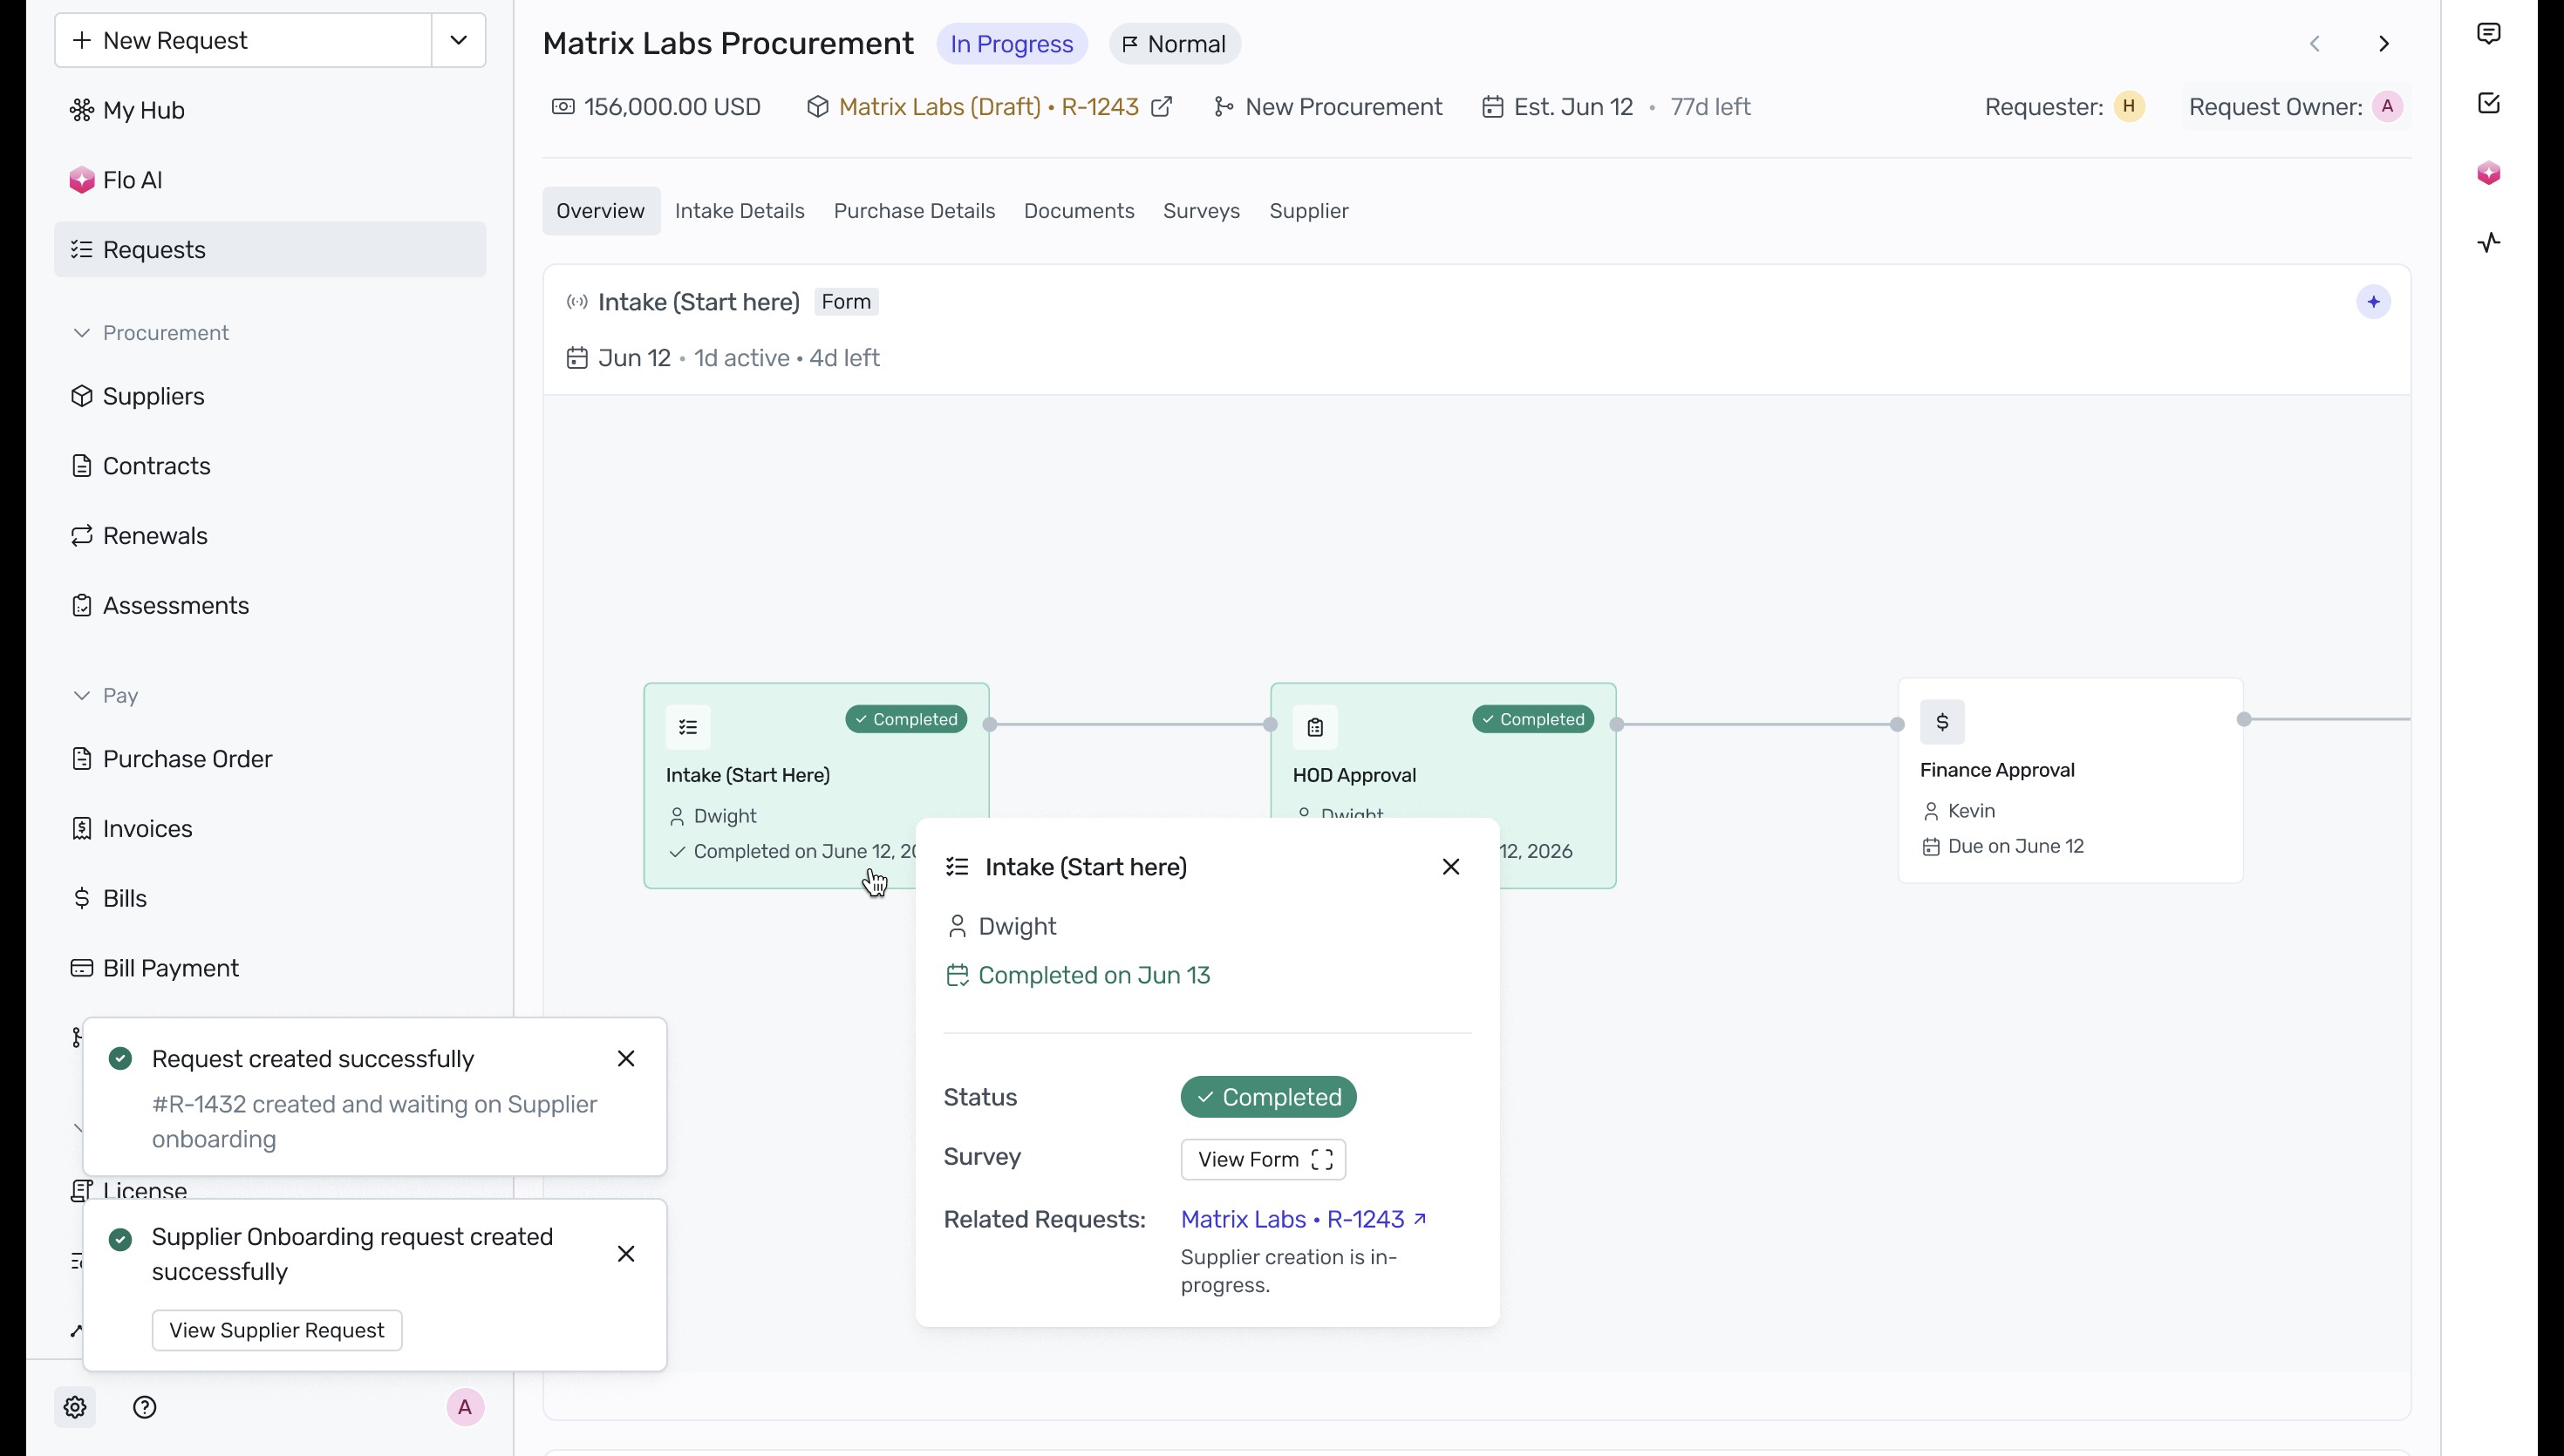
After submission, Spendflo redirects you to the request details page. You can view confirmation toasts indicating that the procurement request and the parallel supplier onboarding request are successfully created. The workflow tracker displays the completed Intake and HOD Approval stages, and shows that the request is awaiting Finance Approval.
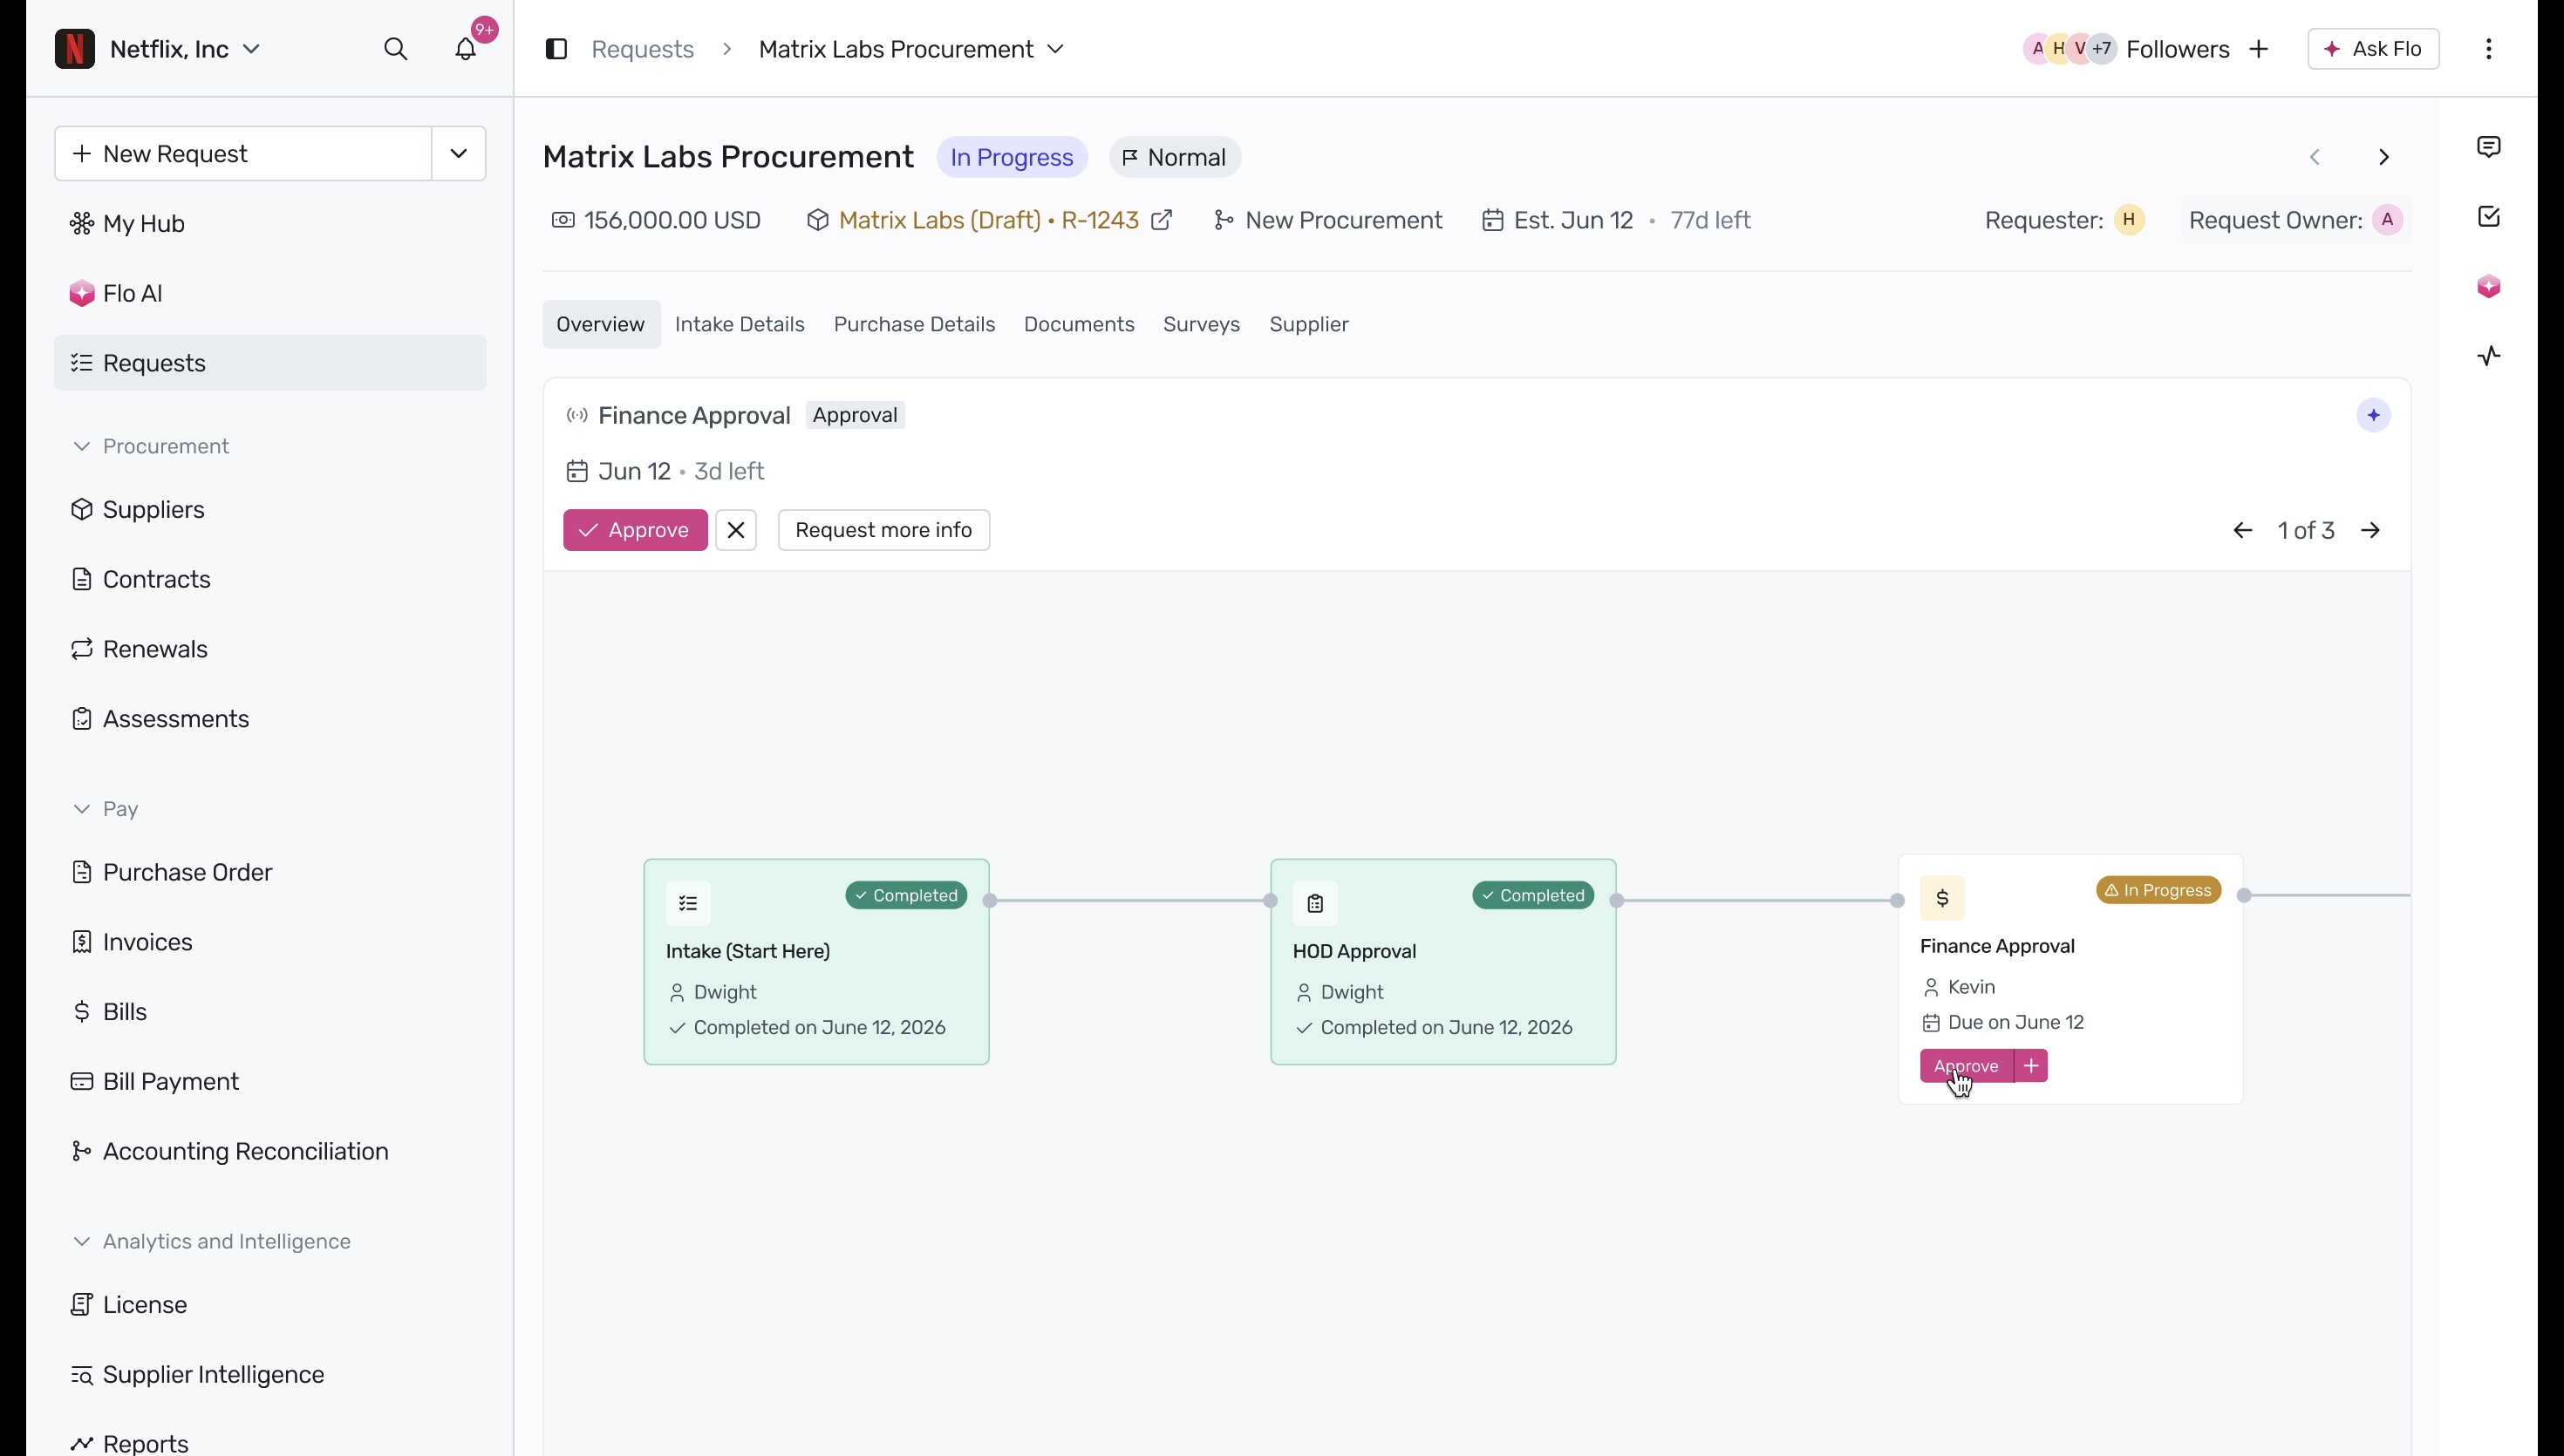
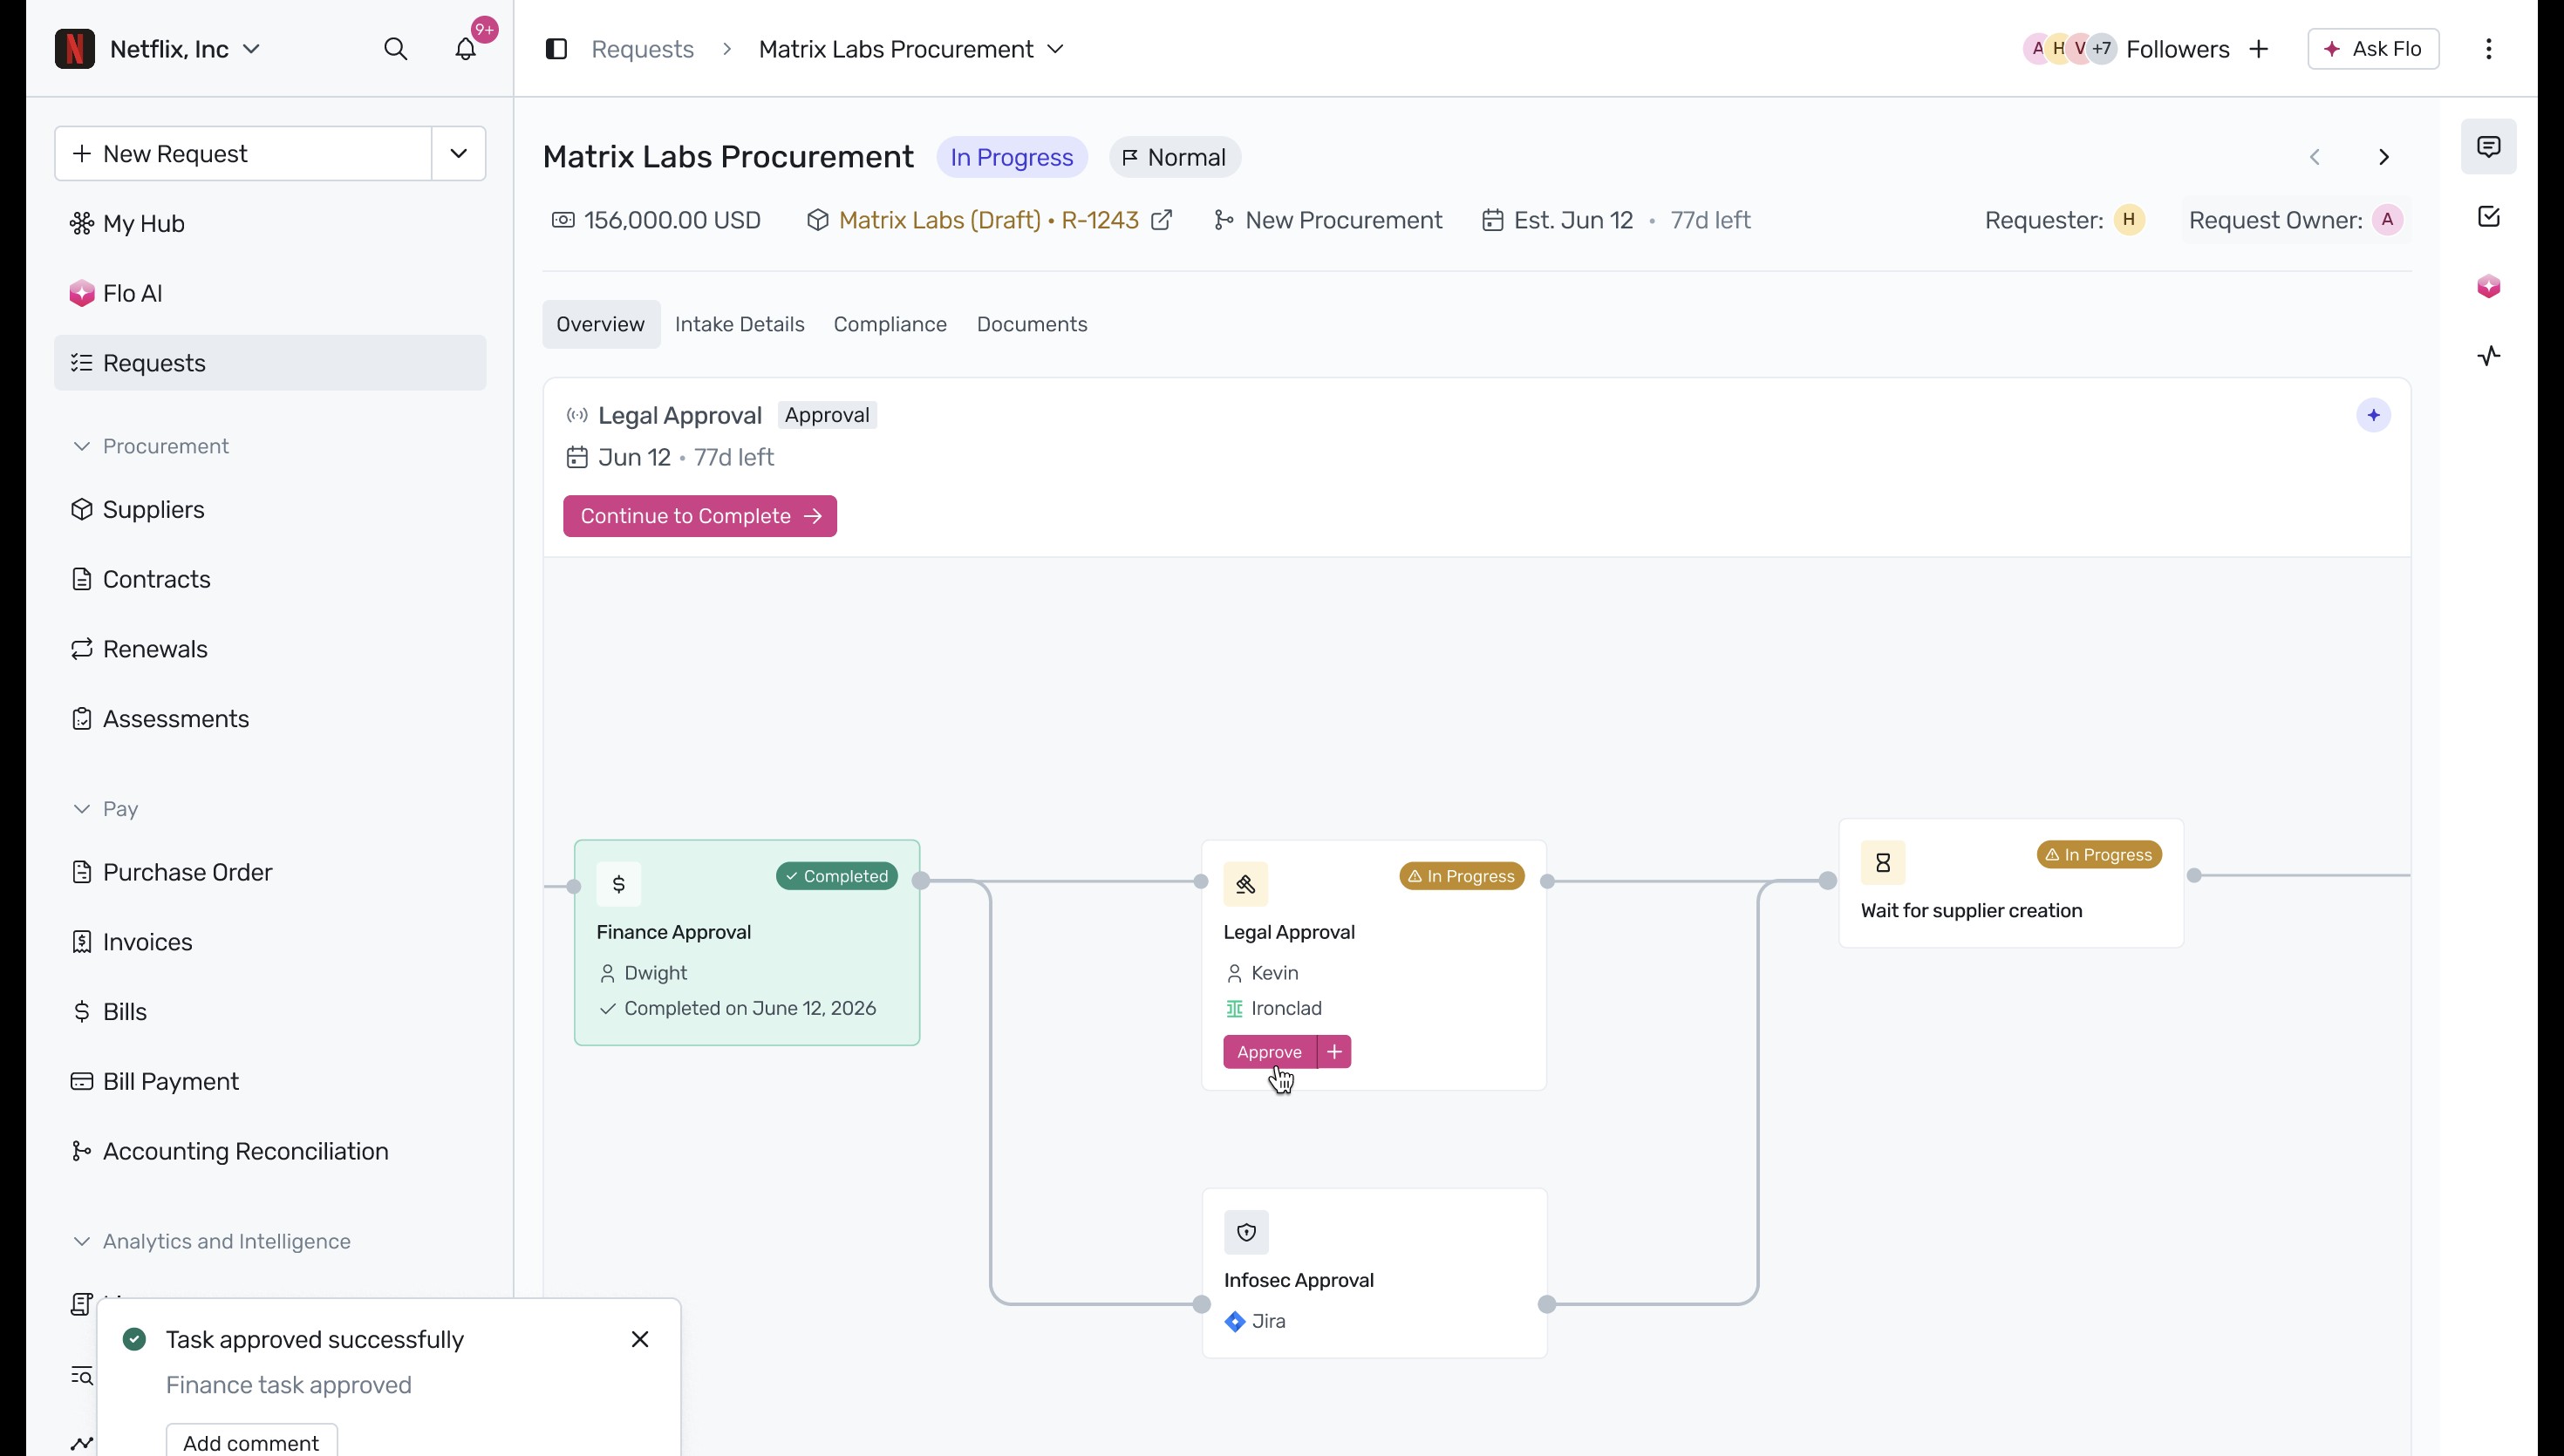
To move the request forward, navigate to the Finance Approval card in the workflow diagram and click Approve. To learn more about managing approvals.
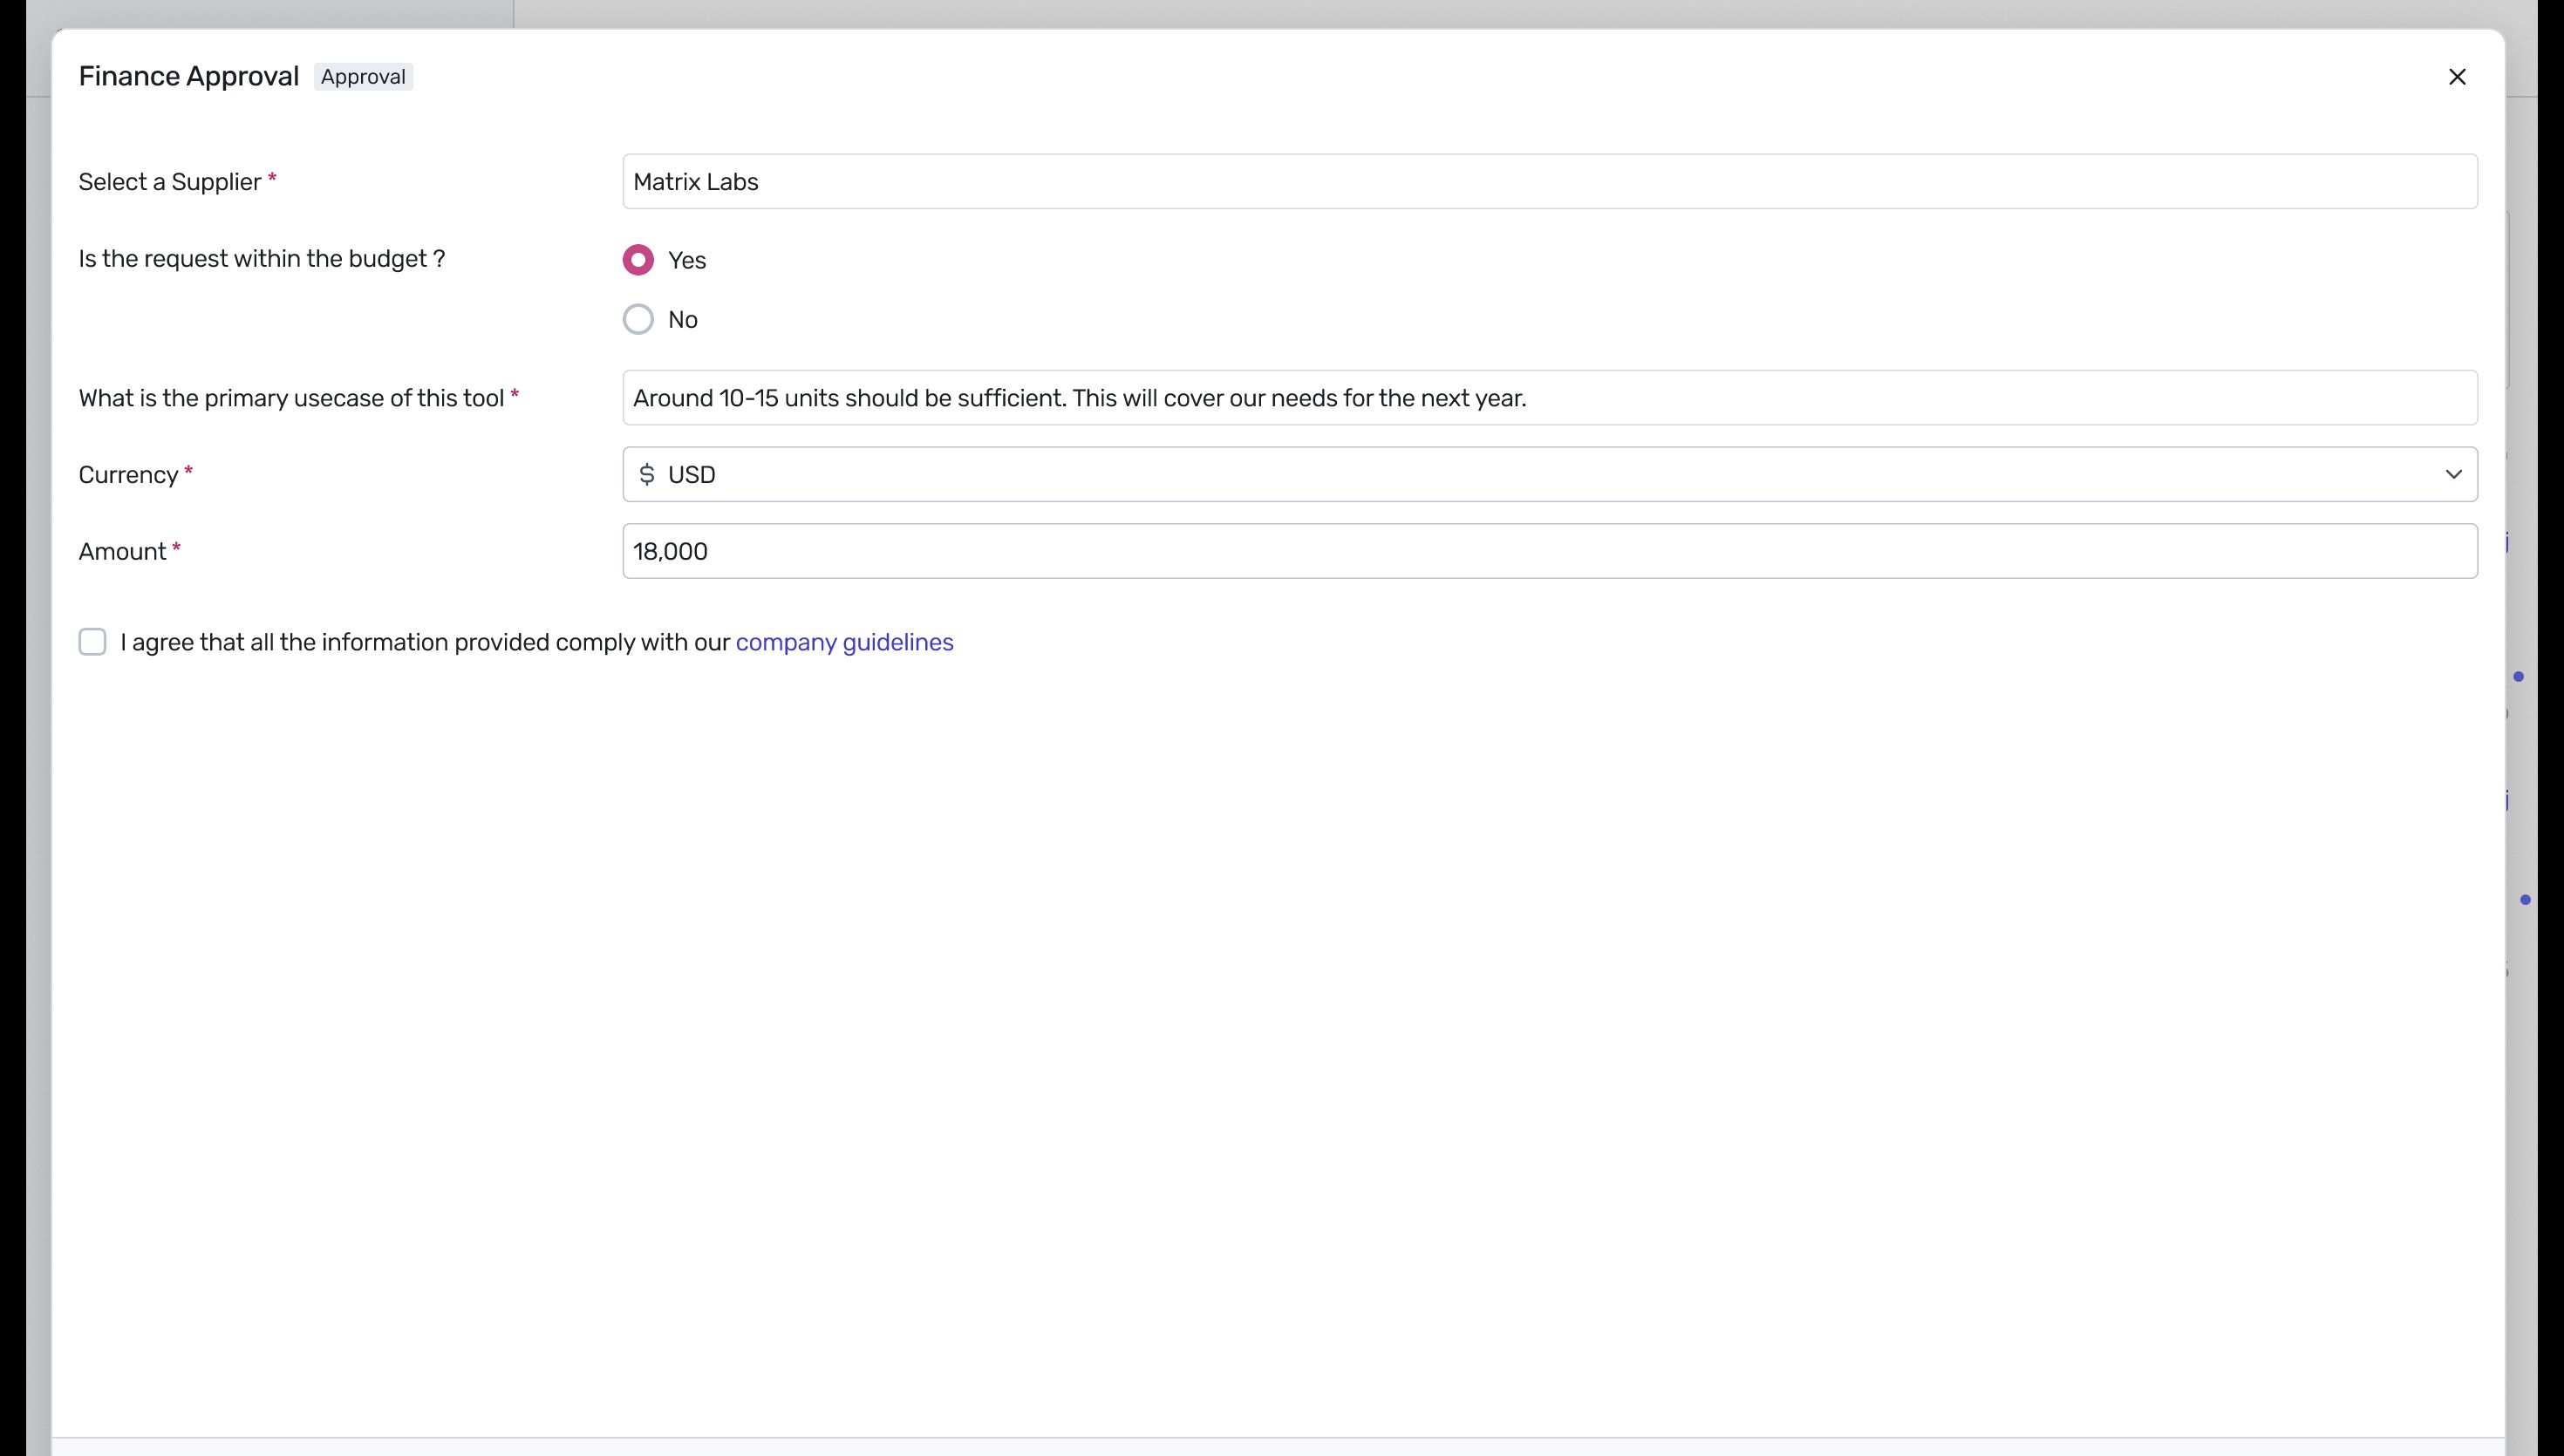
In the Finance Approval modal, verify the supplier, budget compliance, primary use case, currency, and amount. Select the checkbox to agree that all provided information complies with company guidelines, and then submit the approval.
Once the finance task is approved, the workflow branches into parallel tracks: Legal Approval (integrated with Ironclad) and Infosec Approval (integrated with Jira), alongside a wait state for supplier creation. Click Approve or Continue to Complete on the Legal Approval card to handle the contract. For more information on parallel tasks.
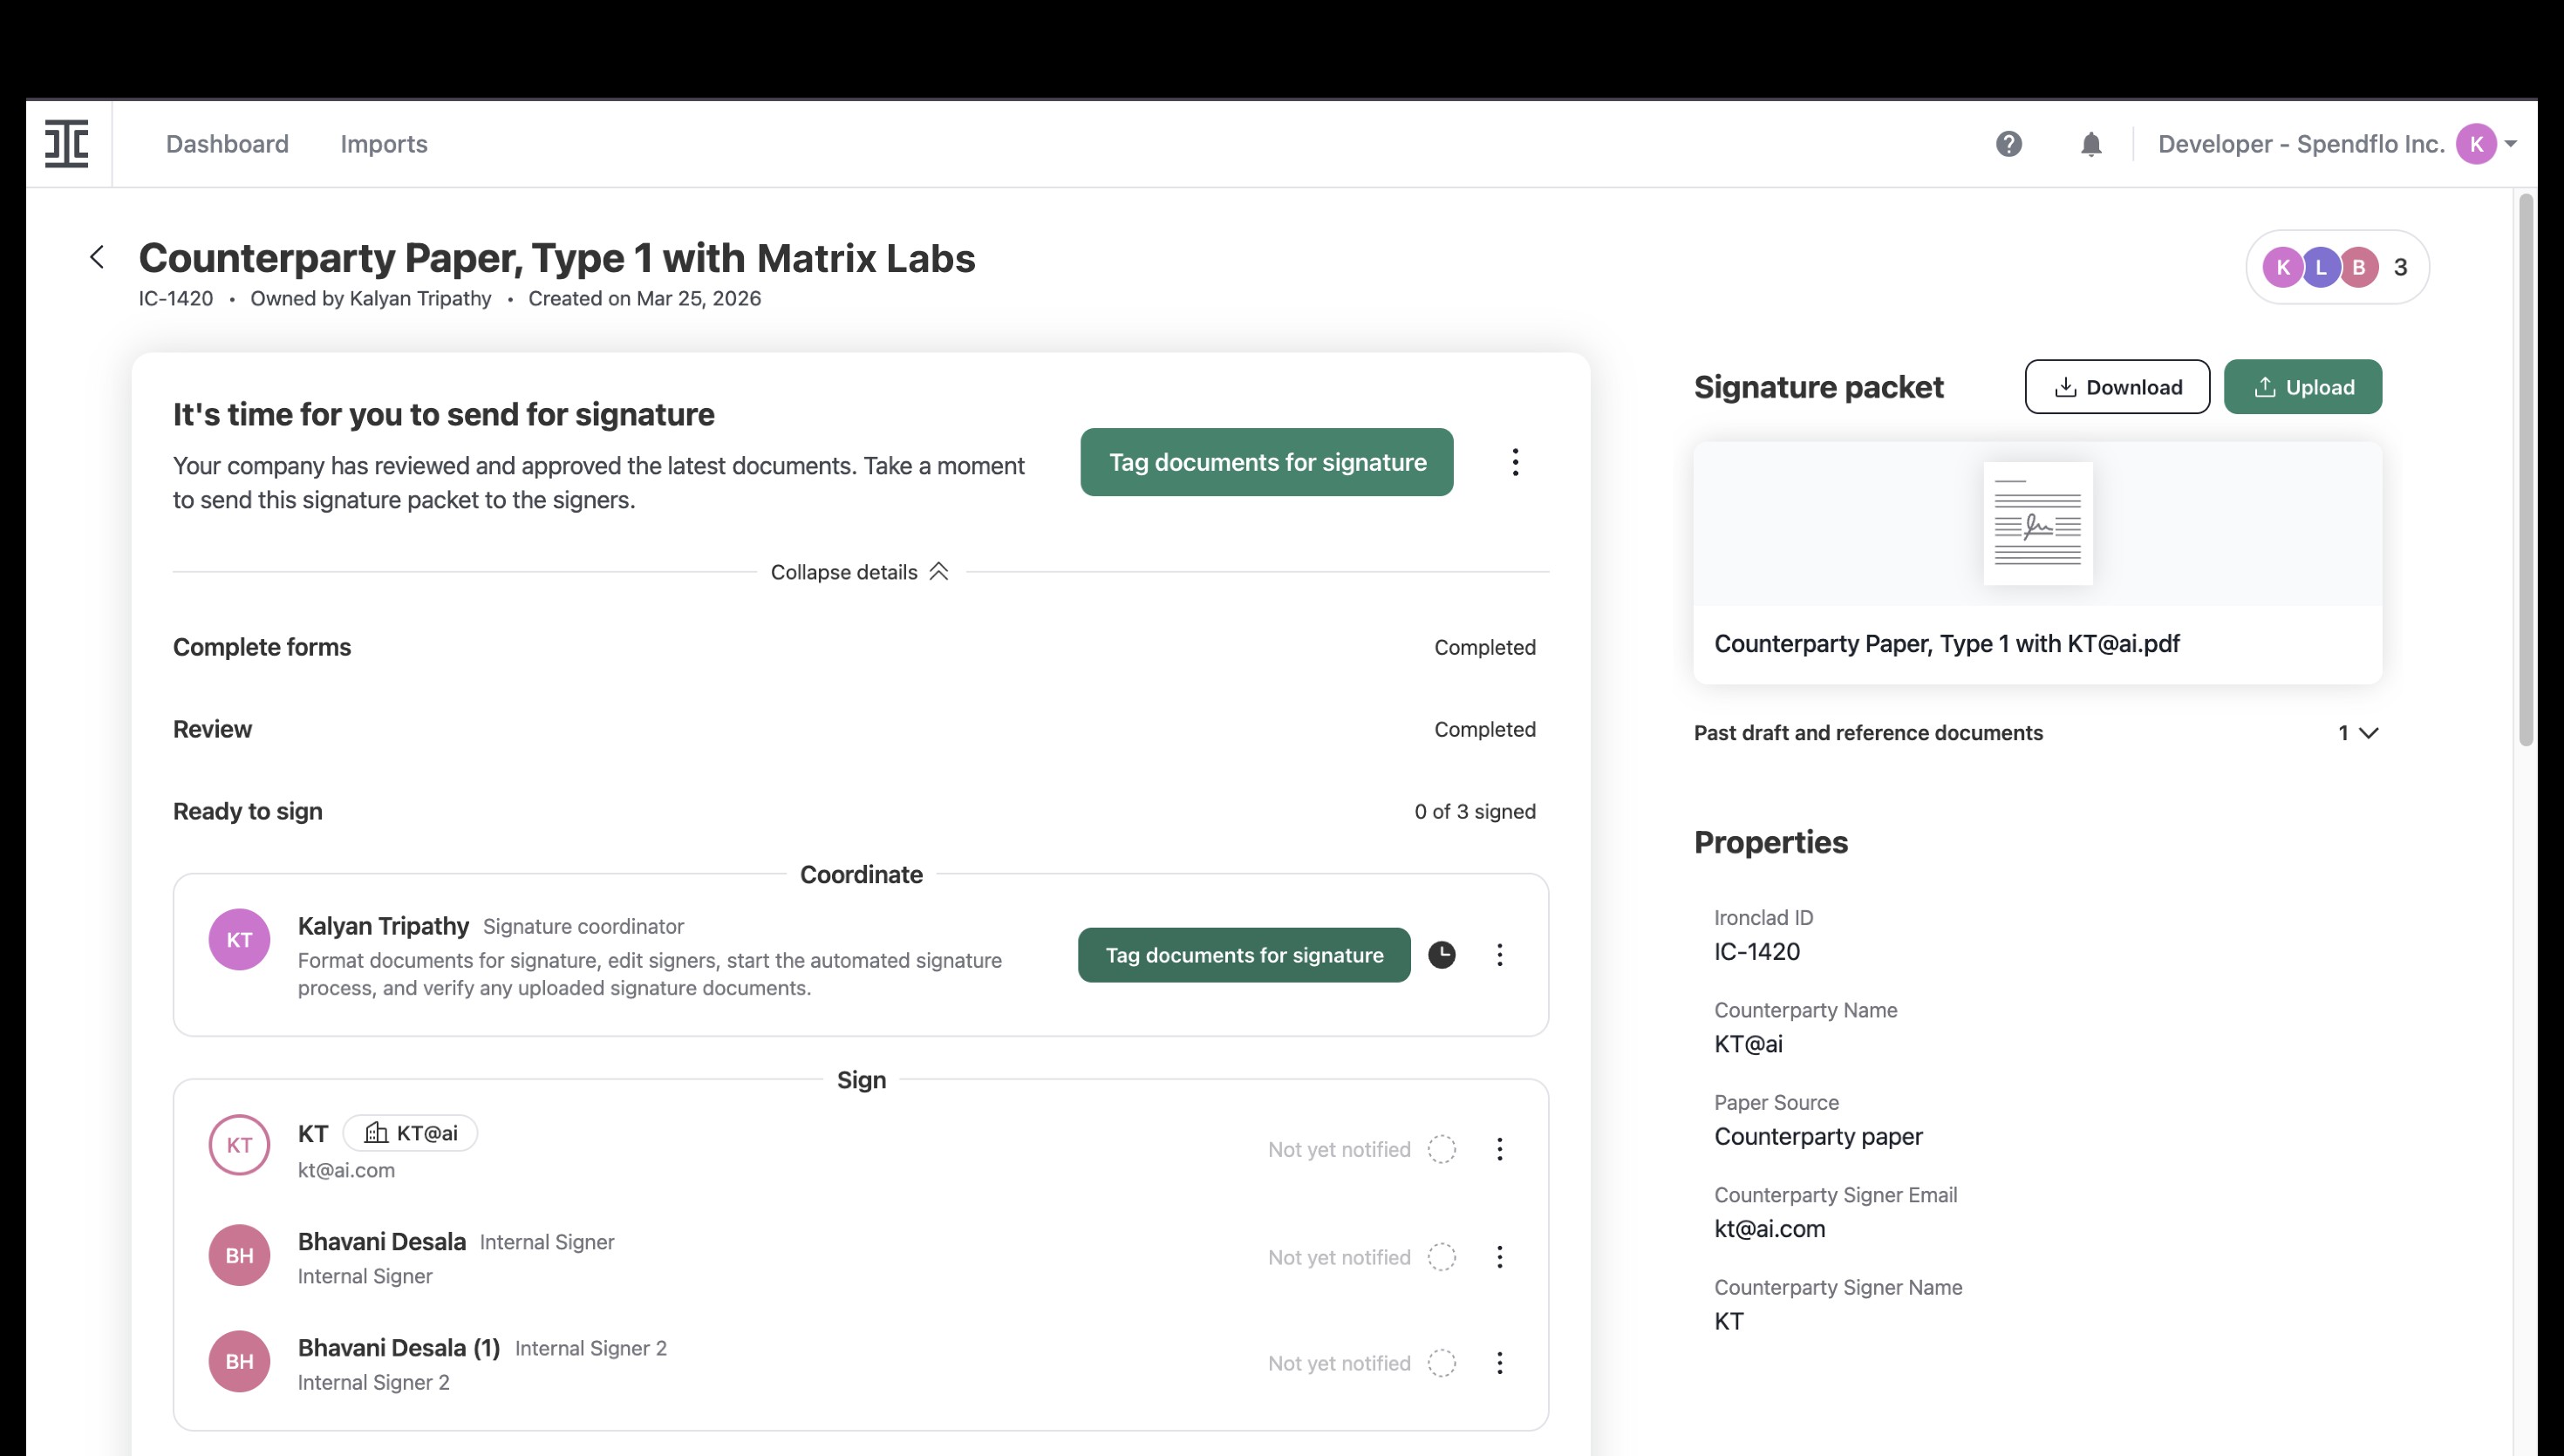
The system redirects you to the integrated Ironclad platform. Here, you can review the counterparty paper, tag the documents for signature, and coordinate the signing process with internal and external signers. To learn more about contract lifecycle integrations.
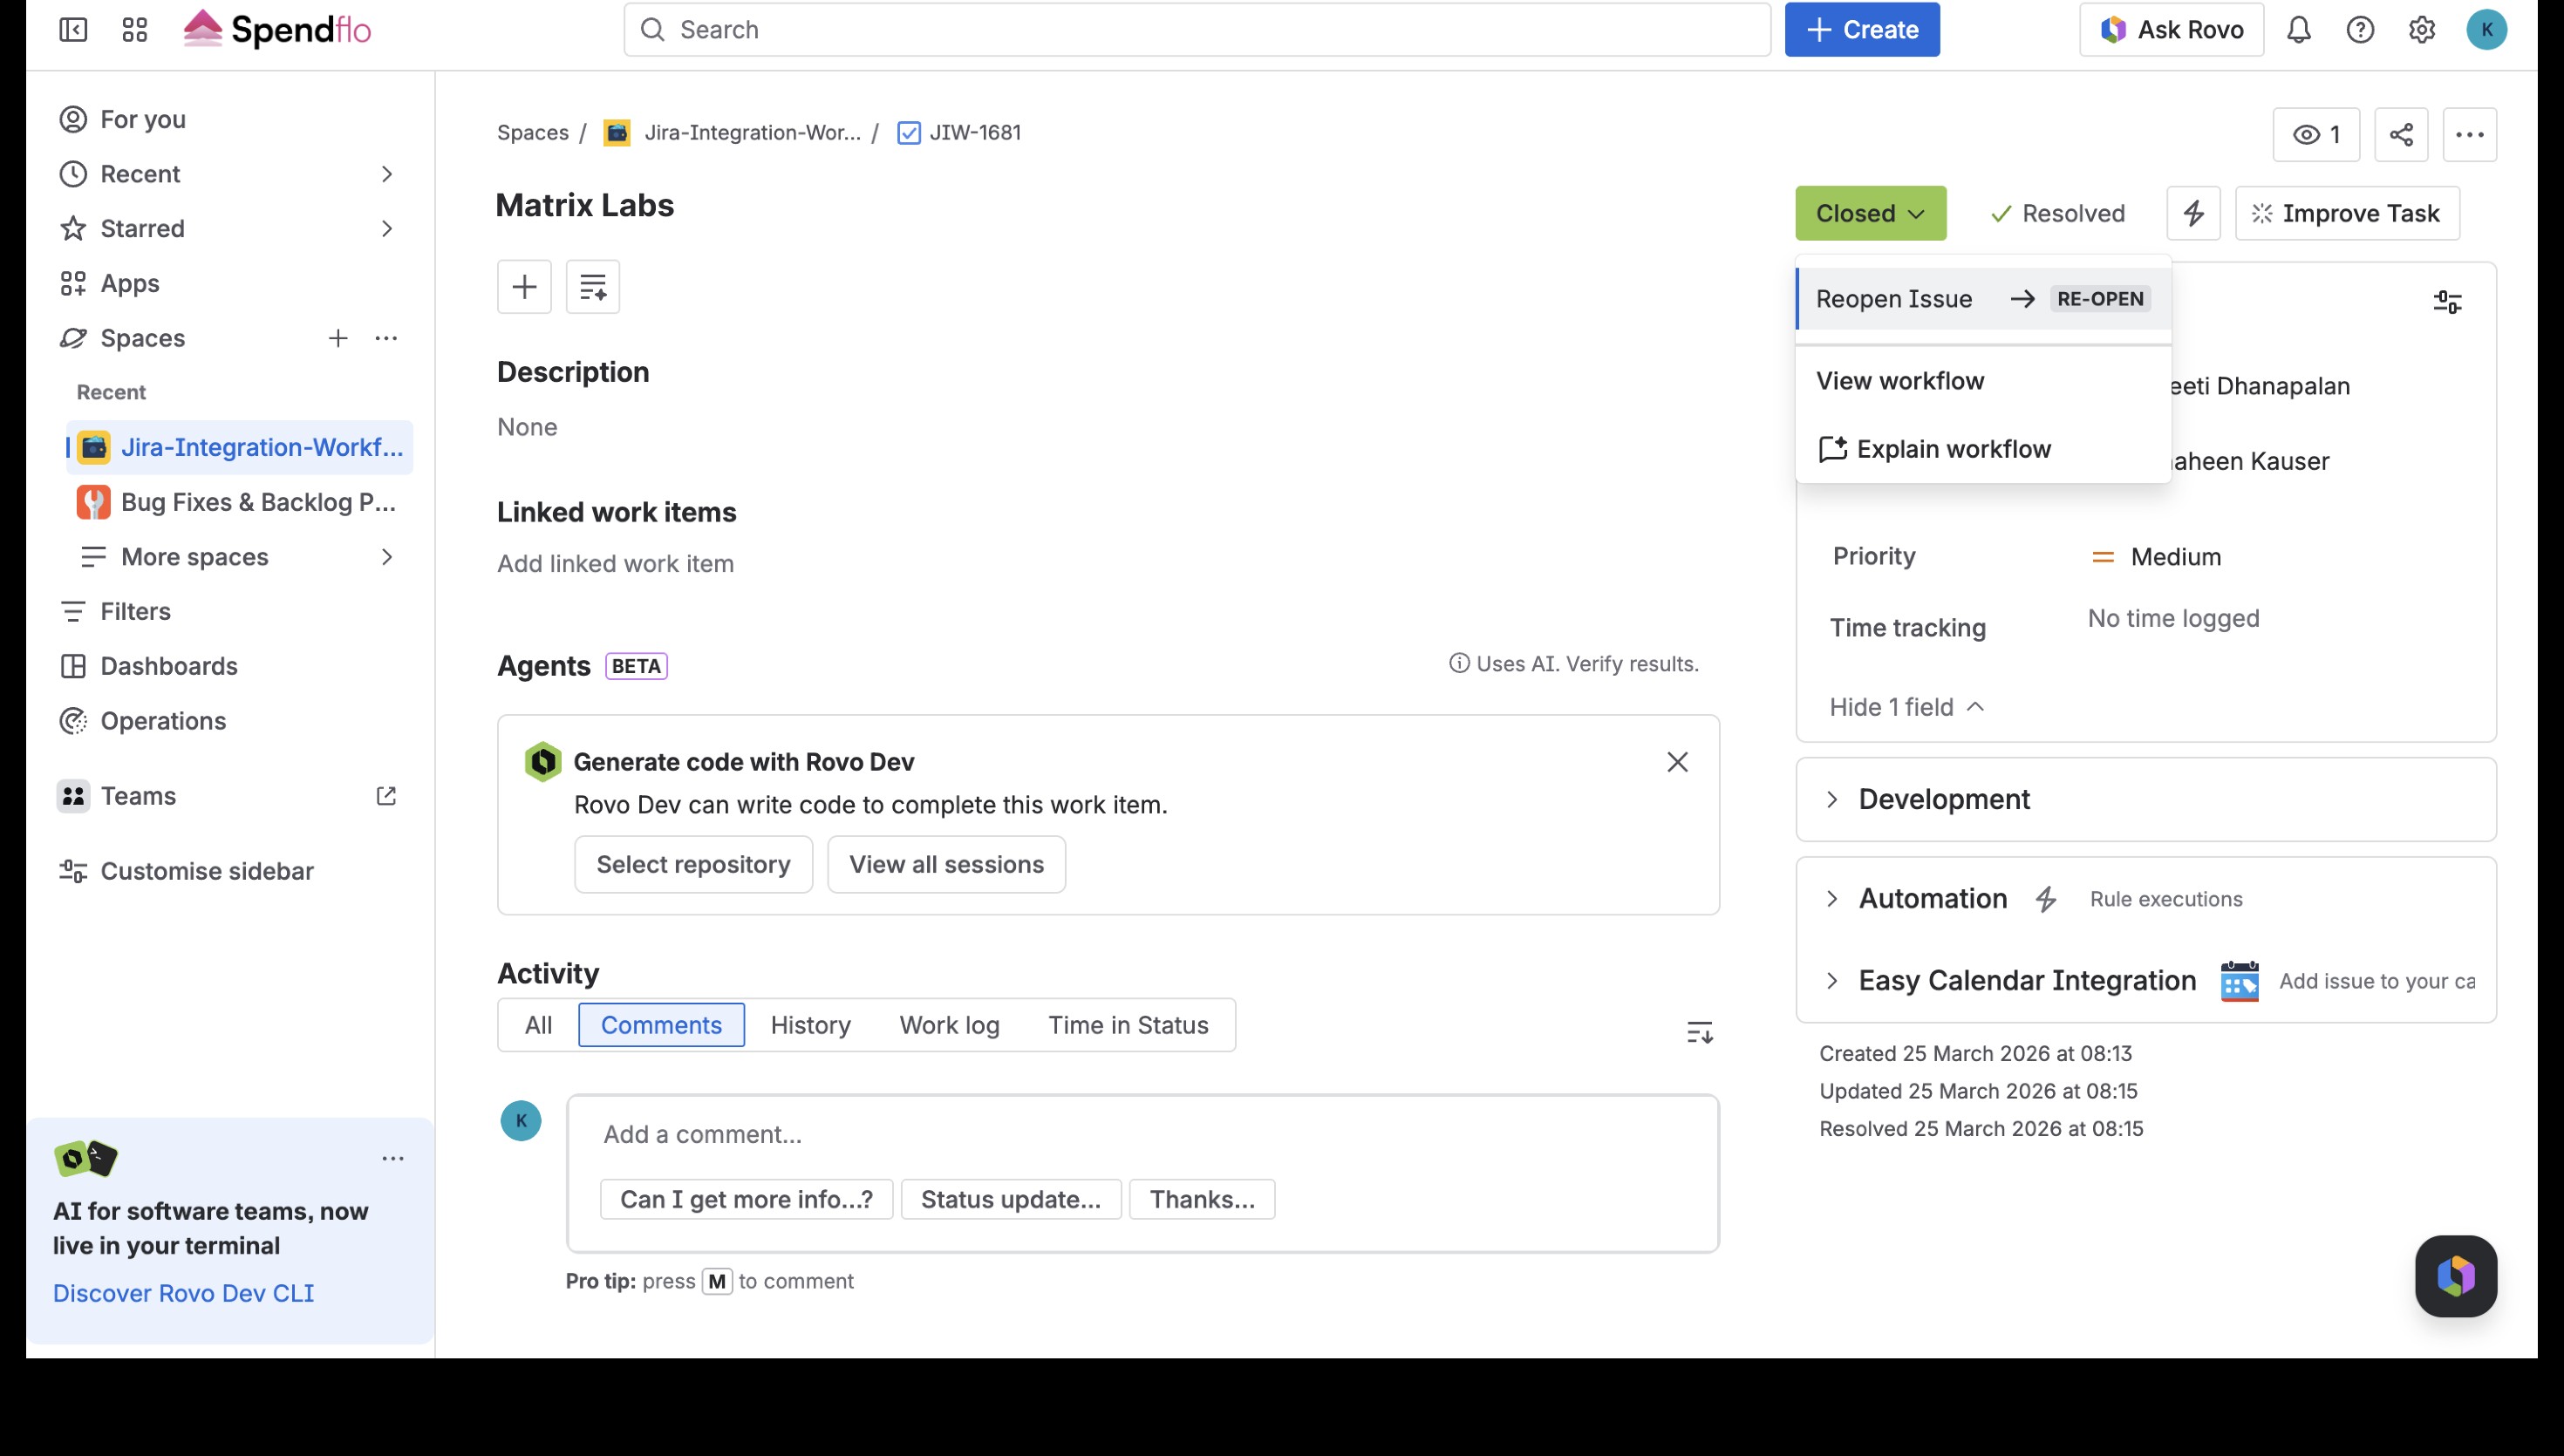
Return to the procurement app and click on the Infosec Approval card to view its status. To verify the security review progress, click the linked Jira ticket URL. For more details on this integration.

In the integrated Jira instance, confirm that the Infosec review ticket has been resolved and marked as Closed.
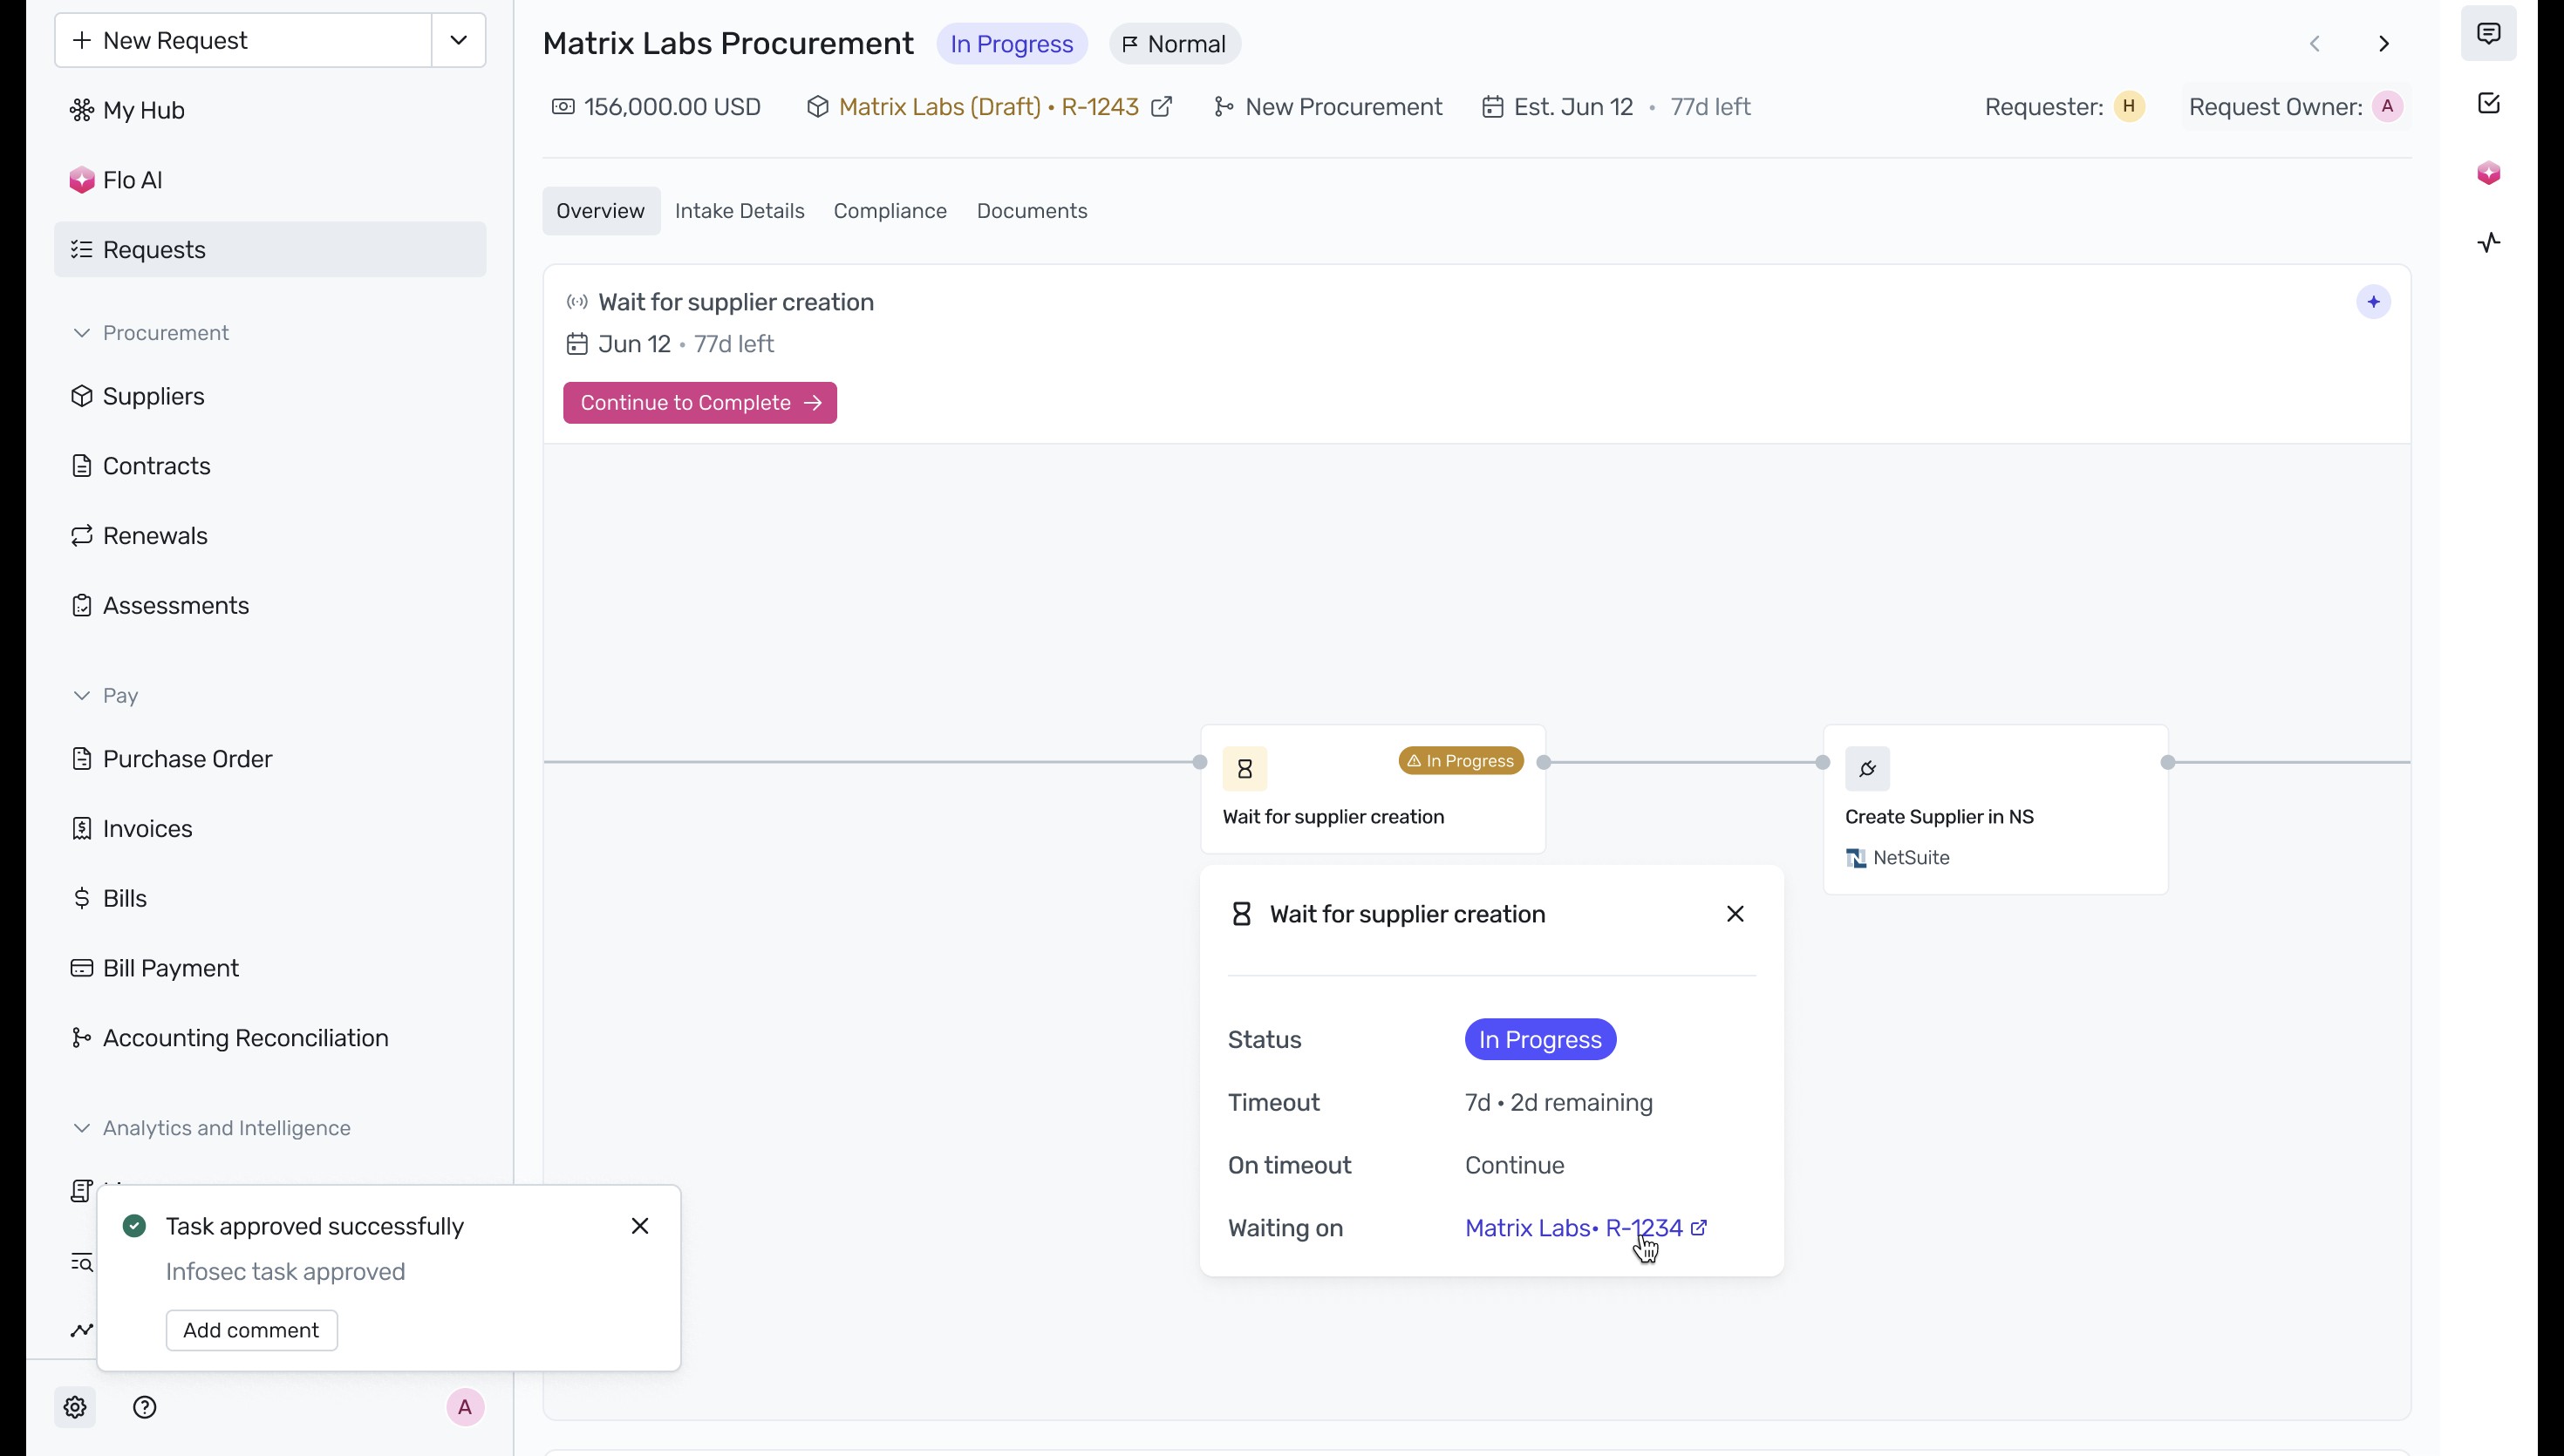
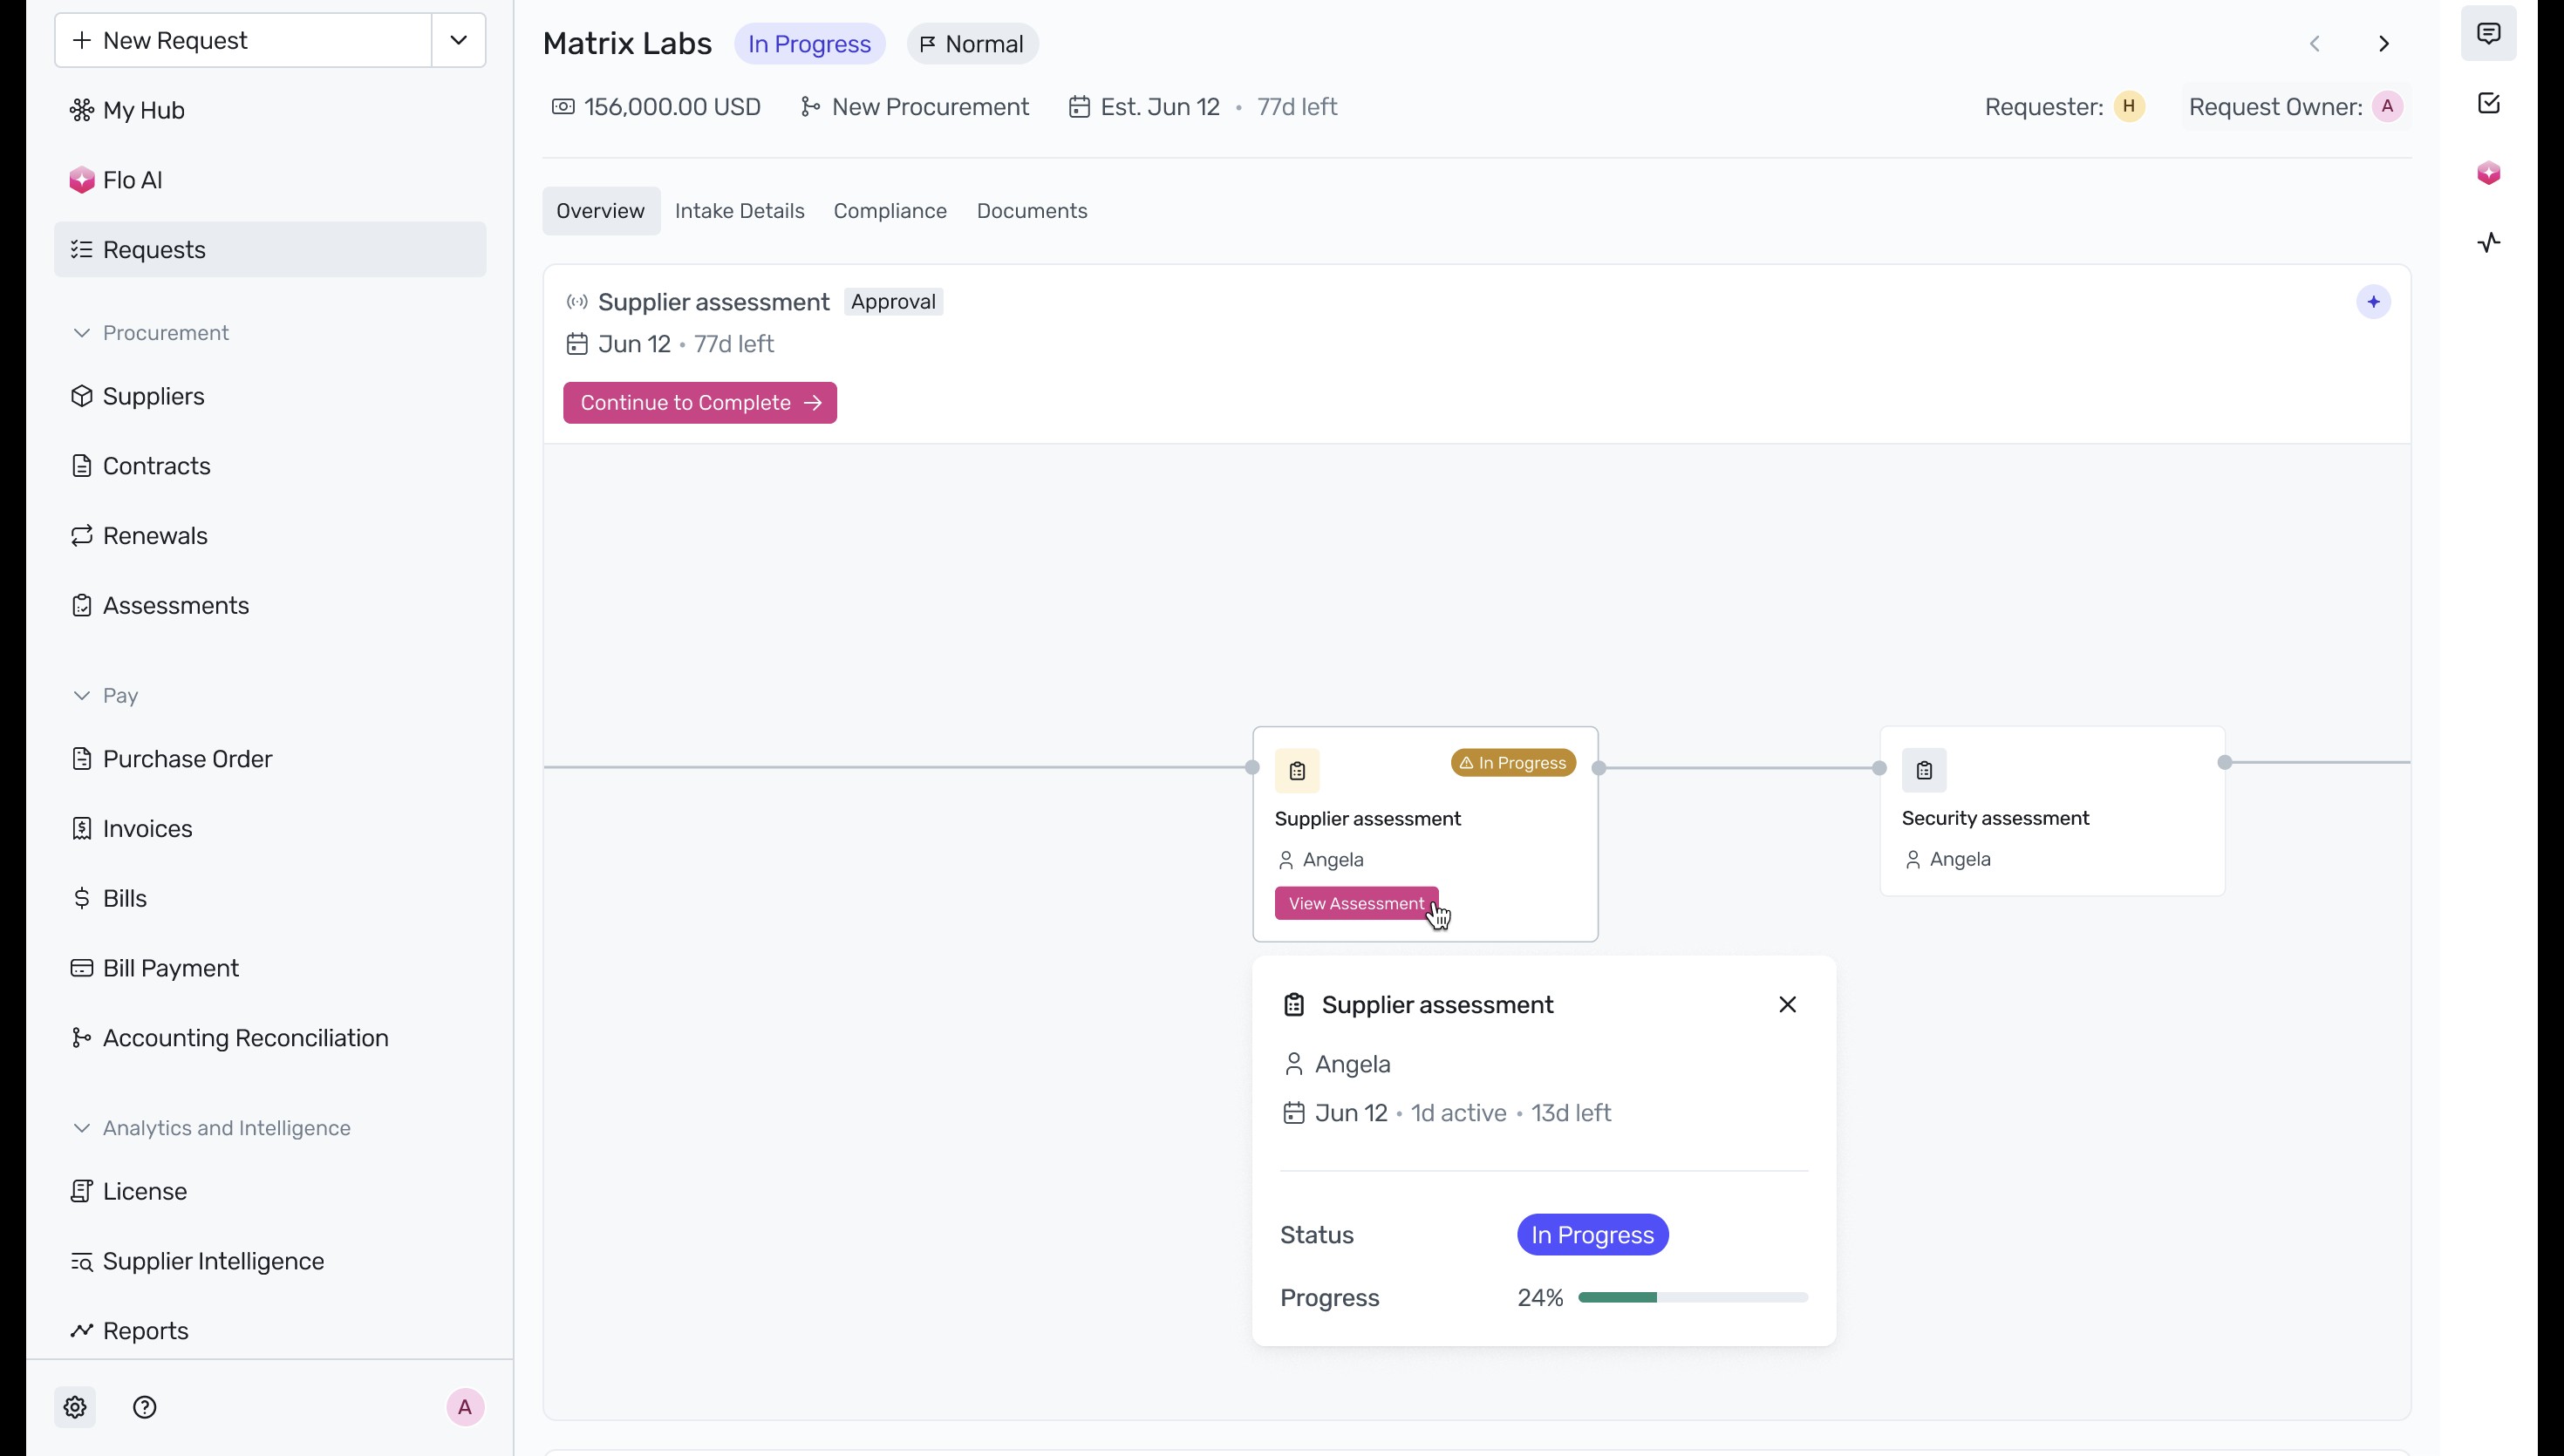
Back in the procurement workflow, click on the Wait for supplier creation card. To check on the onboarding status, click the linked parallel request.
In the parallel supplier onboarding request, click View Assessment on the Supplier assessment card to review the submitted compliance details. To learn more about vendor risk reviews.
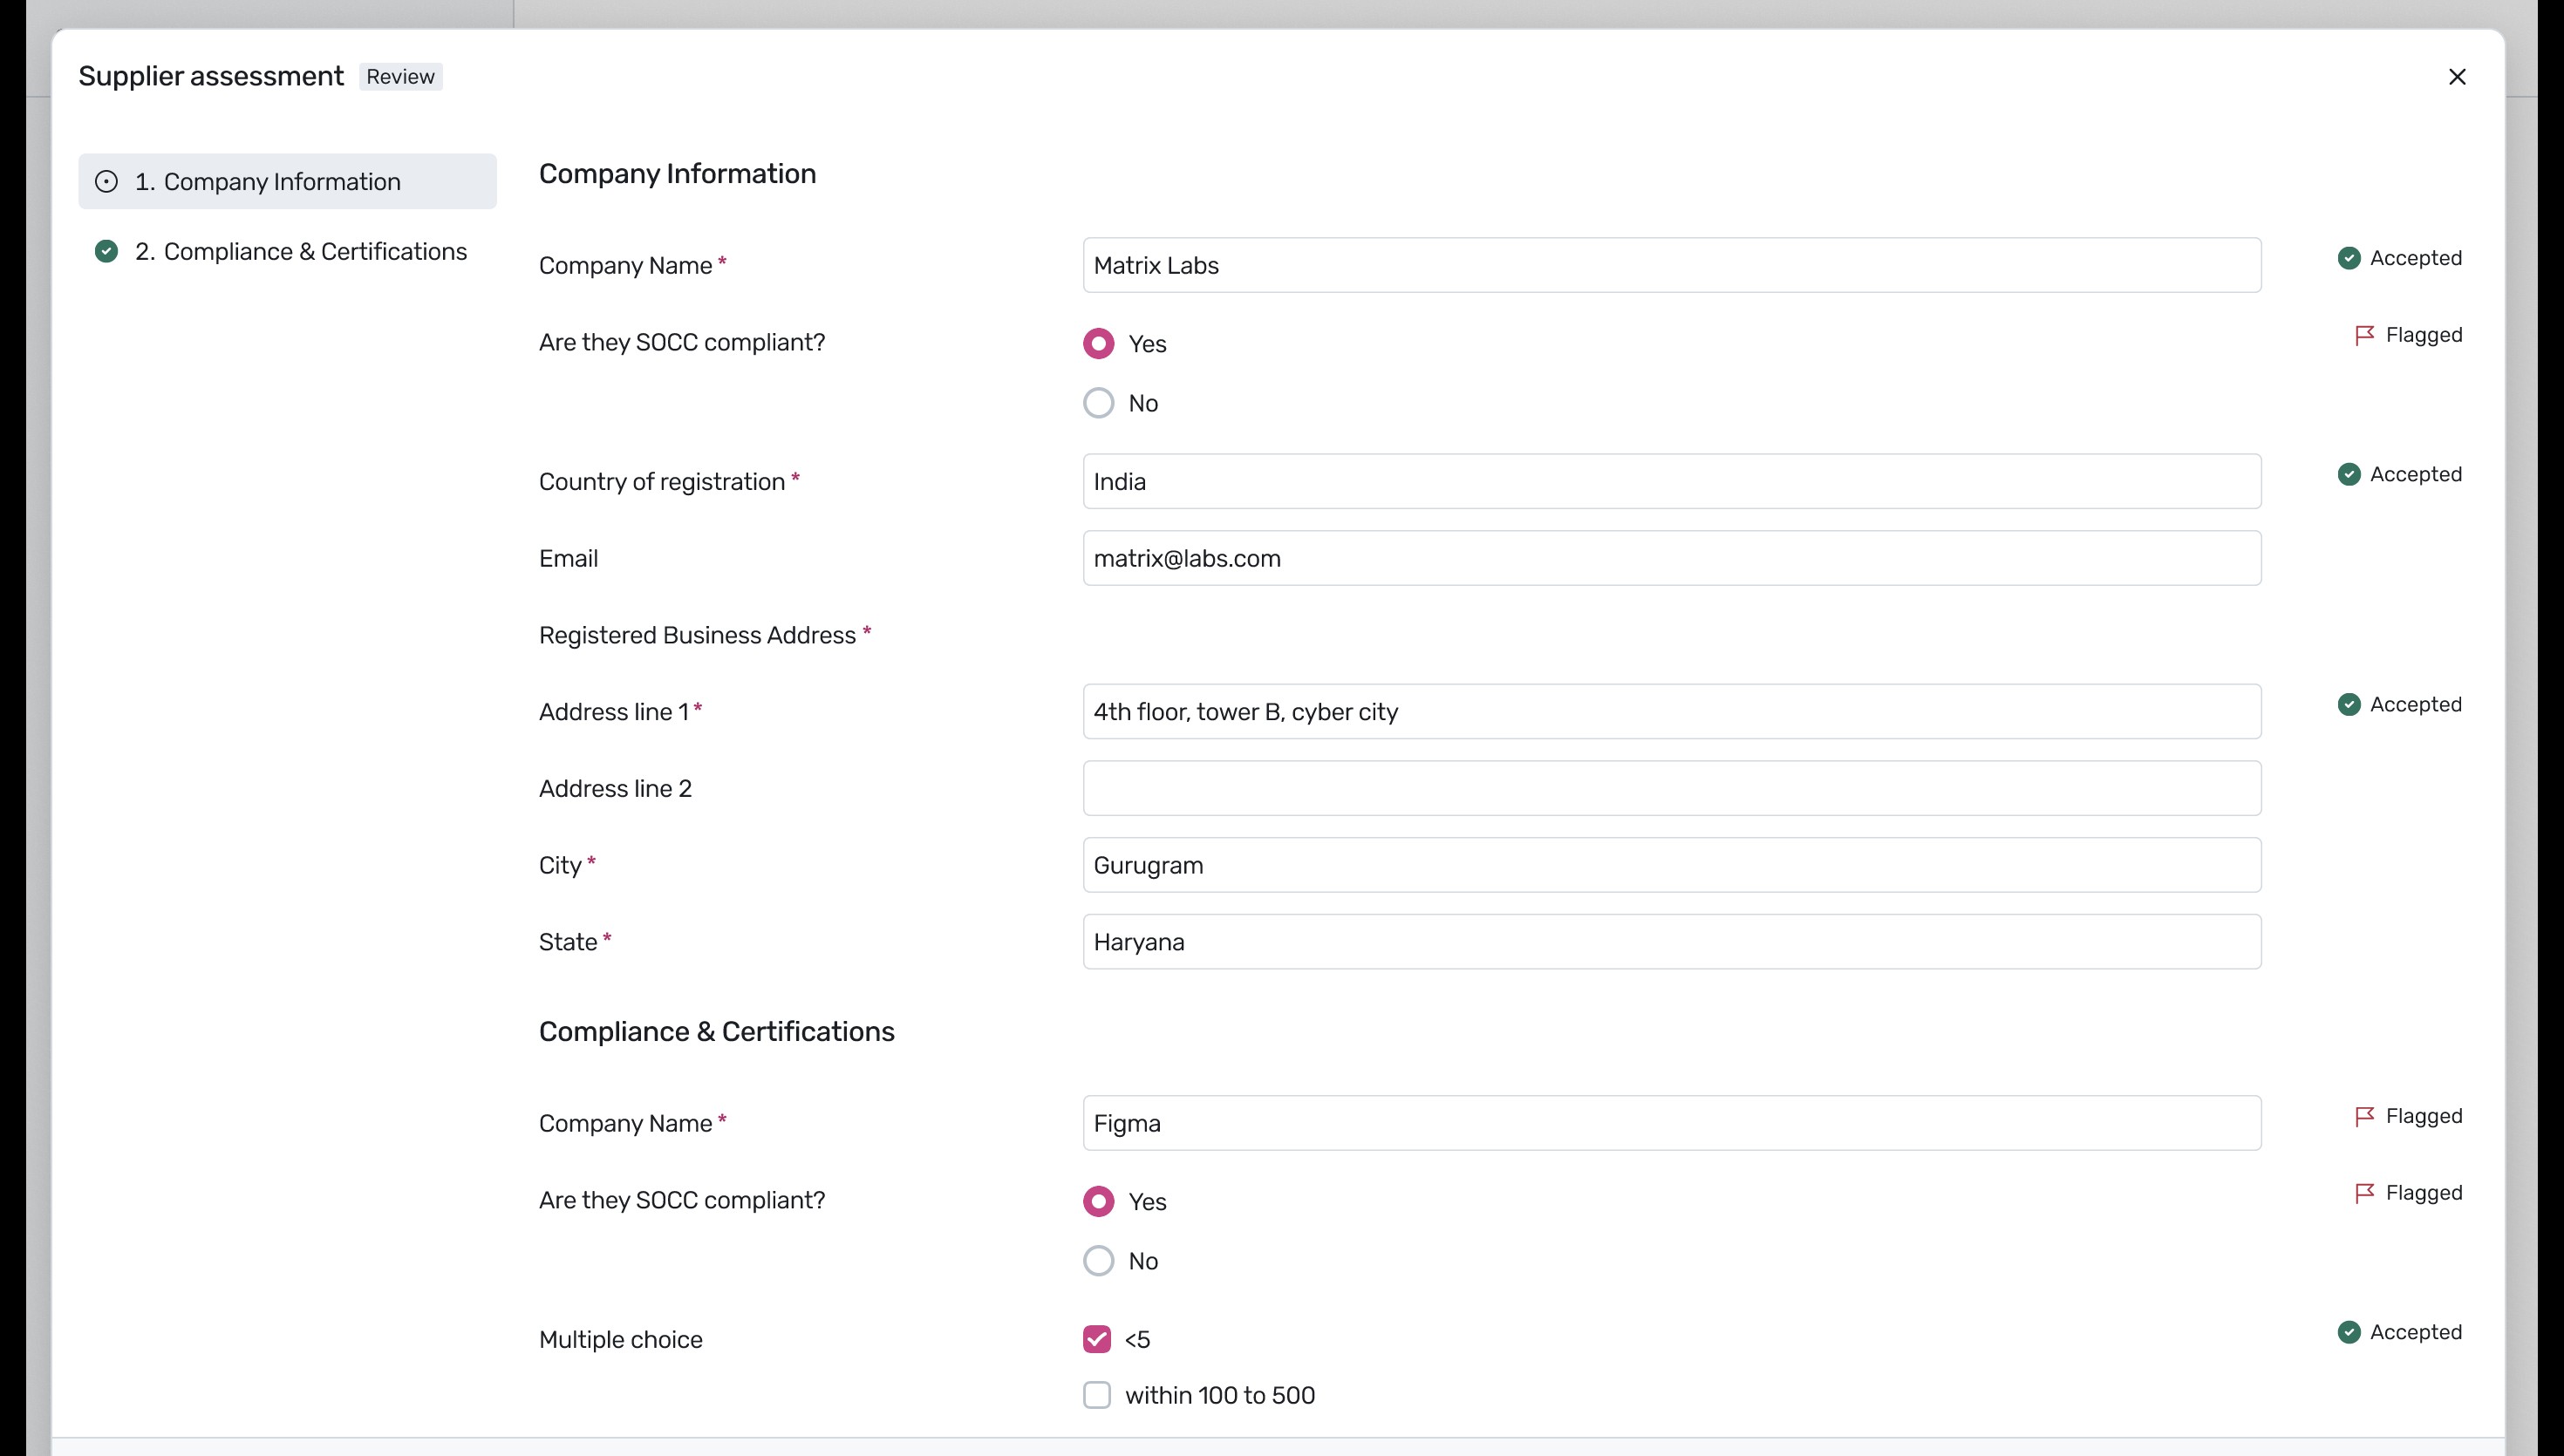
Review the supplier's company information, country of registration, address, and compliance certifications. Ensure all flagged items are addressed before finalizing the assessment.
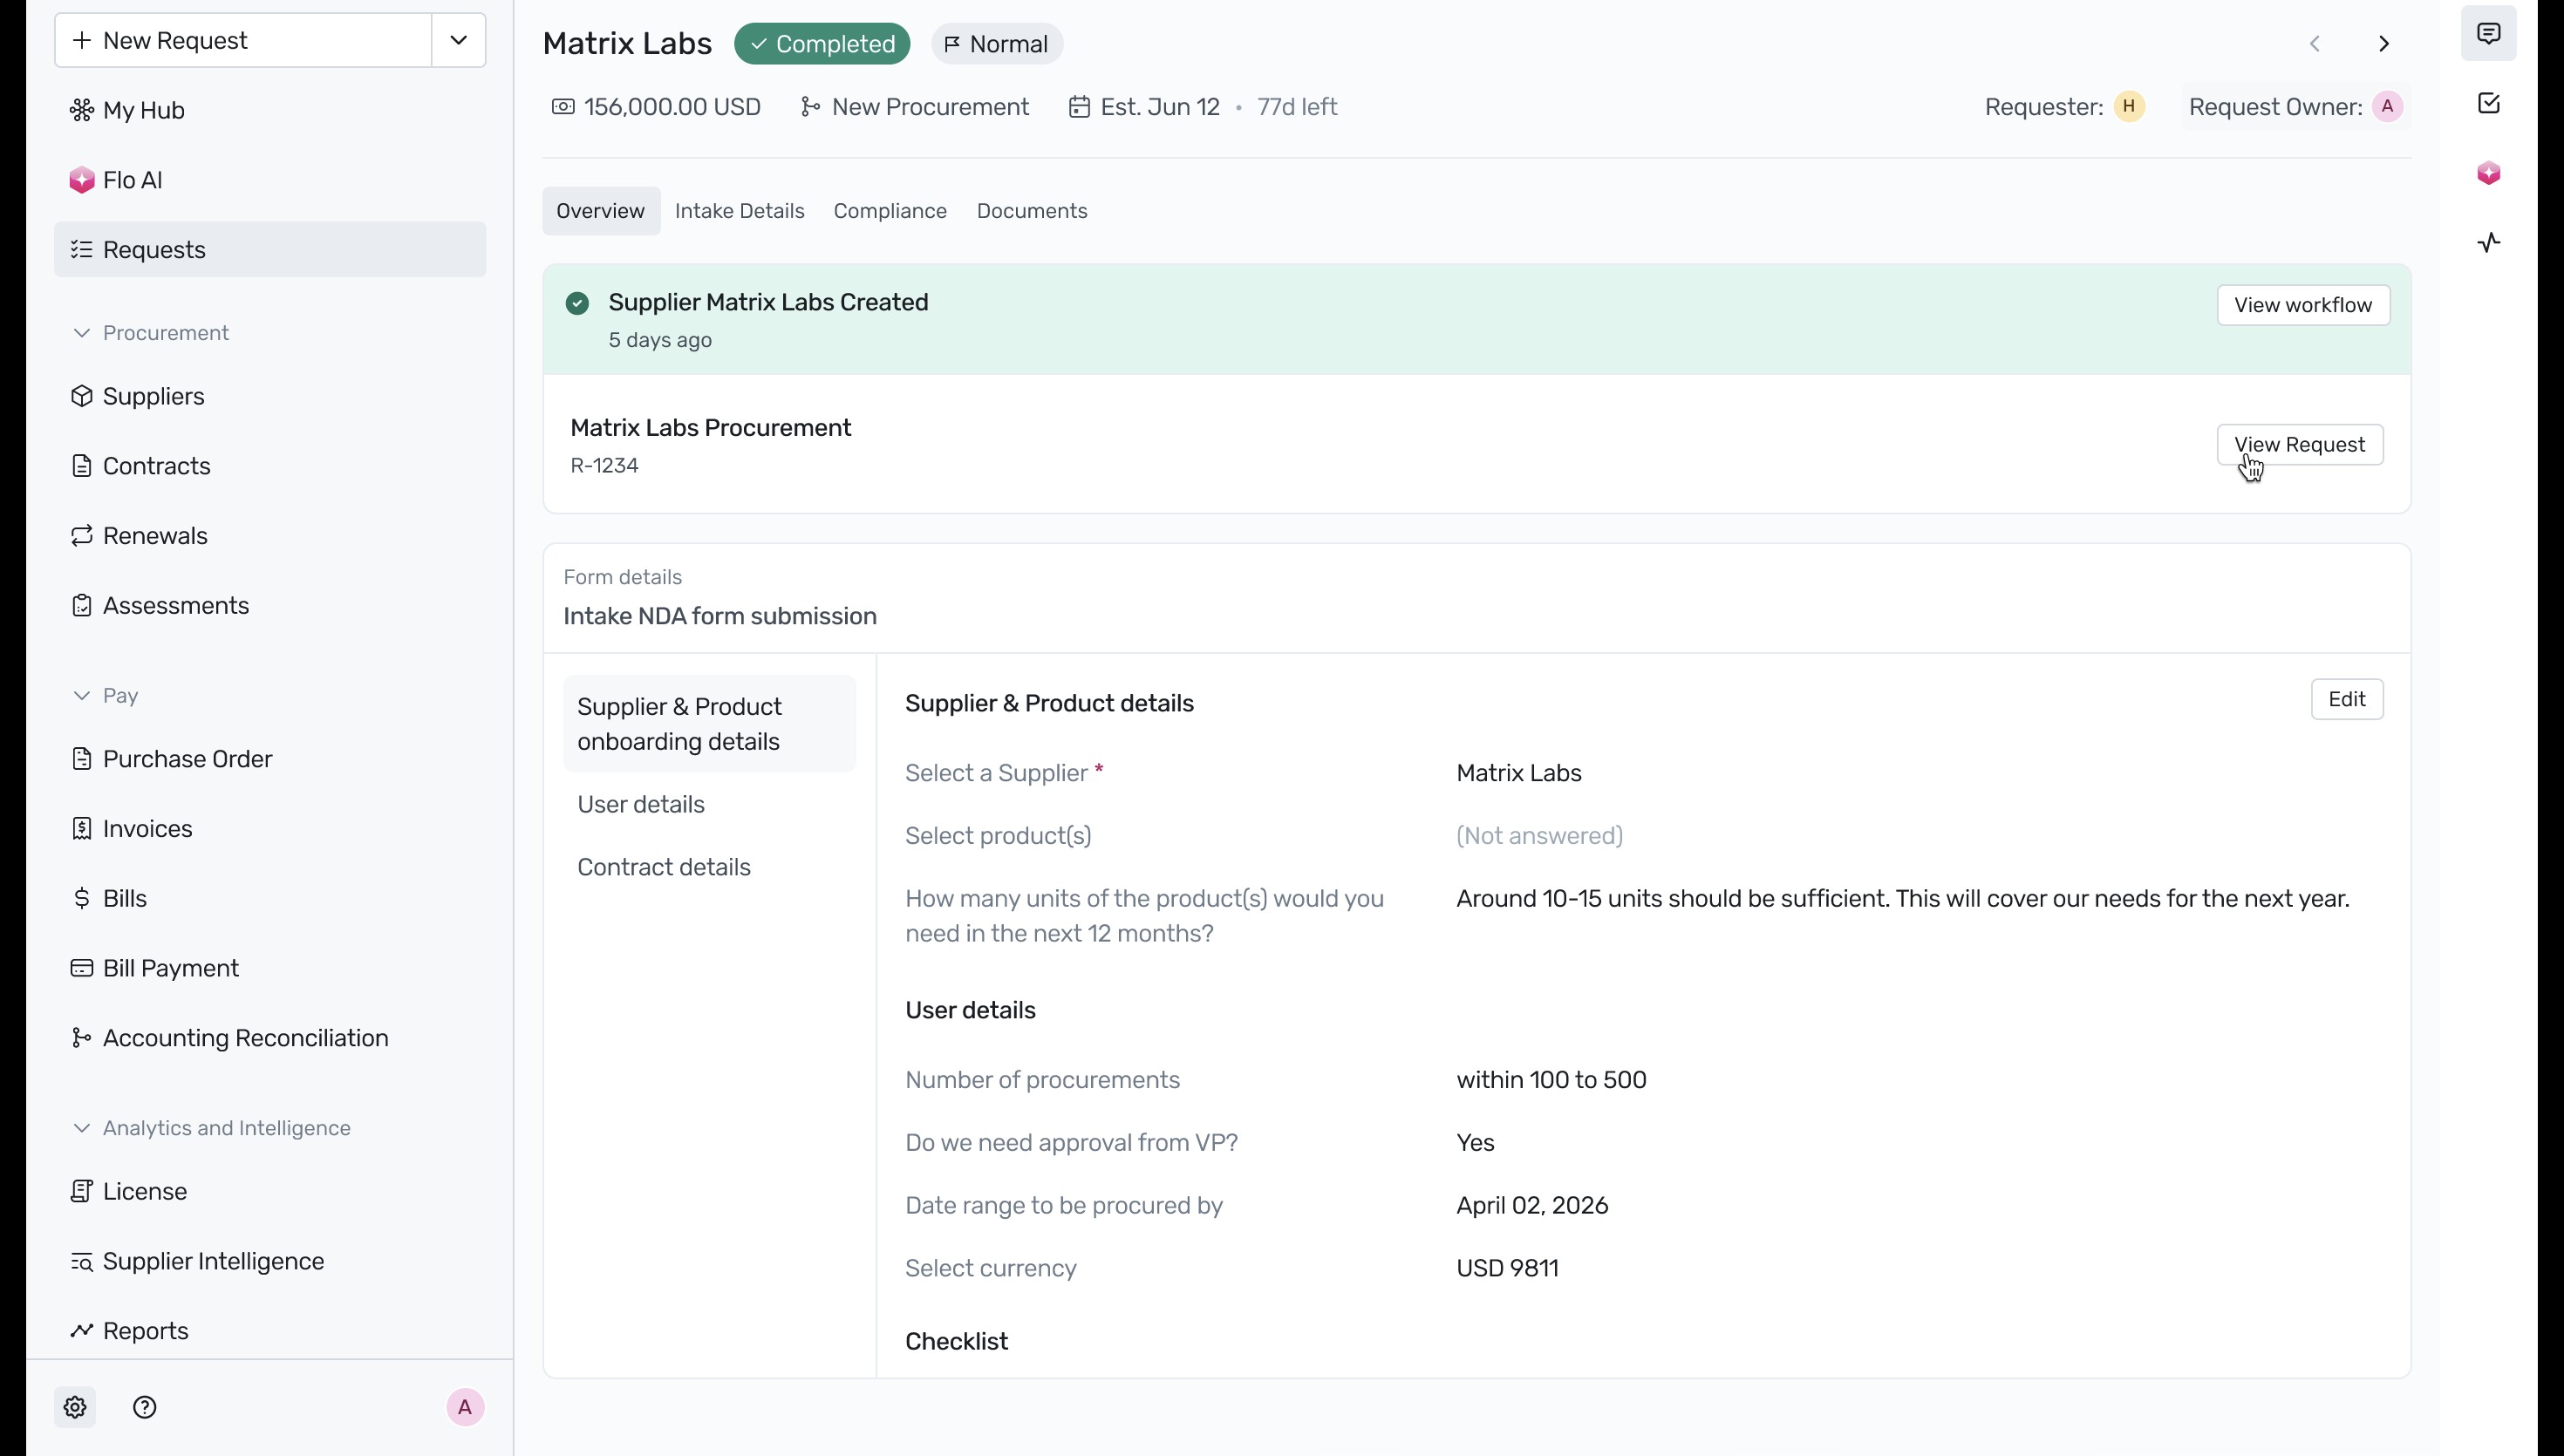
Once the onboarding workflow is completed, a banner confirms that the supplier has been successfully created. Click View Request to return to the main procurement workflow.
With the supplier successfully onboarded, the Wait for supplier creation step is marked as completed, and the workflow moves to Create Supplier in NS. Click on the card and select the supplier link under the Supplier URL to verify the integration. For more details on sequential tasks, see How to add a sequential task.
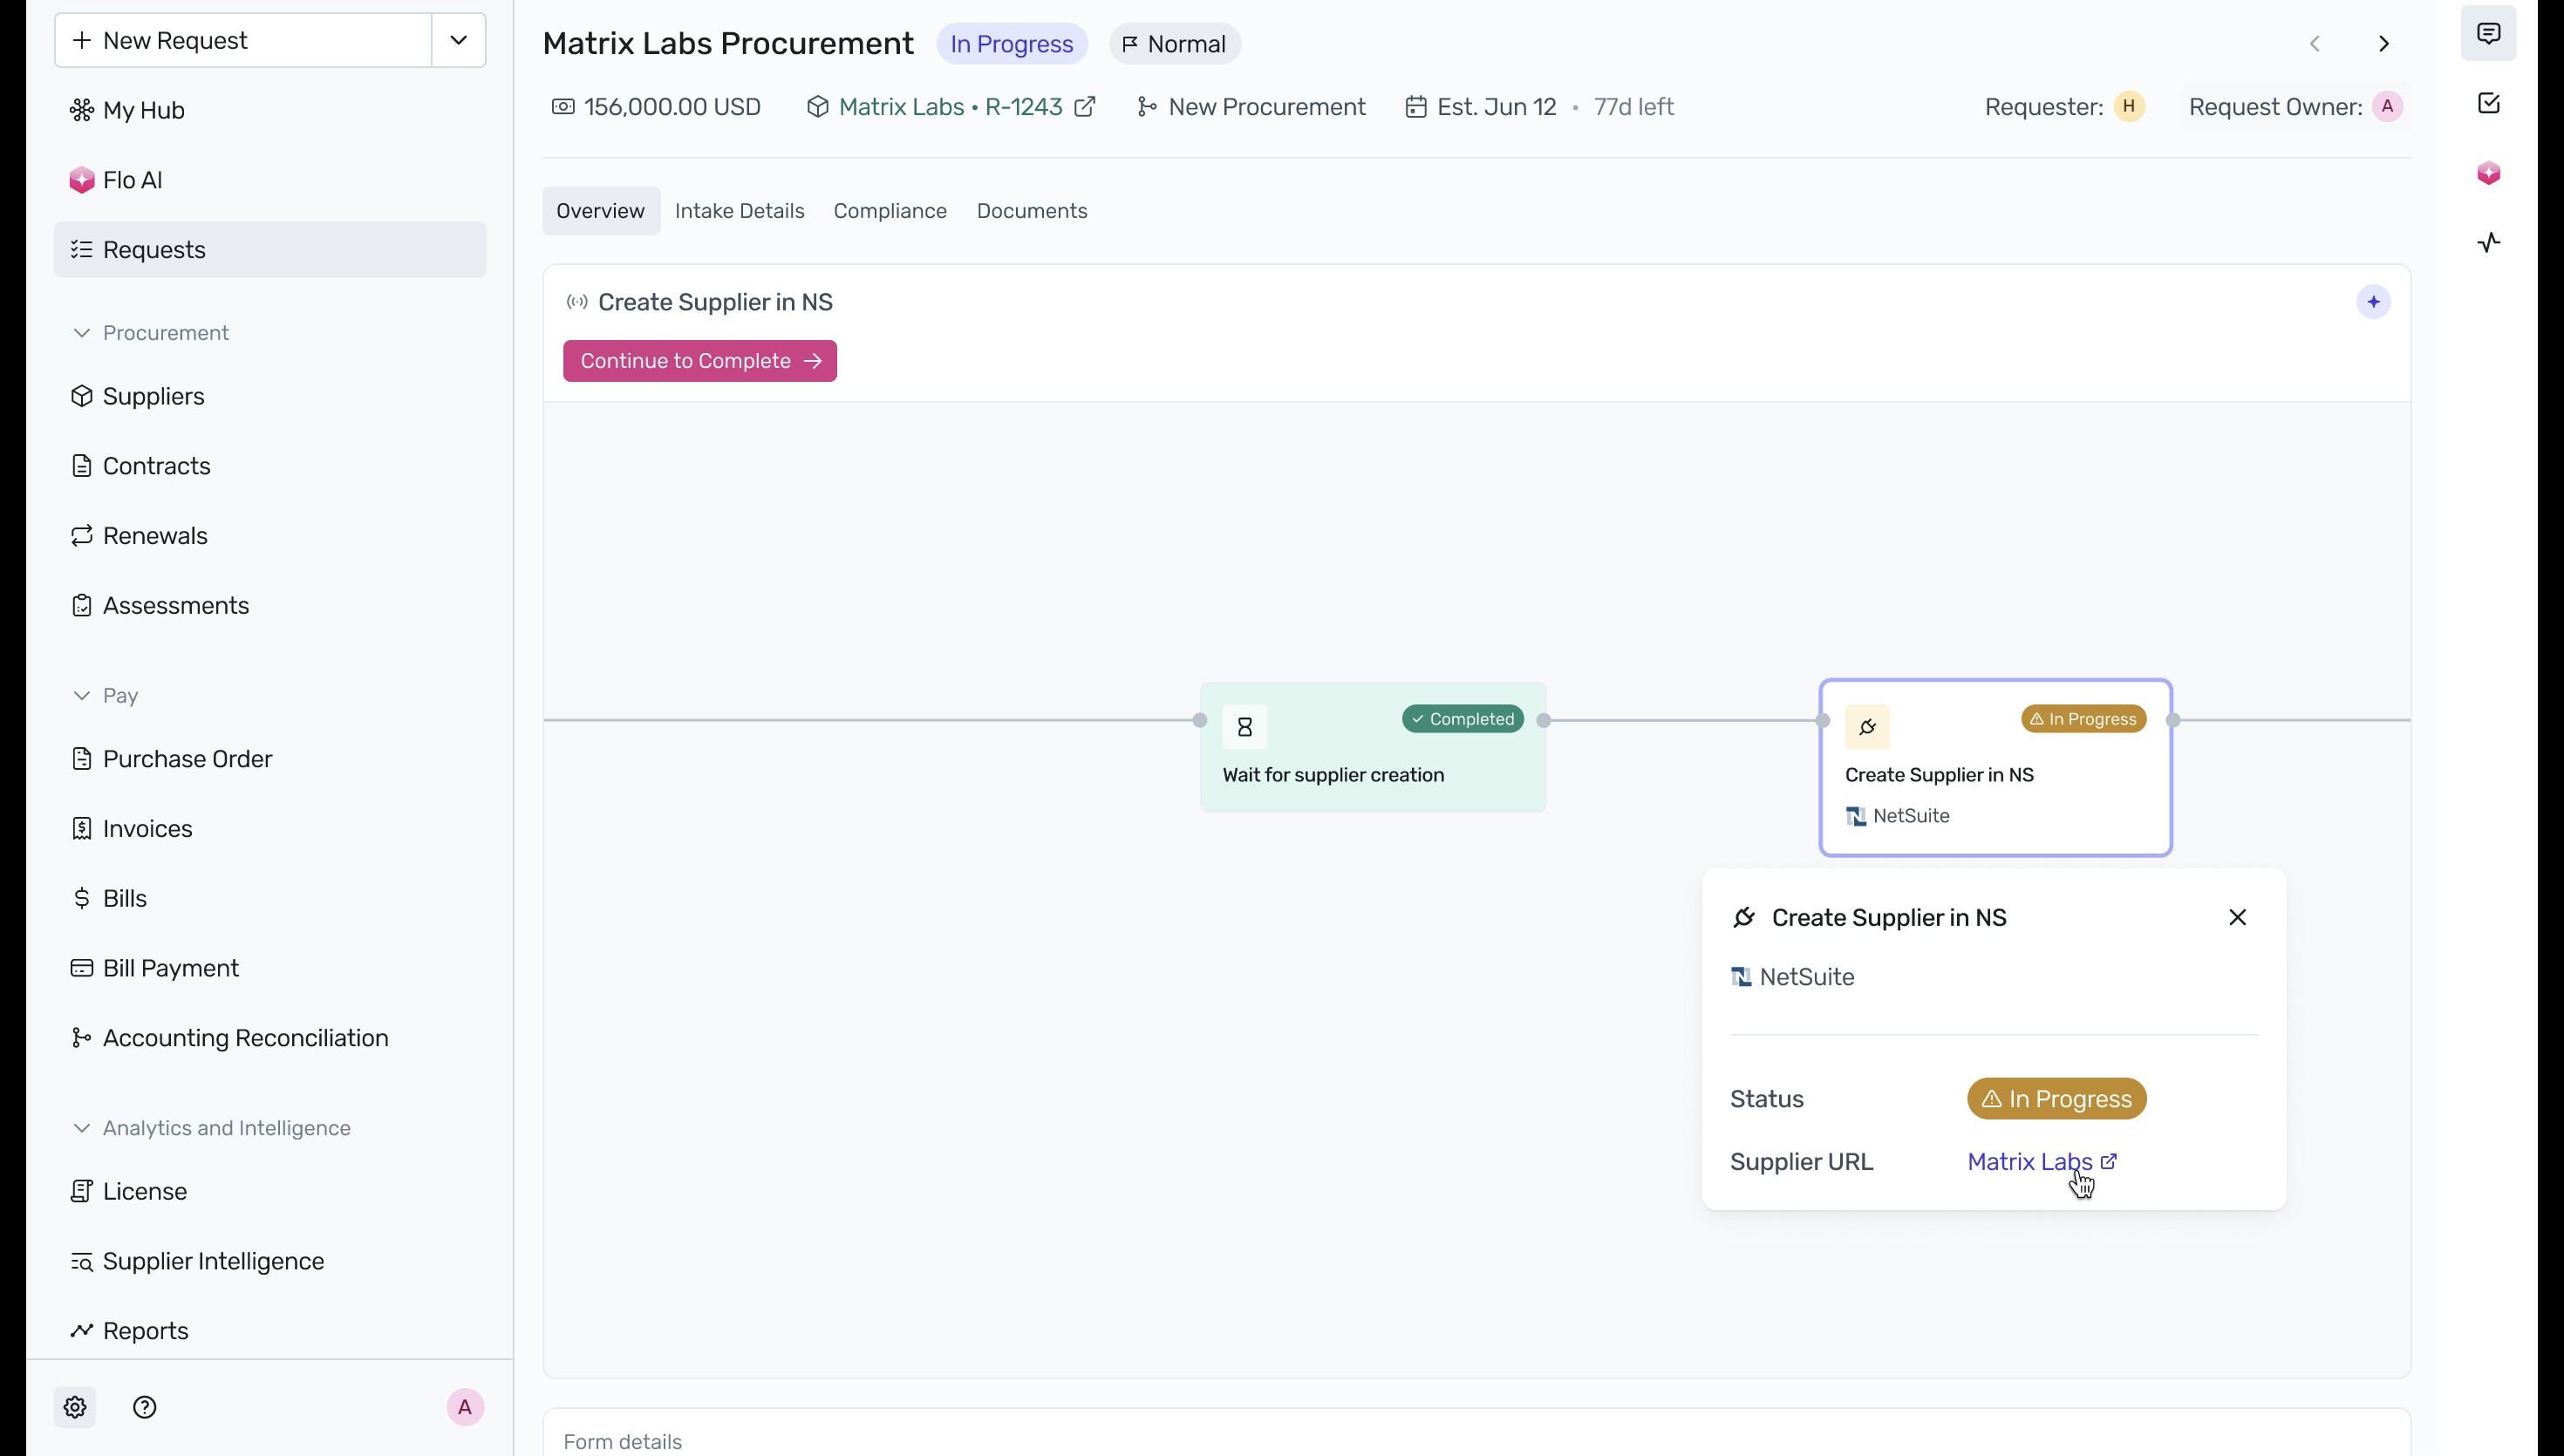
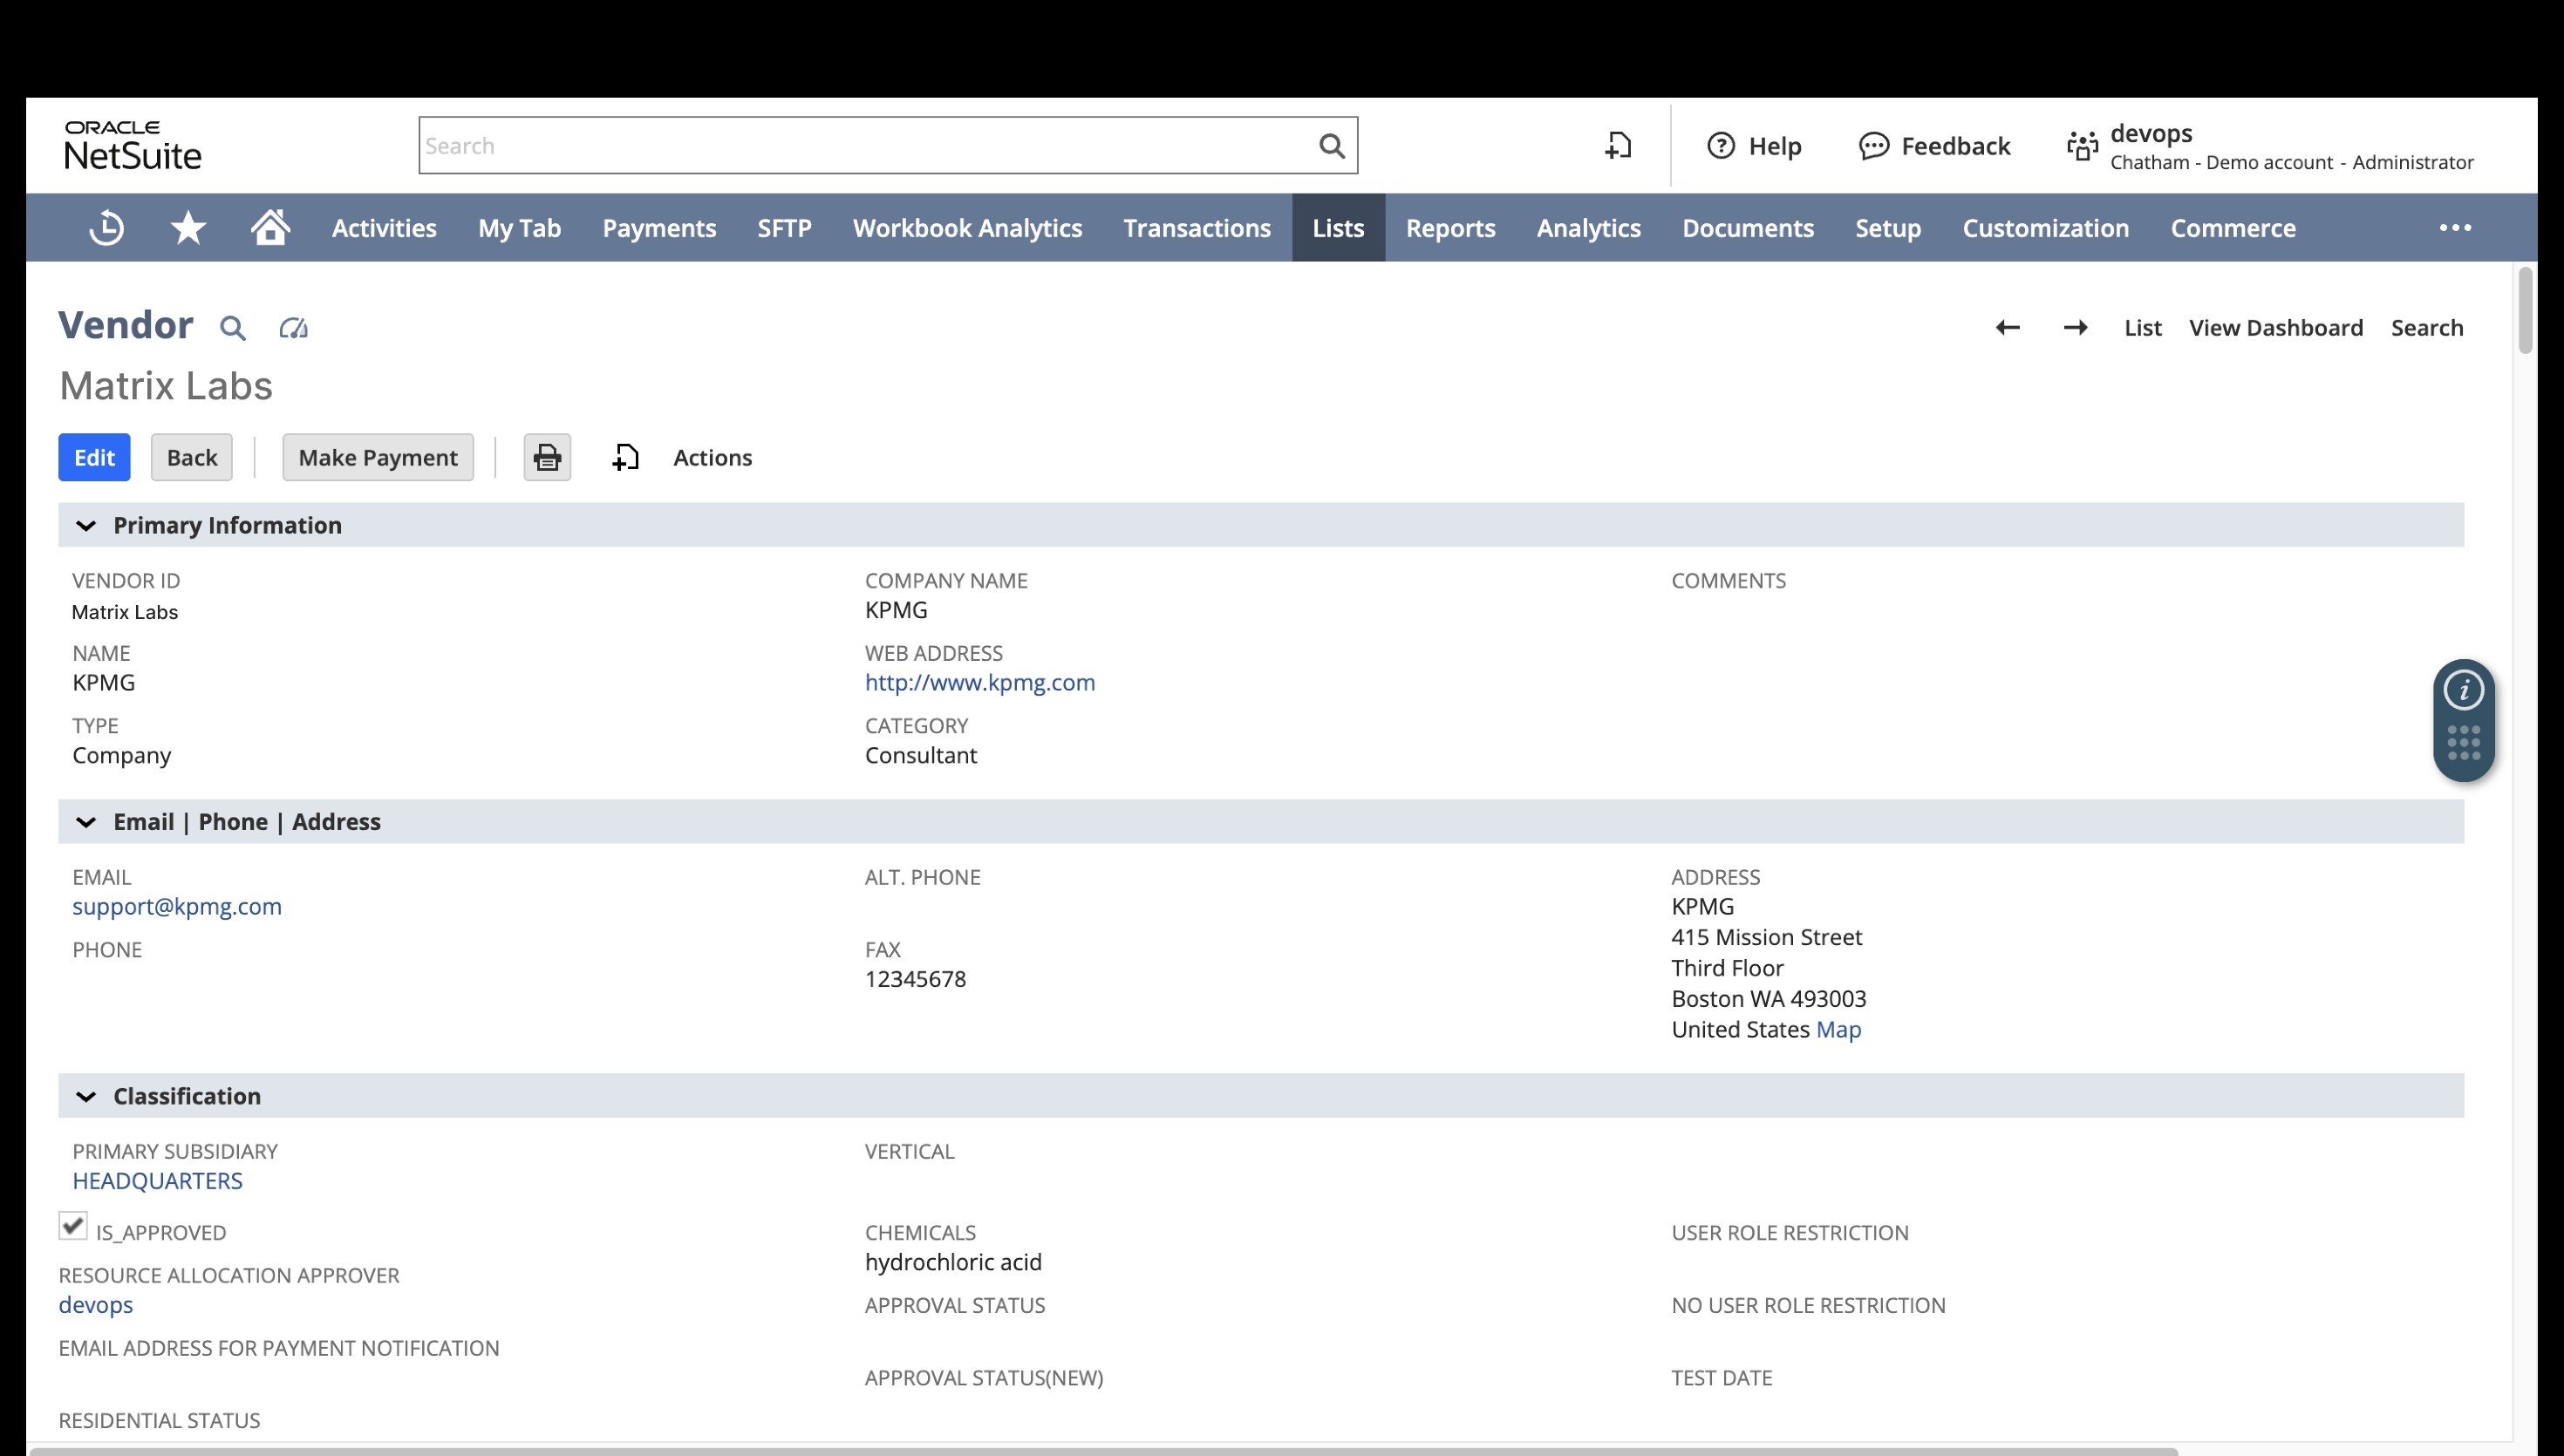
The system redirects you to NetSuite, where you can verify that the vendor record has been automatically created with the correct primary information, classification, and approval status. To learn more about NetSuite setup.
Back in the procurement app, the workflow automatically advances to Create PO in NS. Click on the card and select the PO link under the PO URL to inspect the generated Purchase Order.
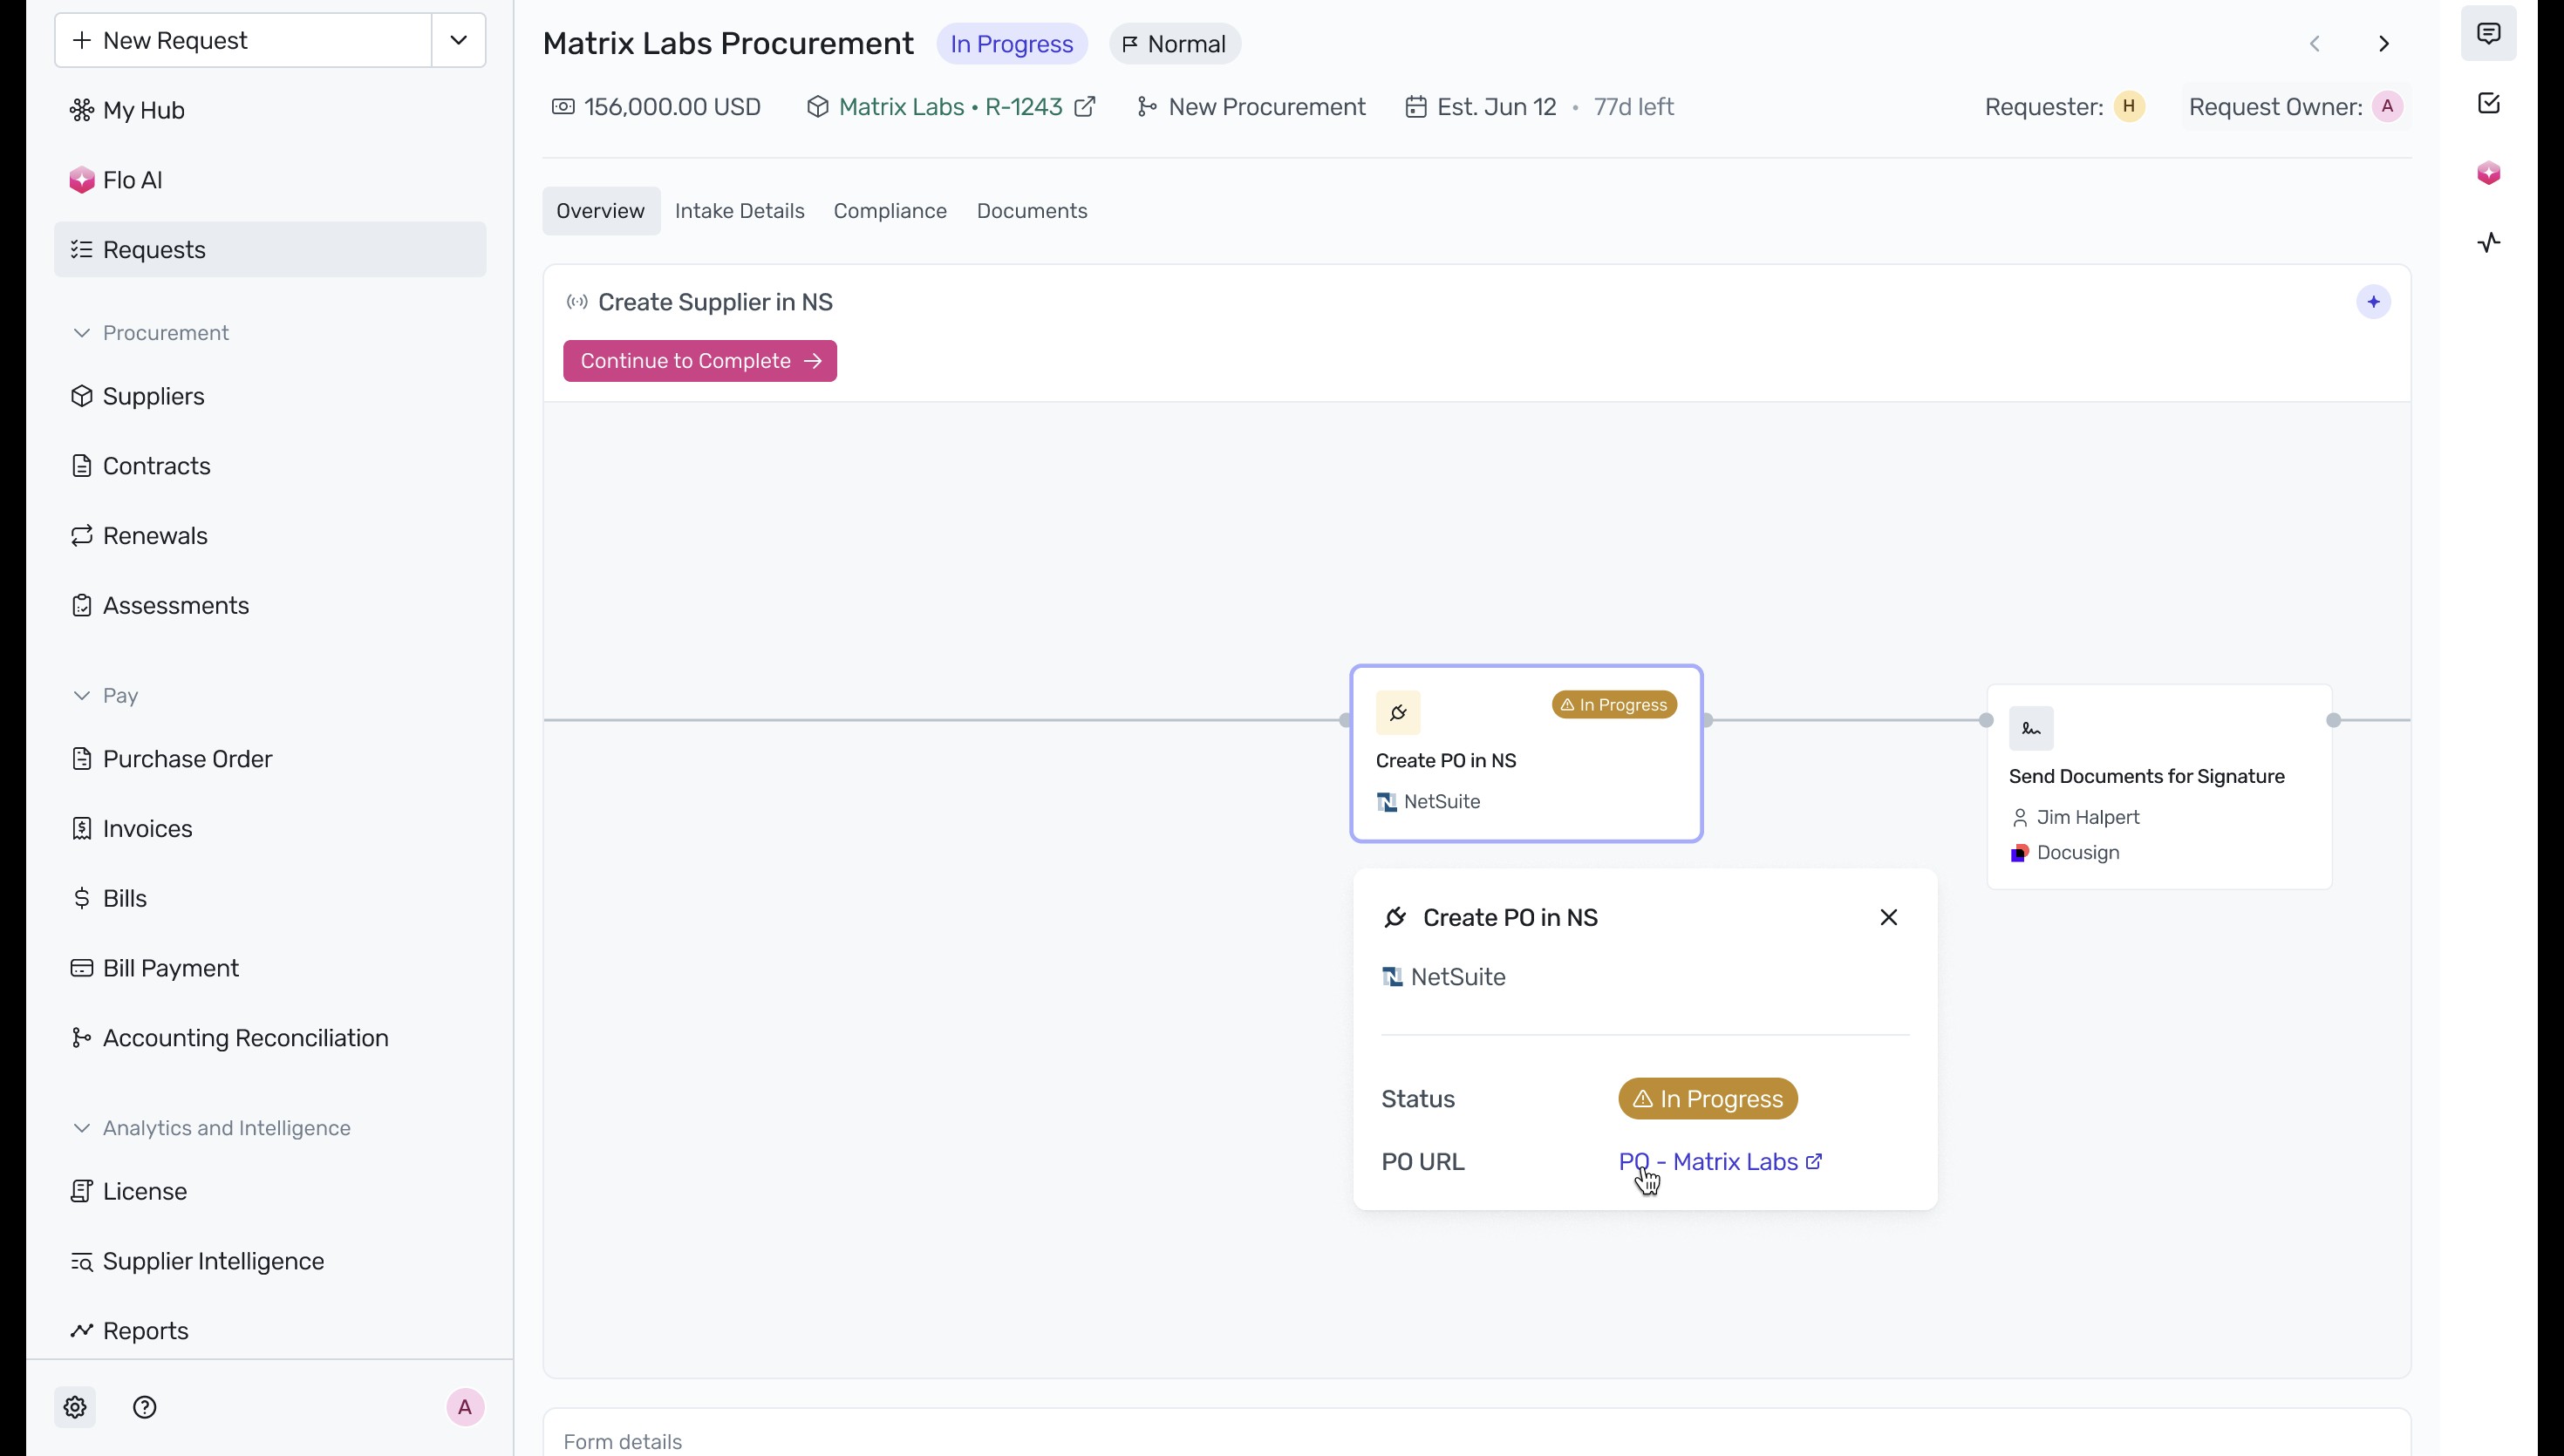
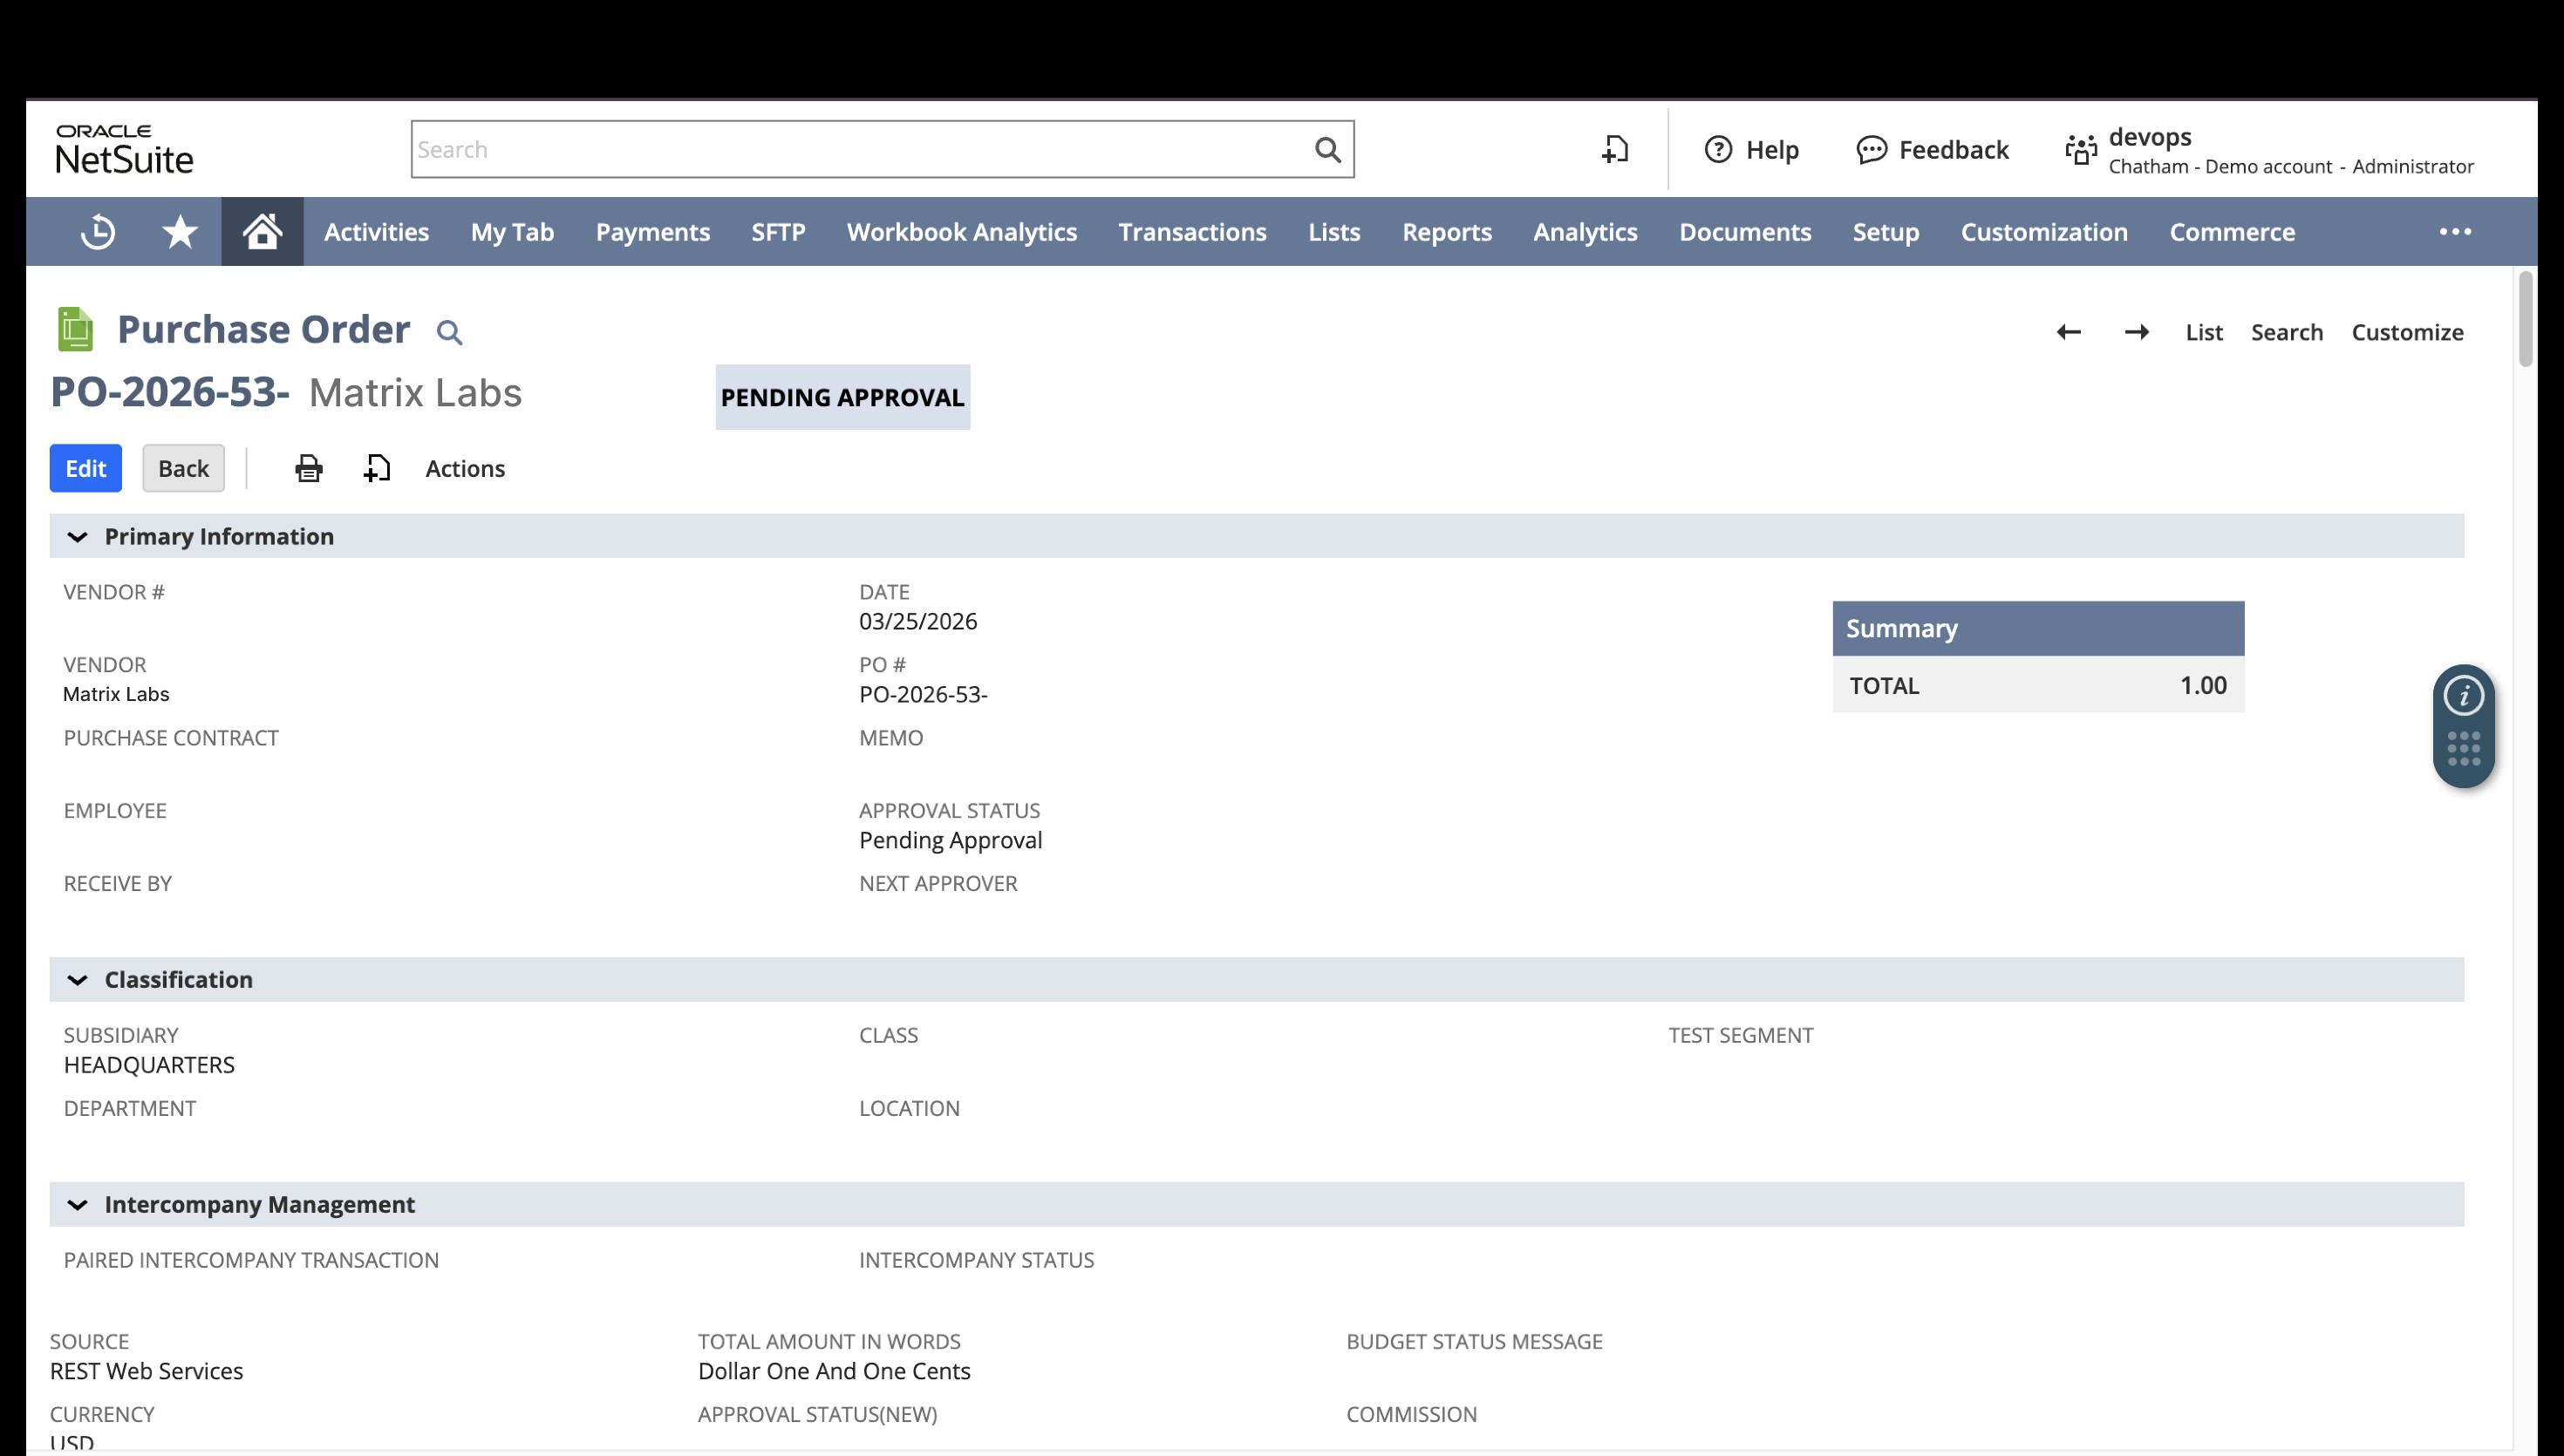
In NetSuite, verify that the Purchase Order has been successfully generated and is in Pending Approval status.
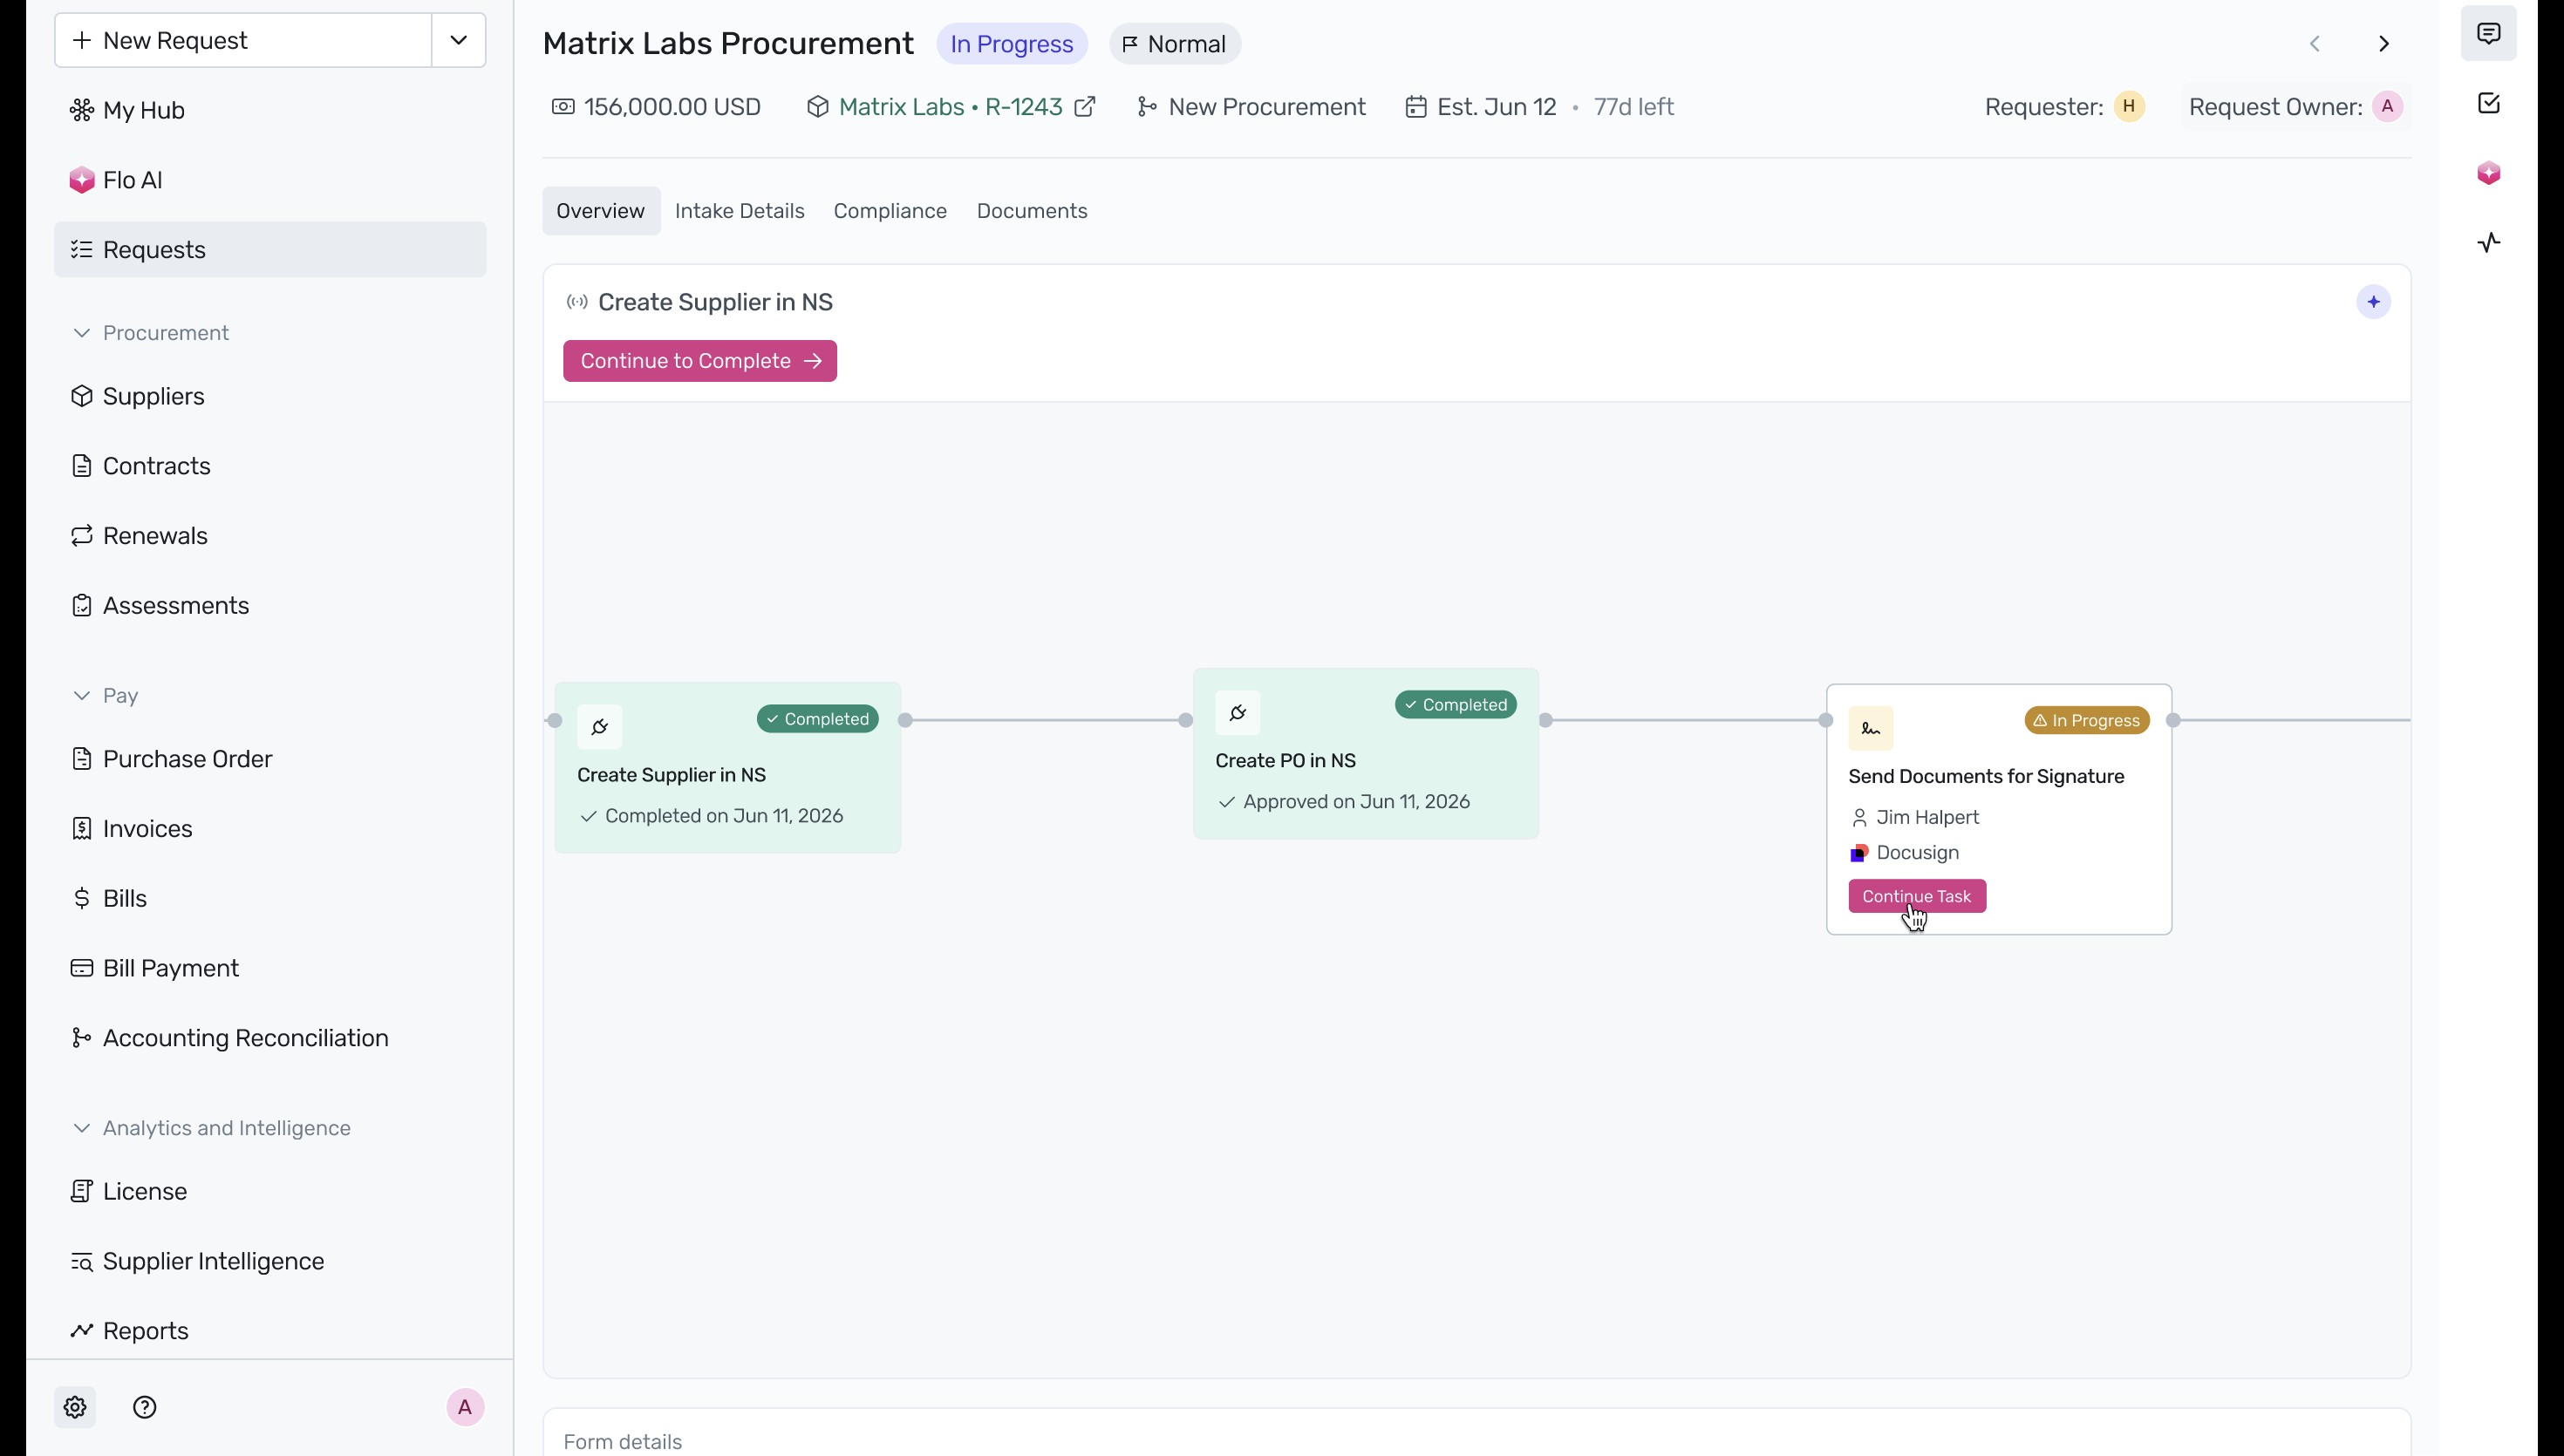
Once the NetSuite PO step is completed, the workflow moves to the final stage: Send Documents for Signature via DocuSign. Click Continue Task to initiate the electronic signature process for the contract.
Next Steps
Now that you understand the post-submission workflow, you can explore how to set up these automated stages for your organization's specific requirements.
Was this article helpful?
That’s Great!
Thank you for your feedback
Sorry! We couldn't be helpful
Thank you for your feedback
Feedback sent
We appreciate your effort and will try to fix the article