In Spendflo, workflows automate routine procurement operations, reduce human error, and ensure compliance across your organization. Every procurement request follows a structured sequence of phases and tasks. These tasks can be executed in sequence or parallel, depending on the conditions defined within the workflow's rule engine. This guide demonstrates how procurement workflows and approval chains are structured and executed within the Spendflo platform, using a sample procurement request as an example. You will see how sequential and parallel approval stages, third-party integrations like Ironclad and Jira, and onboarding dependencies work together to form a robust approval chain.
How Approval Chains are Executed
The following step-by-step walkthrough demonstrates how a procurement request progresses through sequential and parallel approval stages, third-party integrations, and onboarding dependencies.
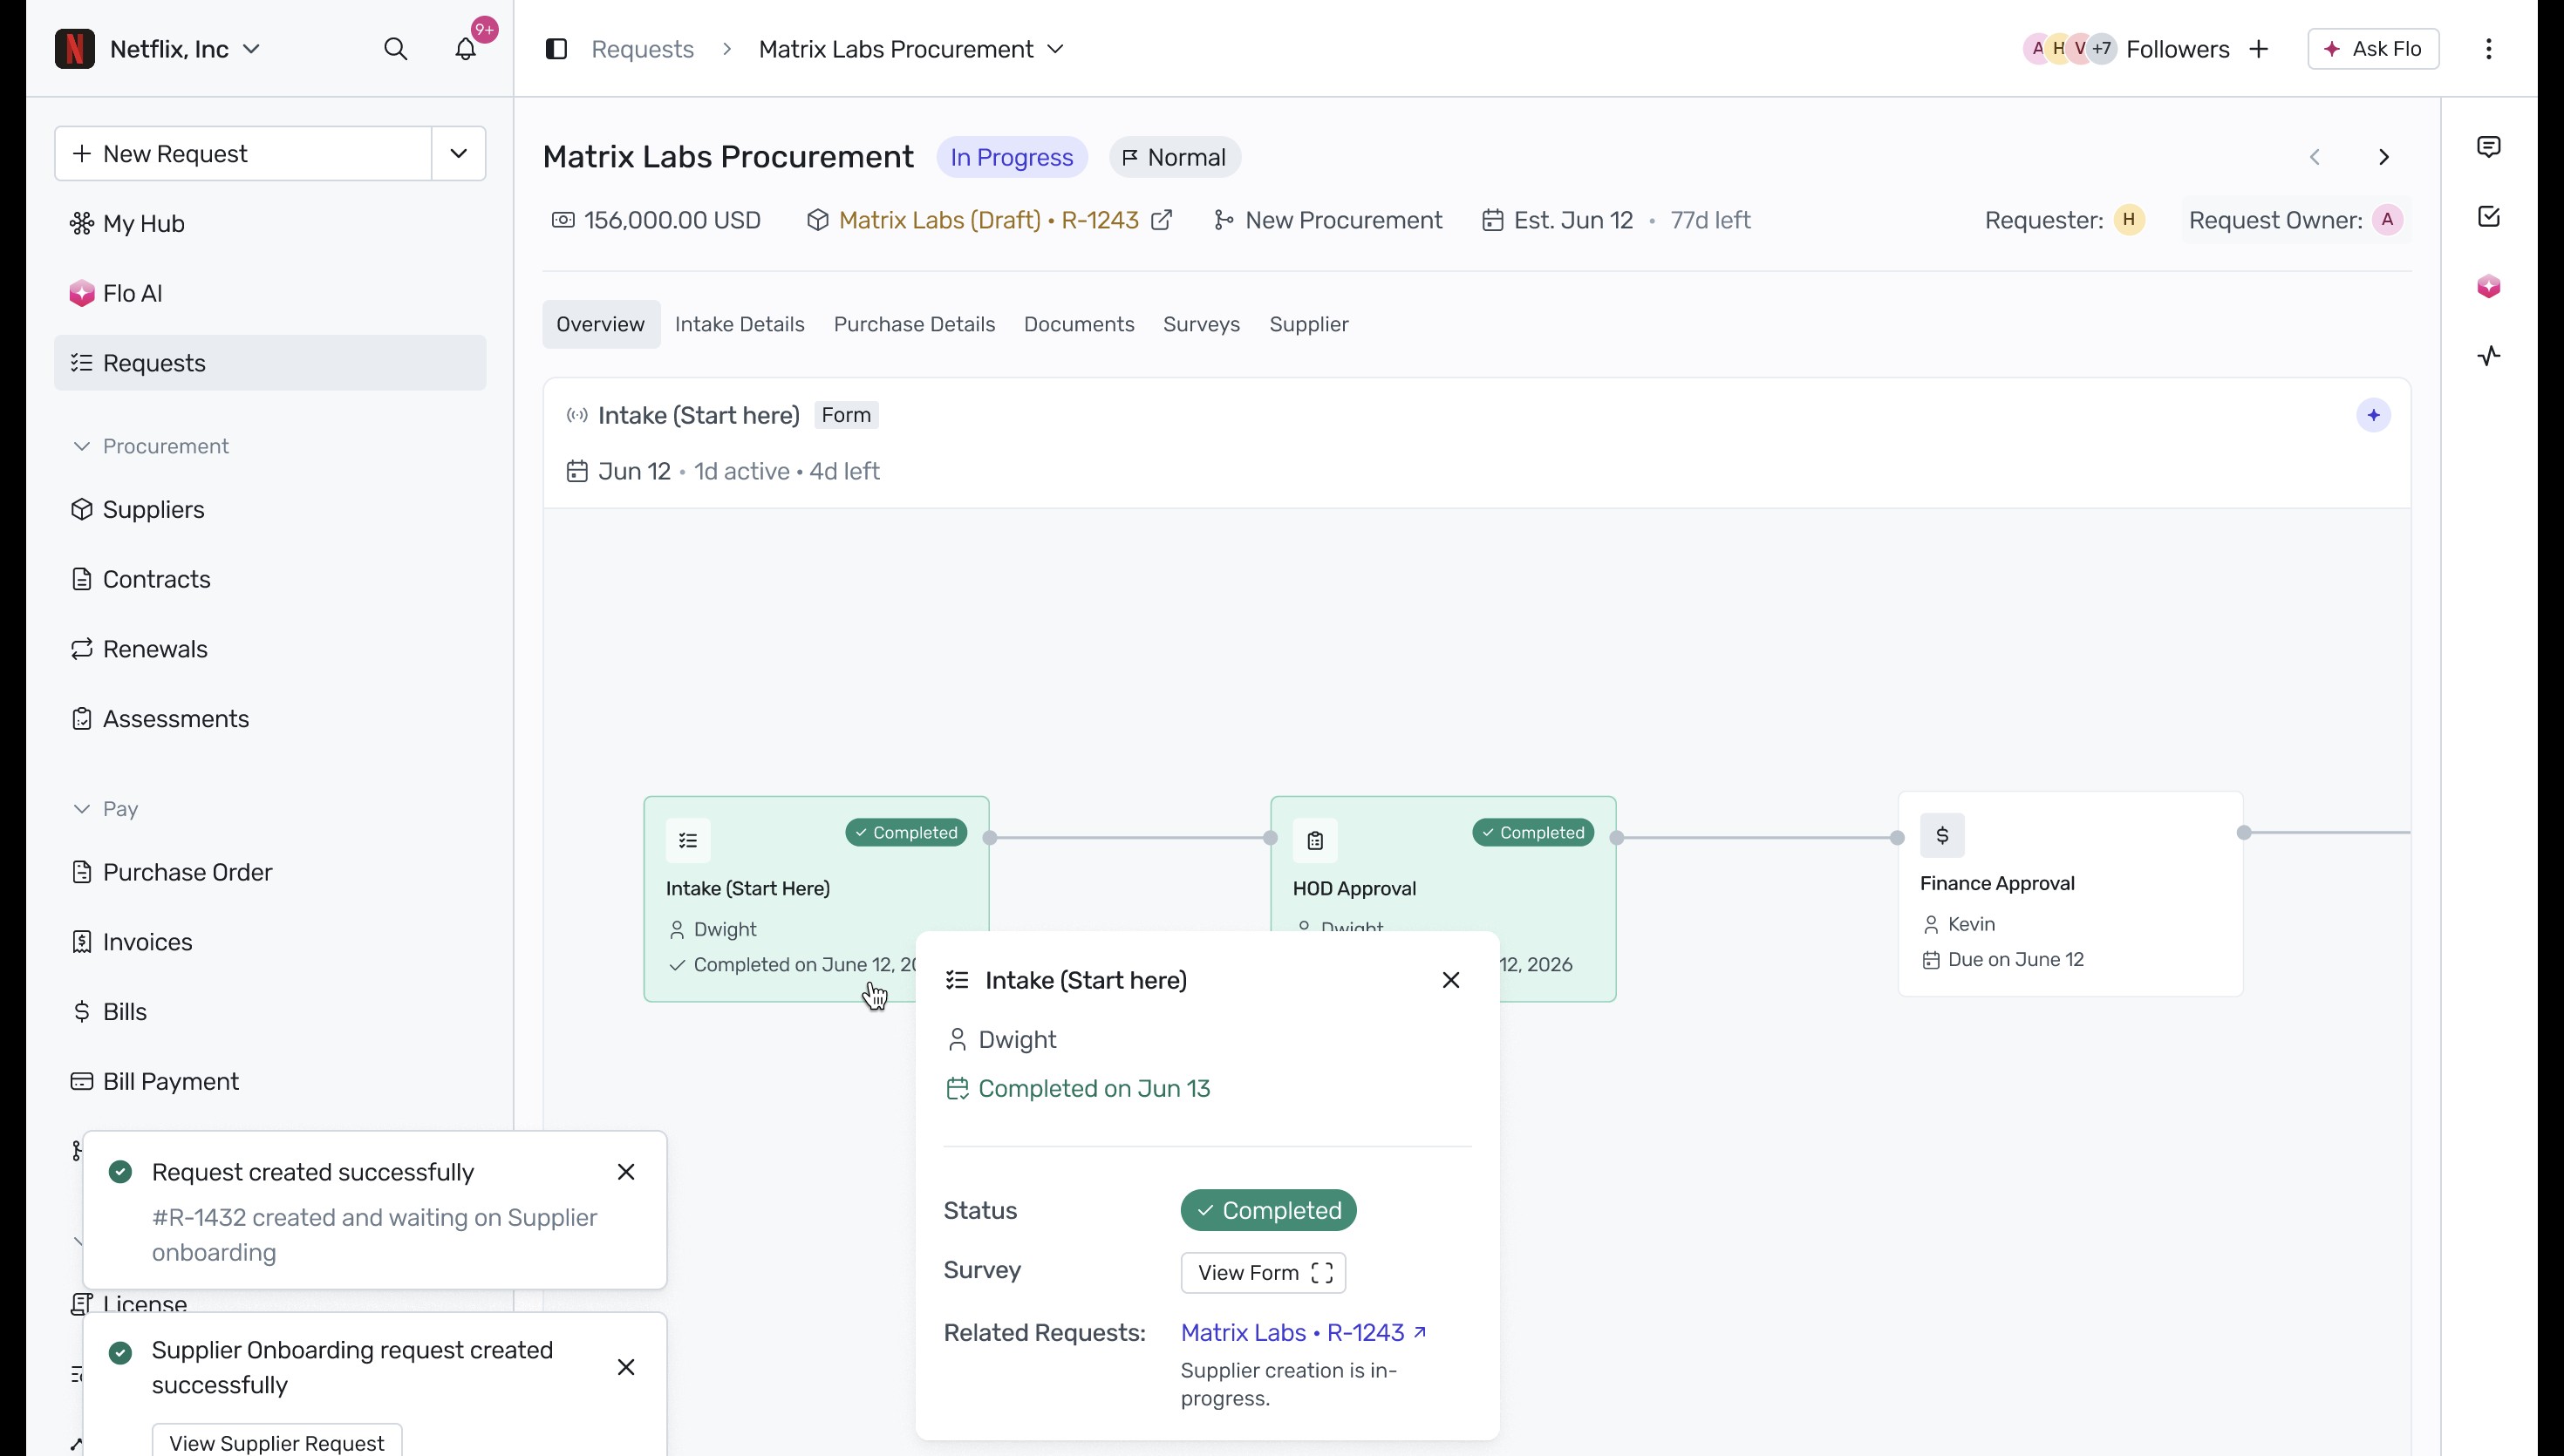
Initiate the Procurement Request: When a new procurement request is created, the workflow begins with the Intake stage. The requester fills out the initial intake form to kick off the approval chain. To view the completed intake details, click on the Intake (Start Here) node in the workflow map.
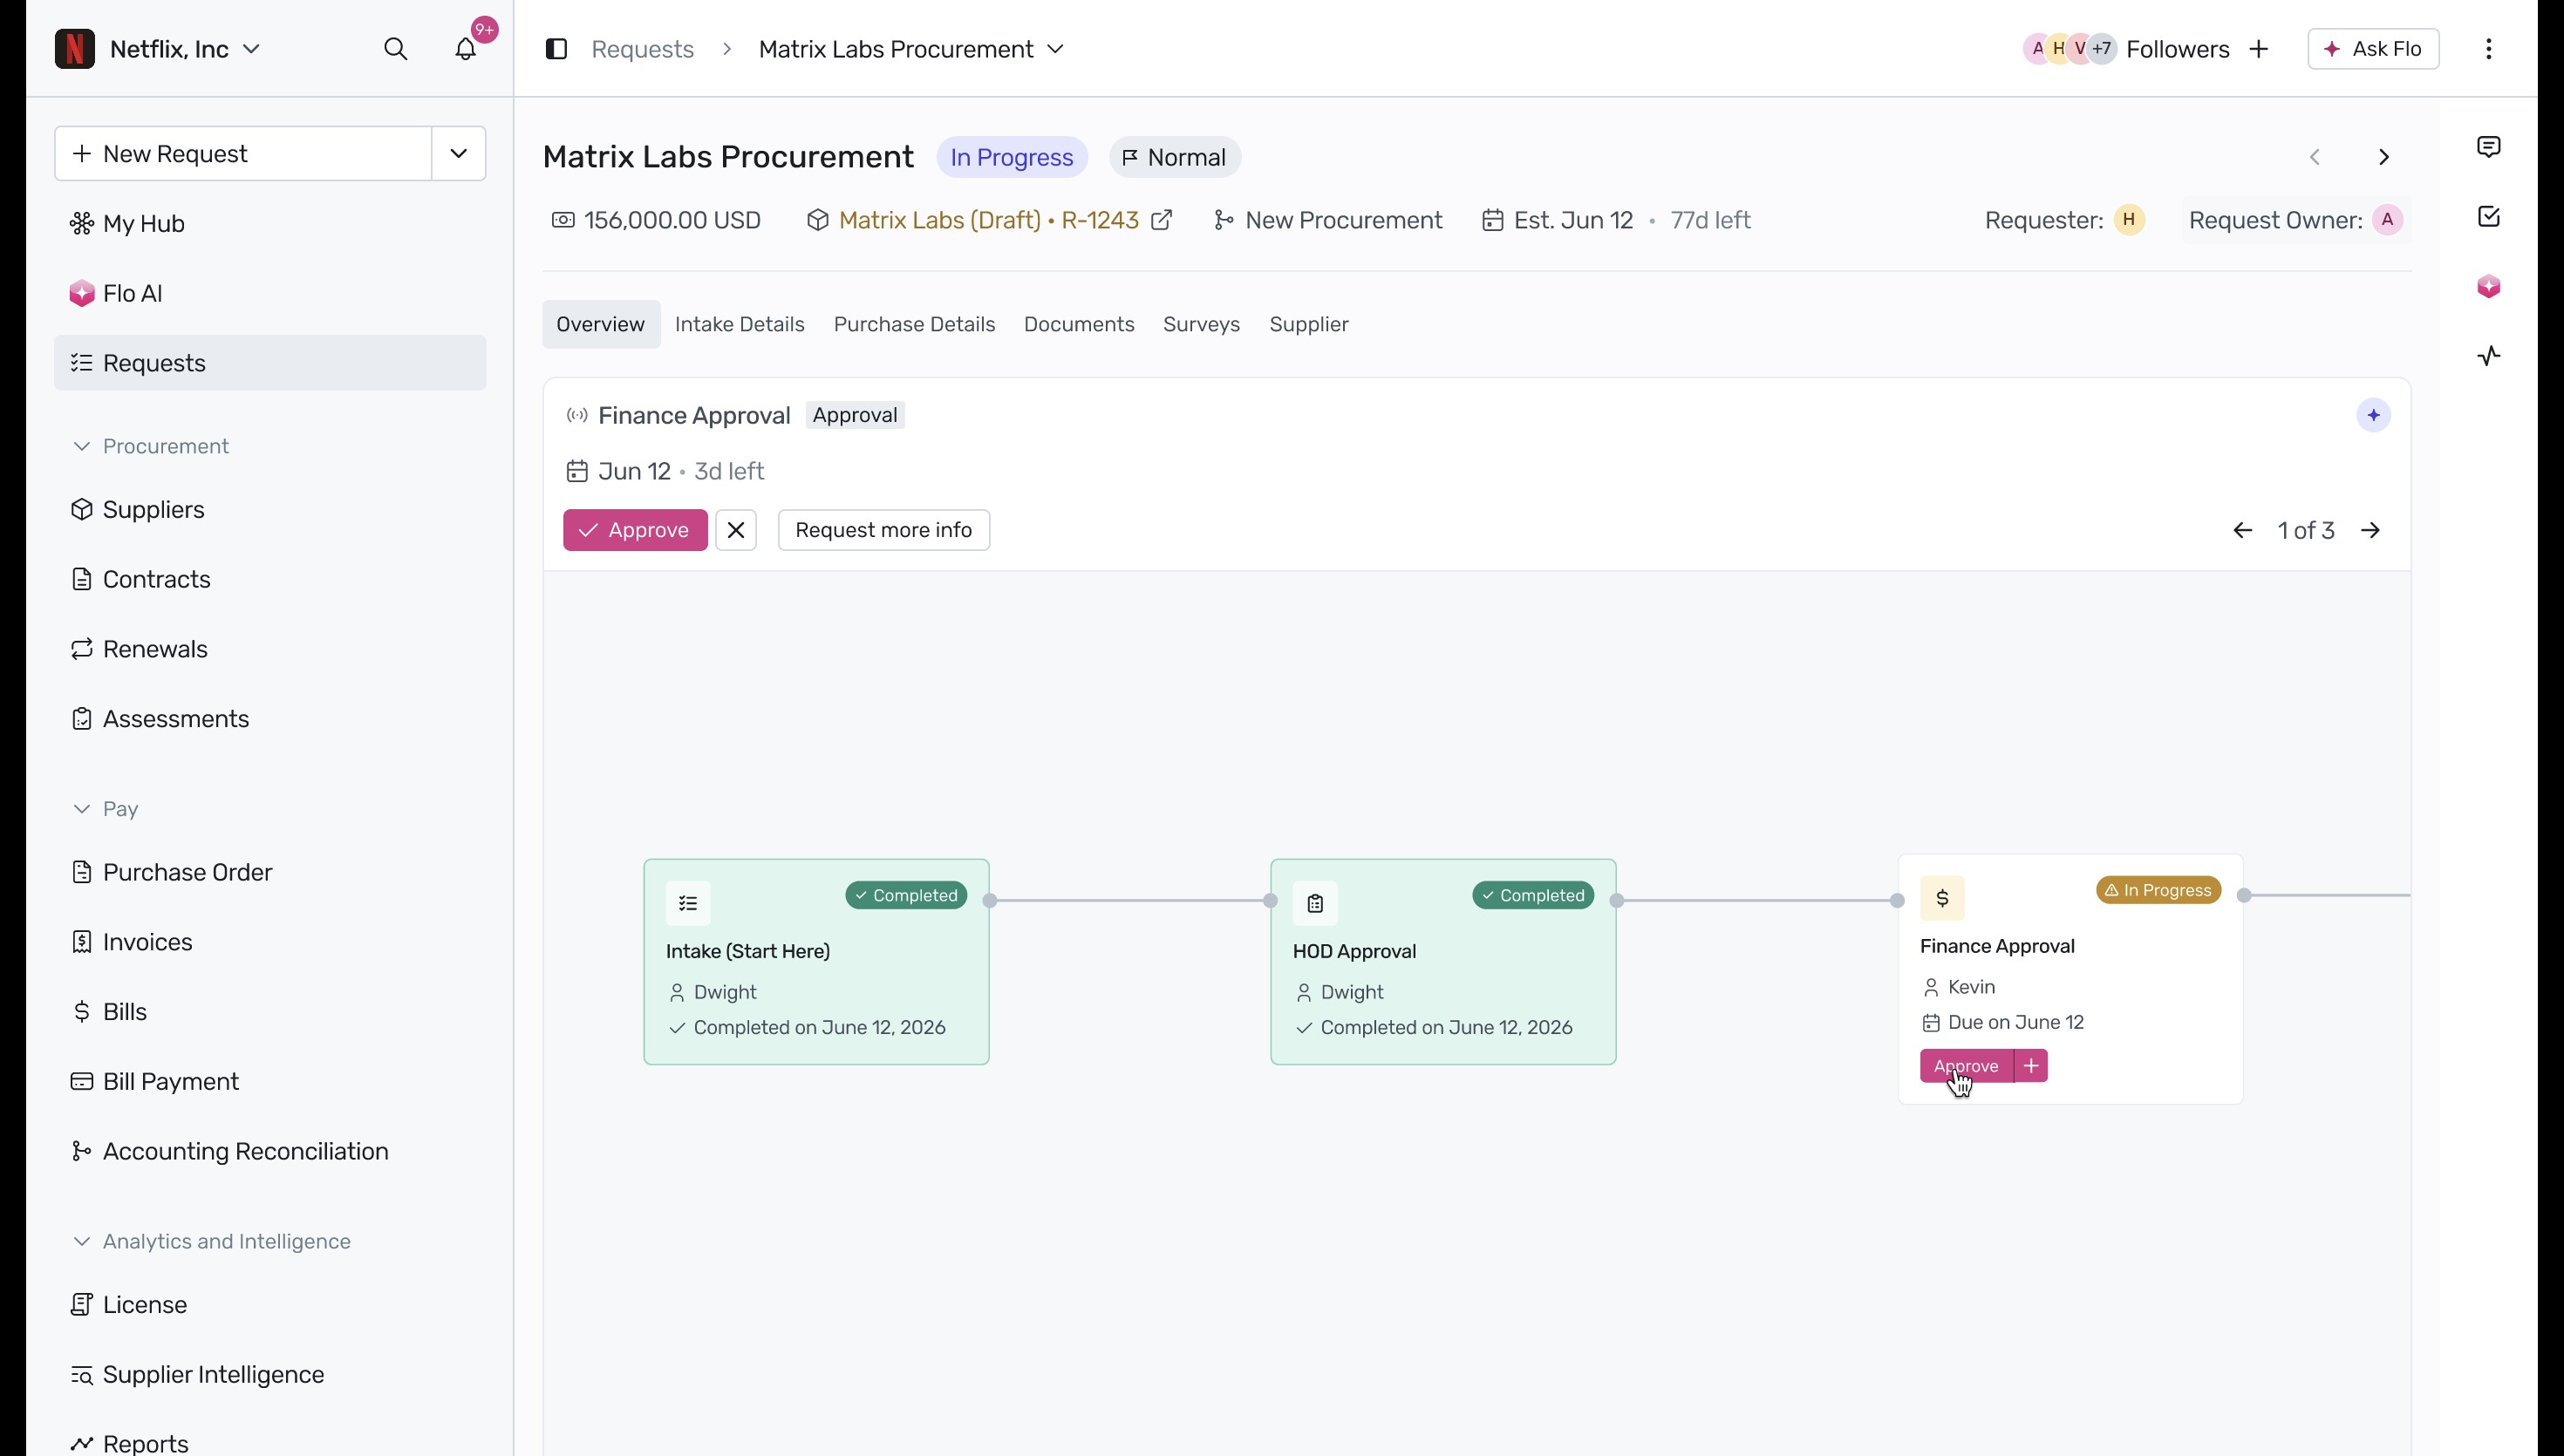
Process Finance Approval: Once the intake and initial Head of Department (HOD) approvals are completed, the request automatically routes to the Finance Approval stage. To proceed with the finance review, click the Approve button on the active Finance Approval card.
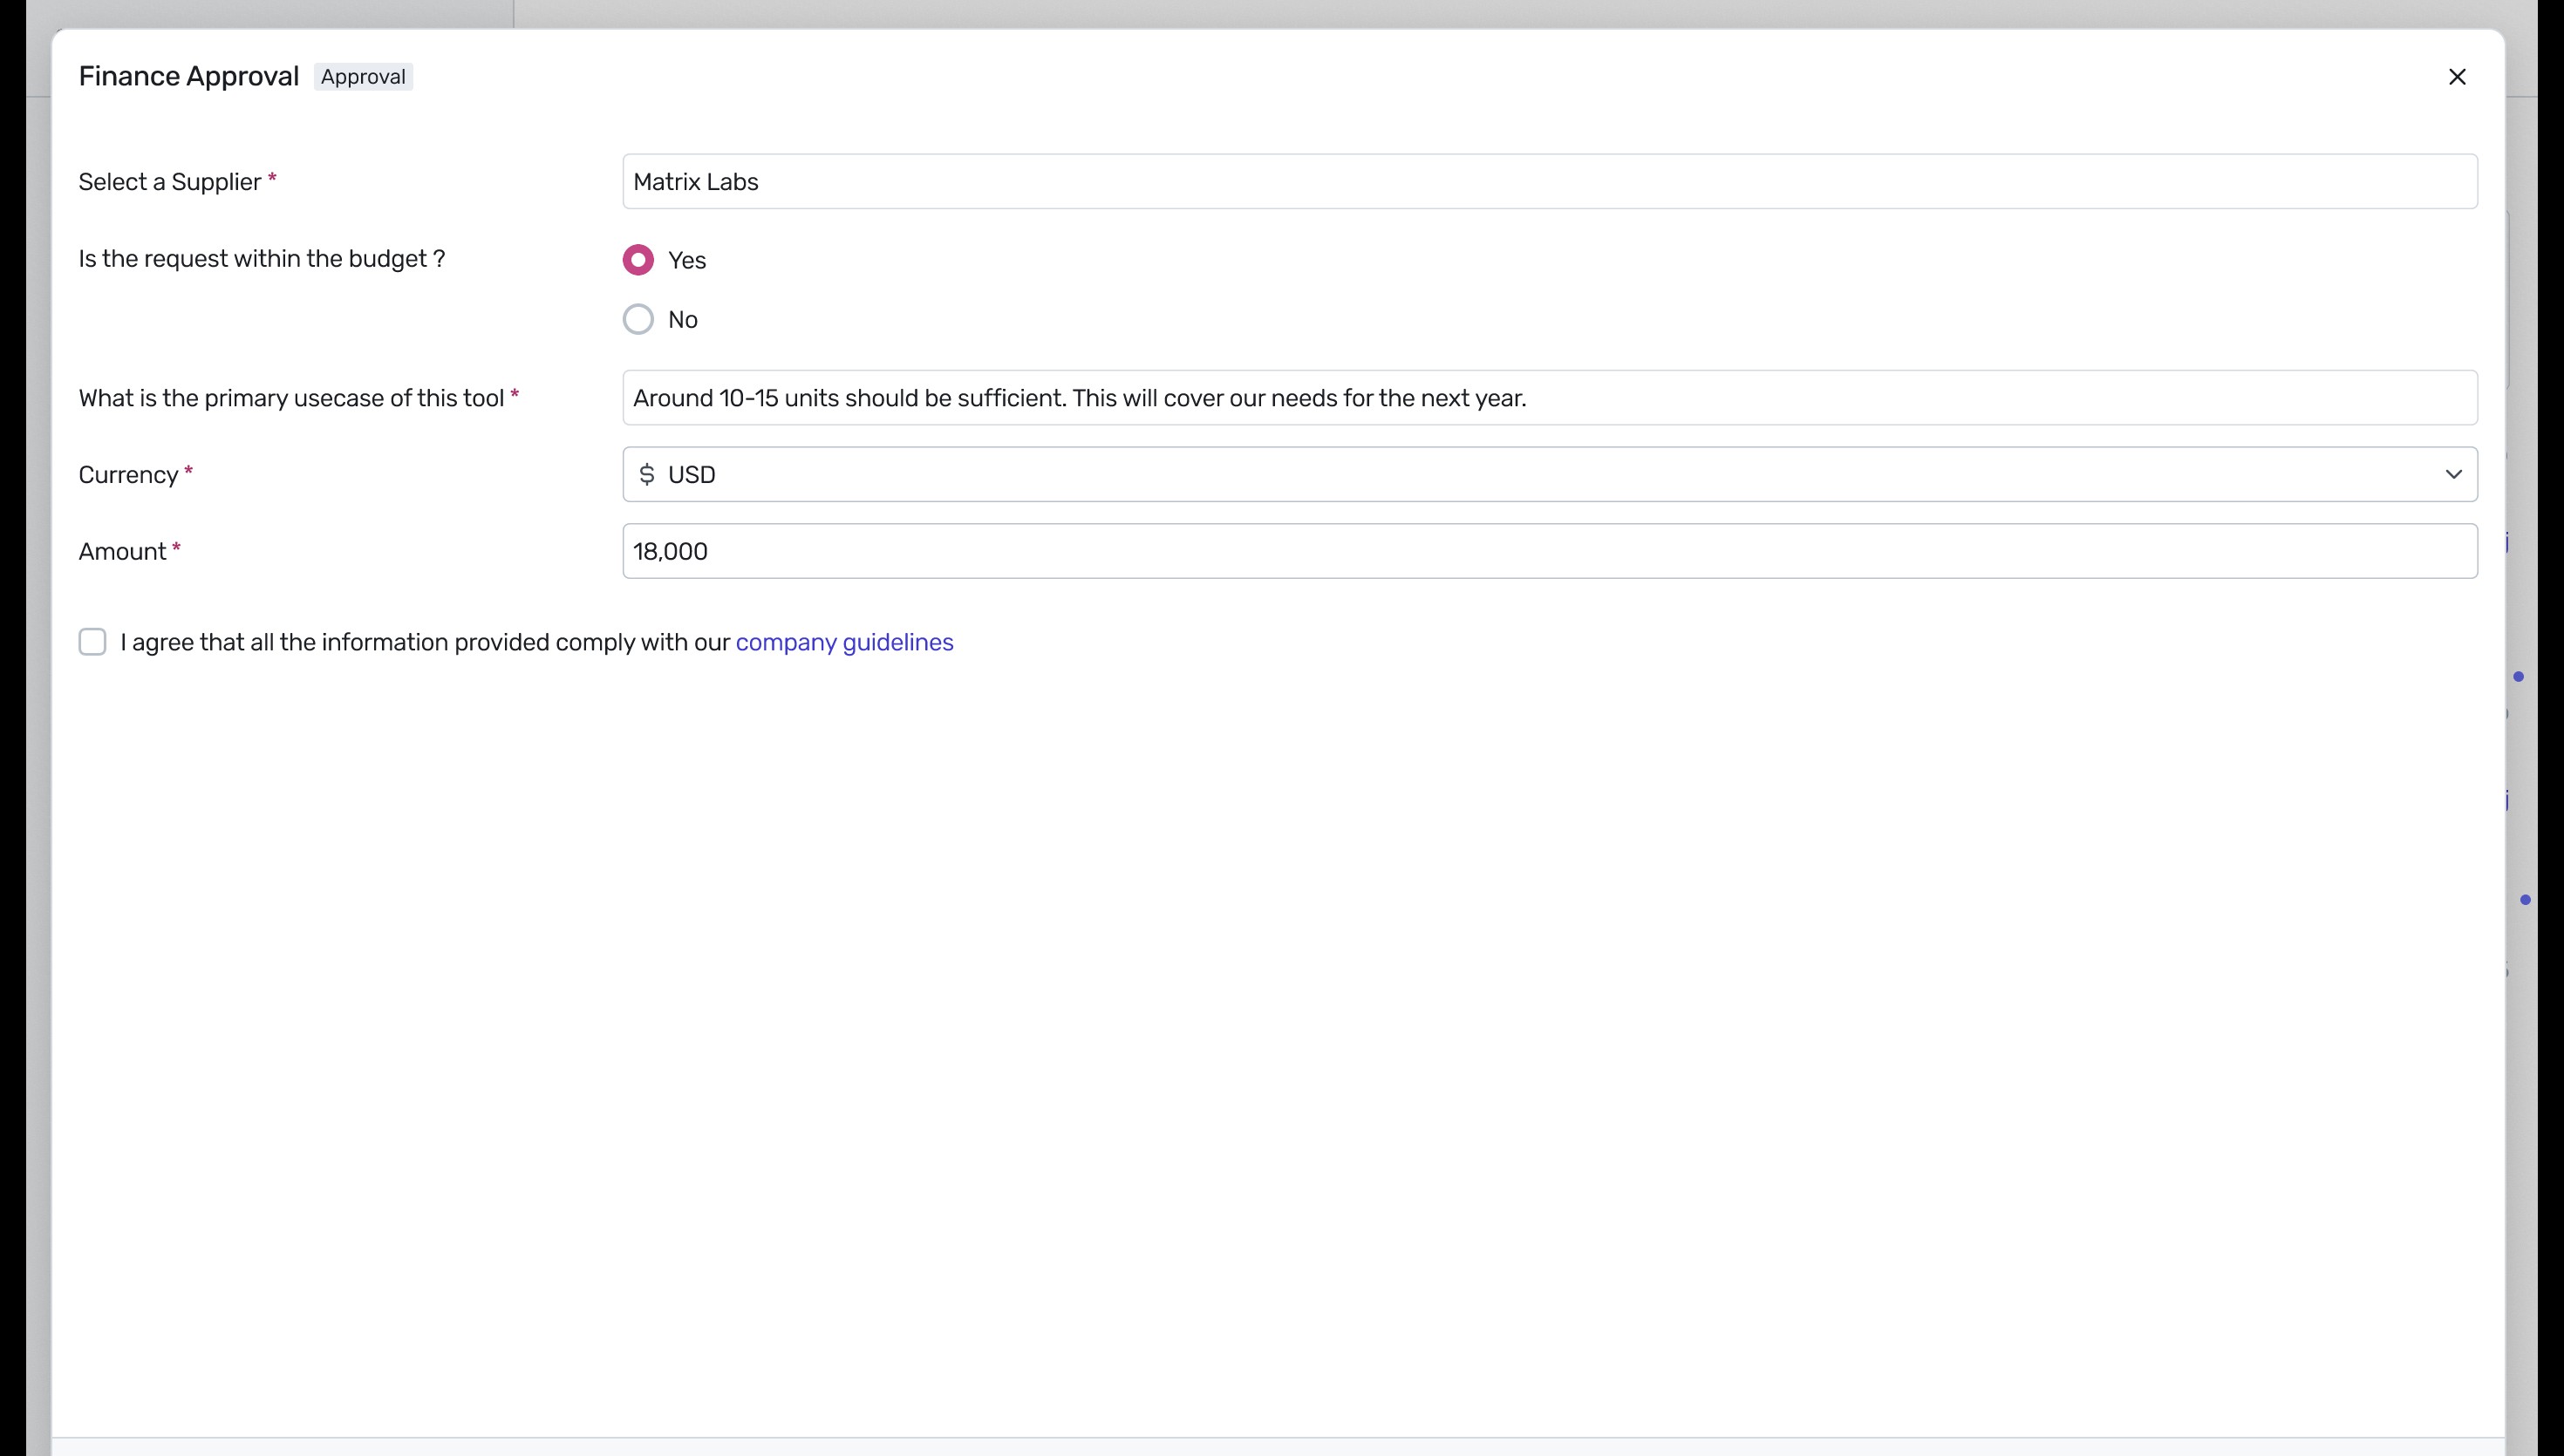
Complete the Finance Approval Form: Clicking approve opens the Finance Approval modal. Verify the supplier details, confirm if the request is within budget, specify the primary use case, select the currency, and input the total amount. Finally, acknowledge compliance with the company guidelines by checking the agreement box. Fill out all required fields in the form and check the compliance box to submit your approval.
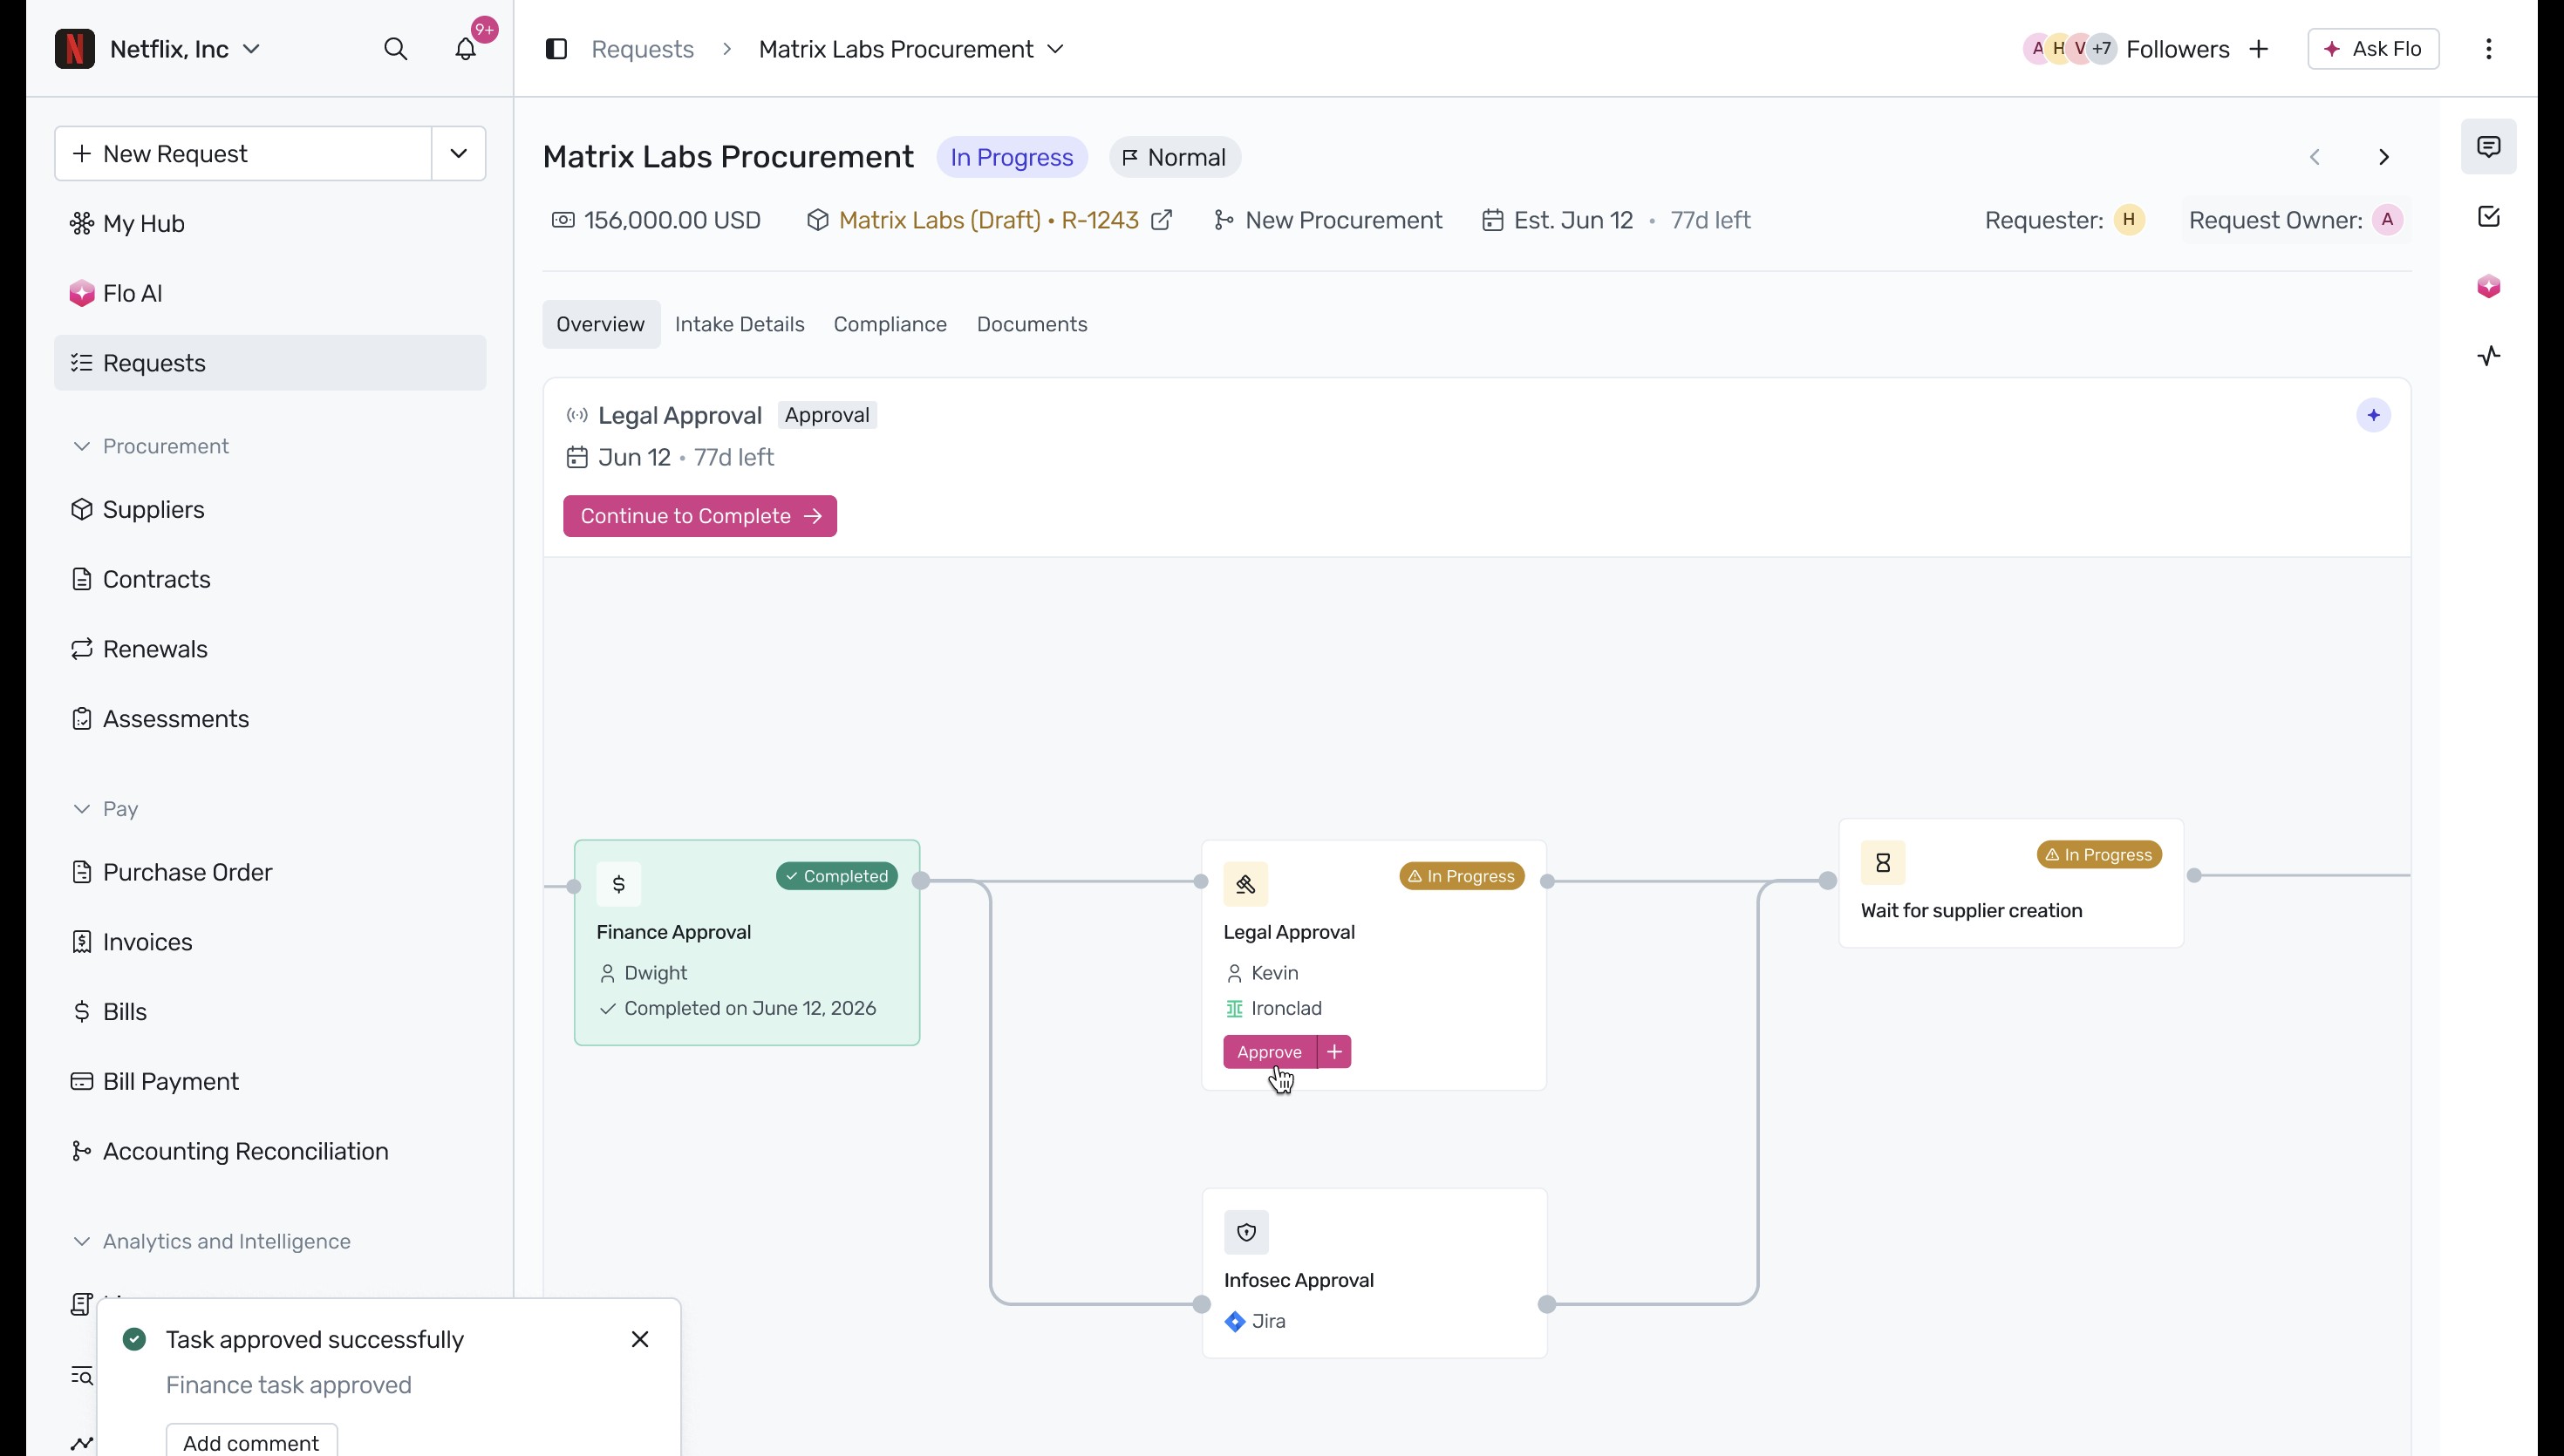
Initiate Parallel Approvals (Legal & Infosec): After Finance Approval is completed, the workflow dynamically splits into parallel paths to expedite the process. In this scenario, the request simultaneously triggers a Legal Approval task (integrated with Ironclad) and an Infosec Approval task (integrated with Jira). To initiate the legal review process, click the Approve button on the Legal Approval card.
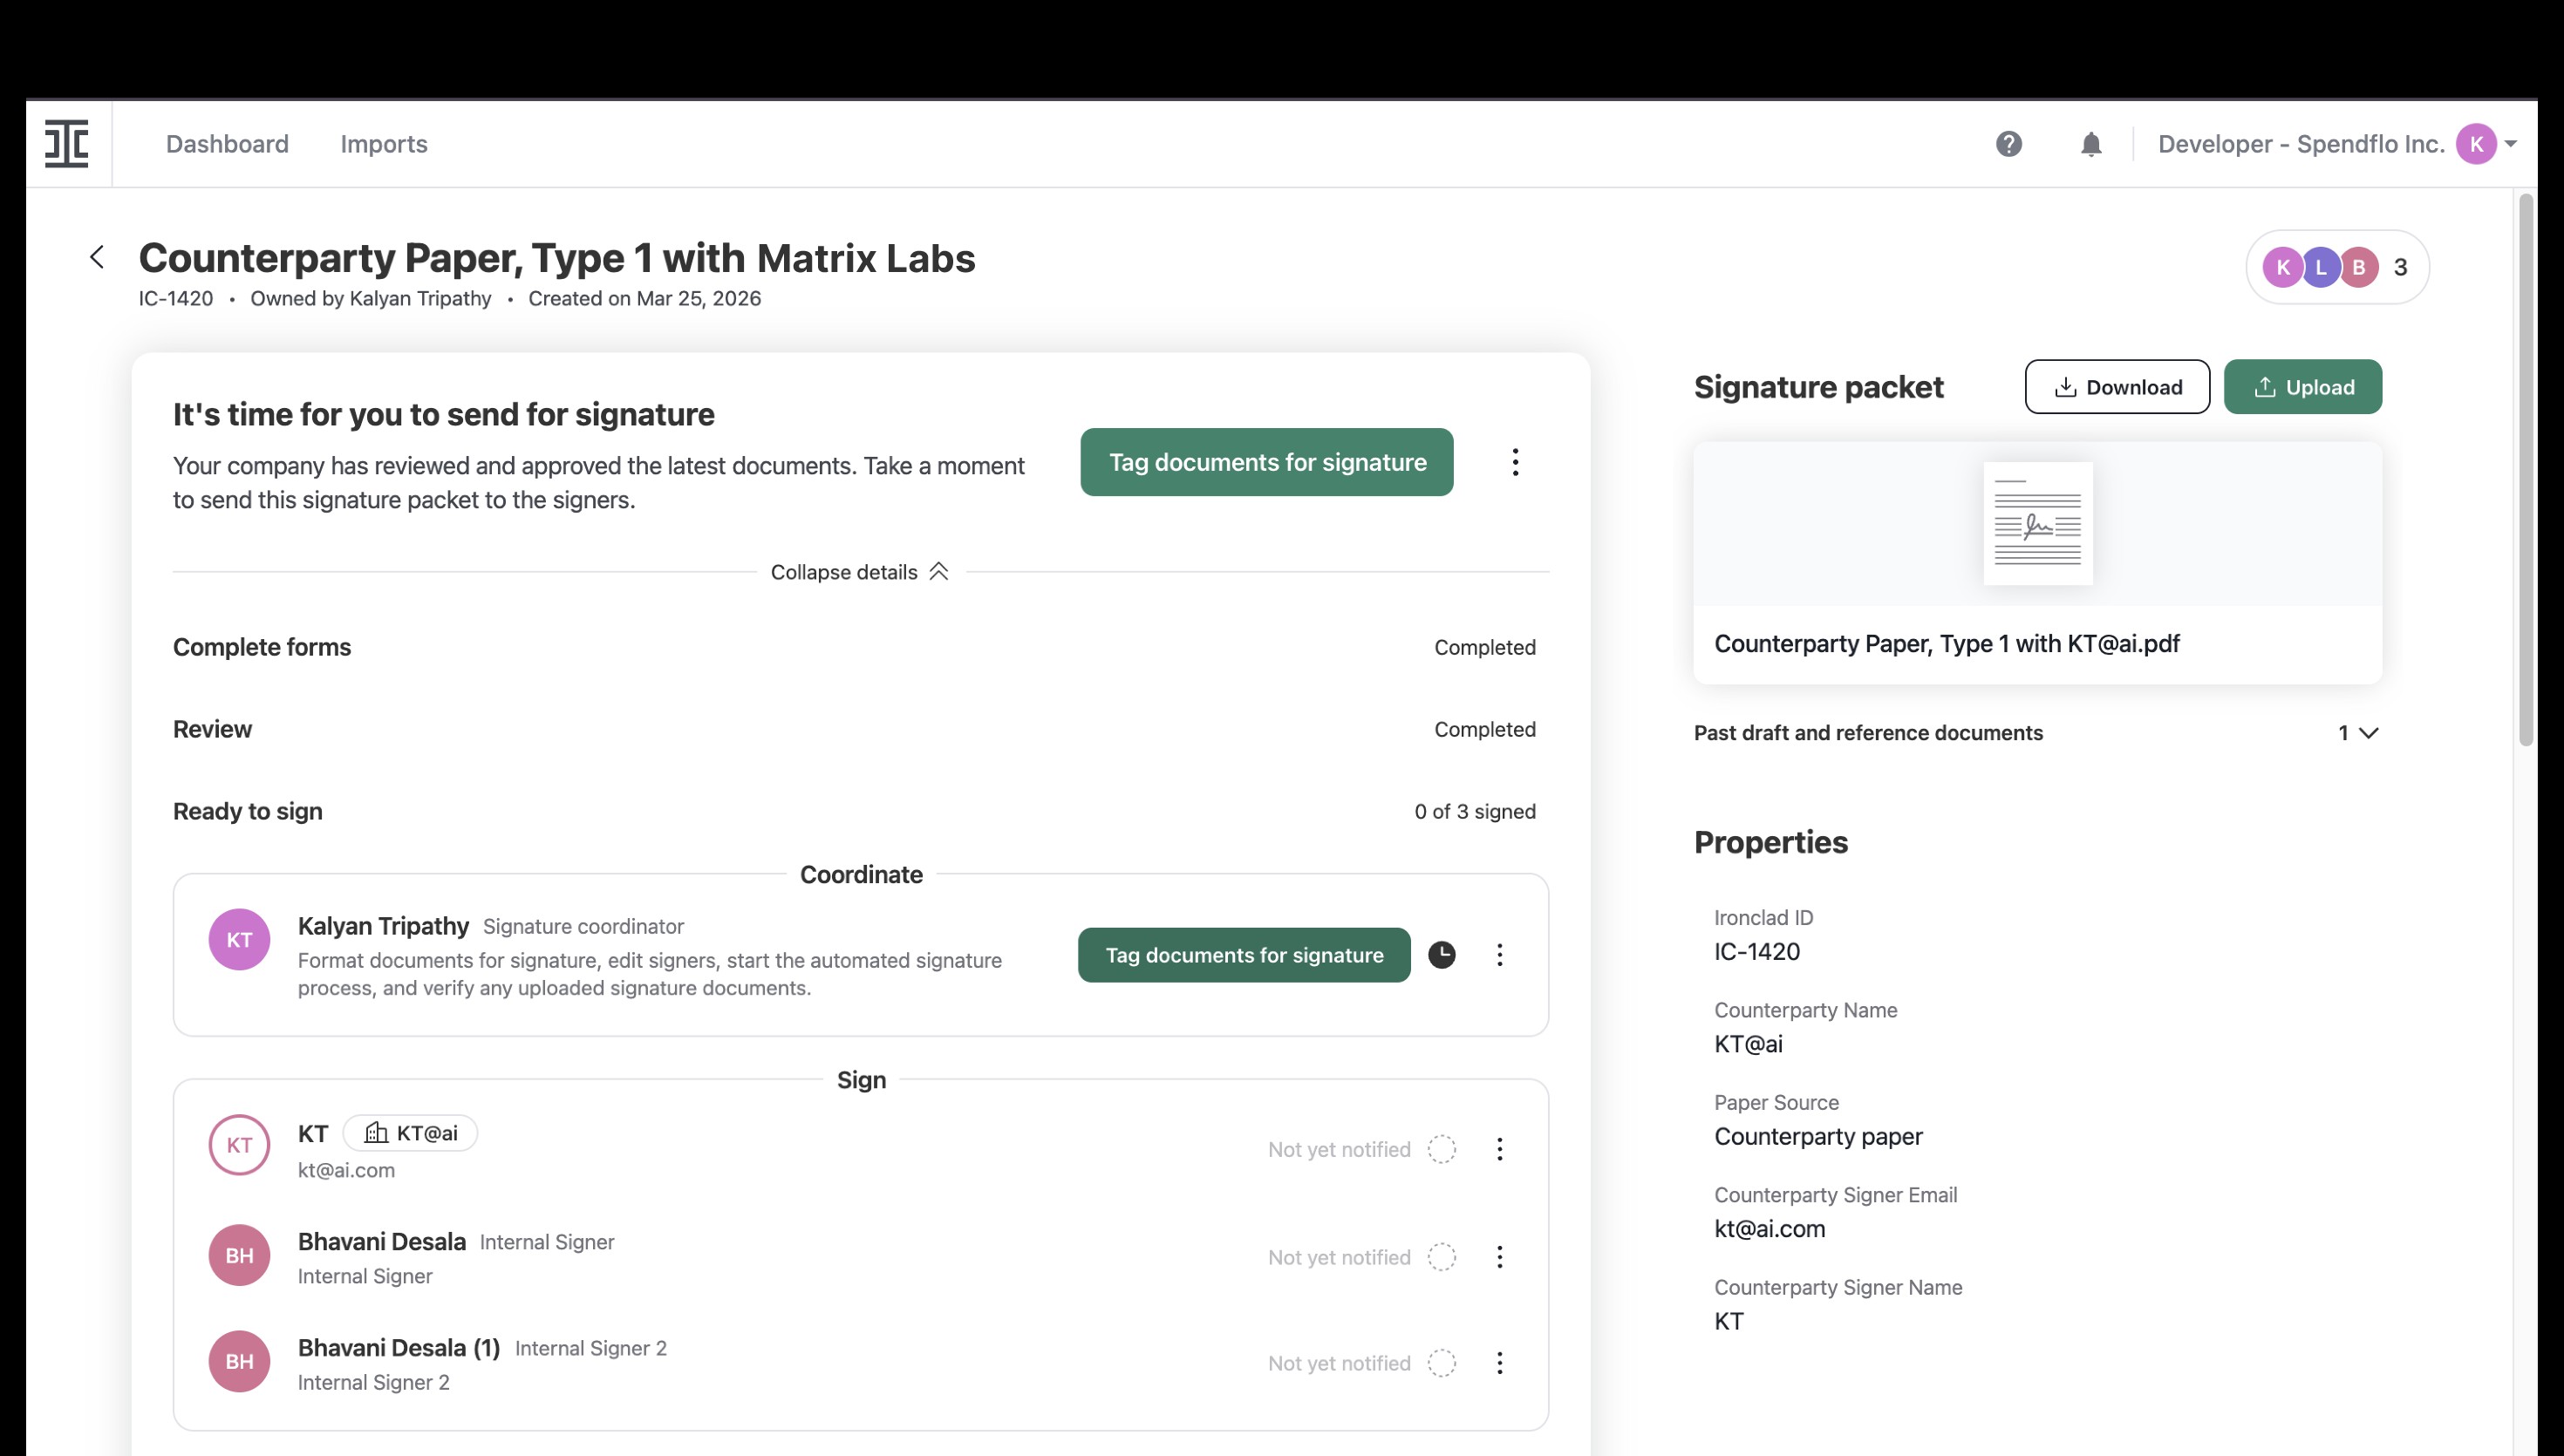
Manage Legal Documents in Ironclad: Because the Legal Approval step is integrated with Ironclad, clicking approve redirects you to the Ironclad platform. Review the counterparty paper, tag documents for signature, and coordinate signers. Prepare the signature packet and send the documents to the designated signers within the Ironclad interface.
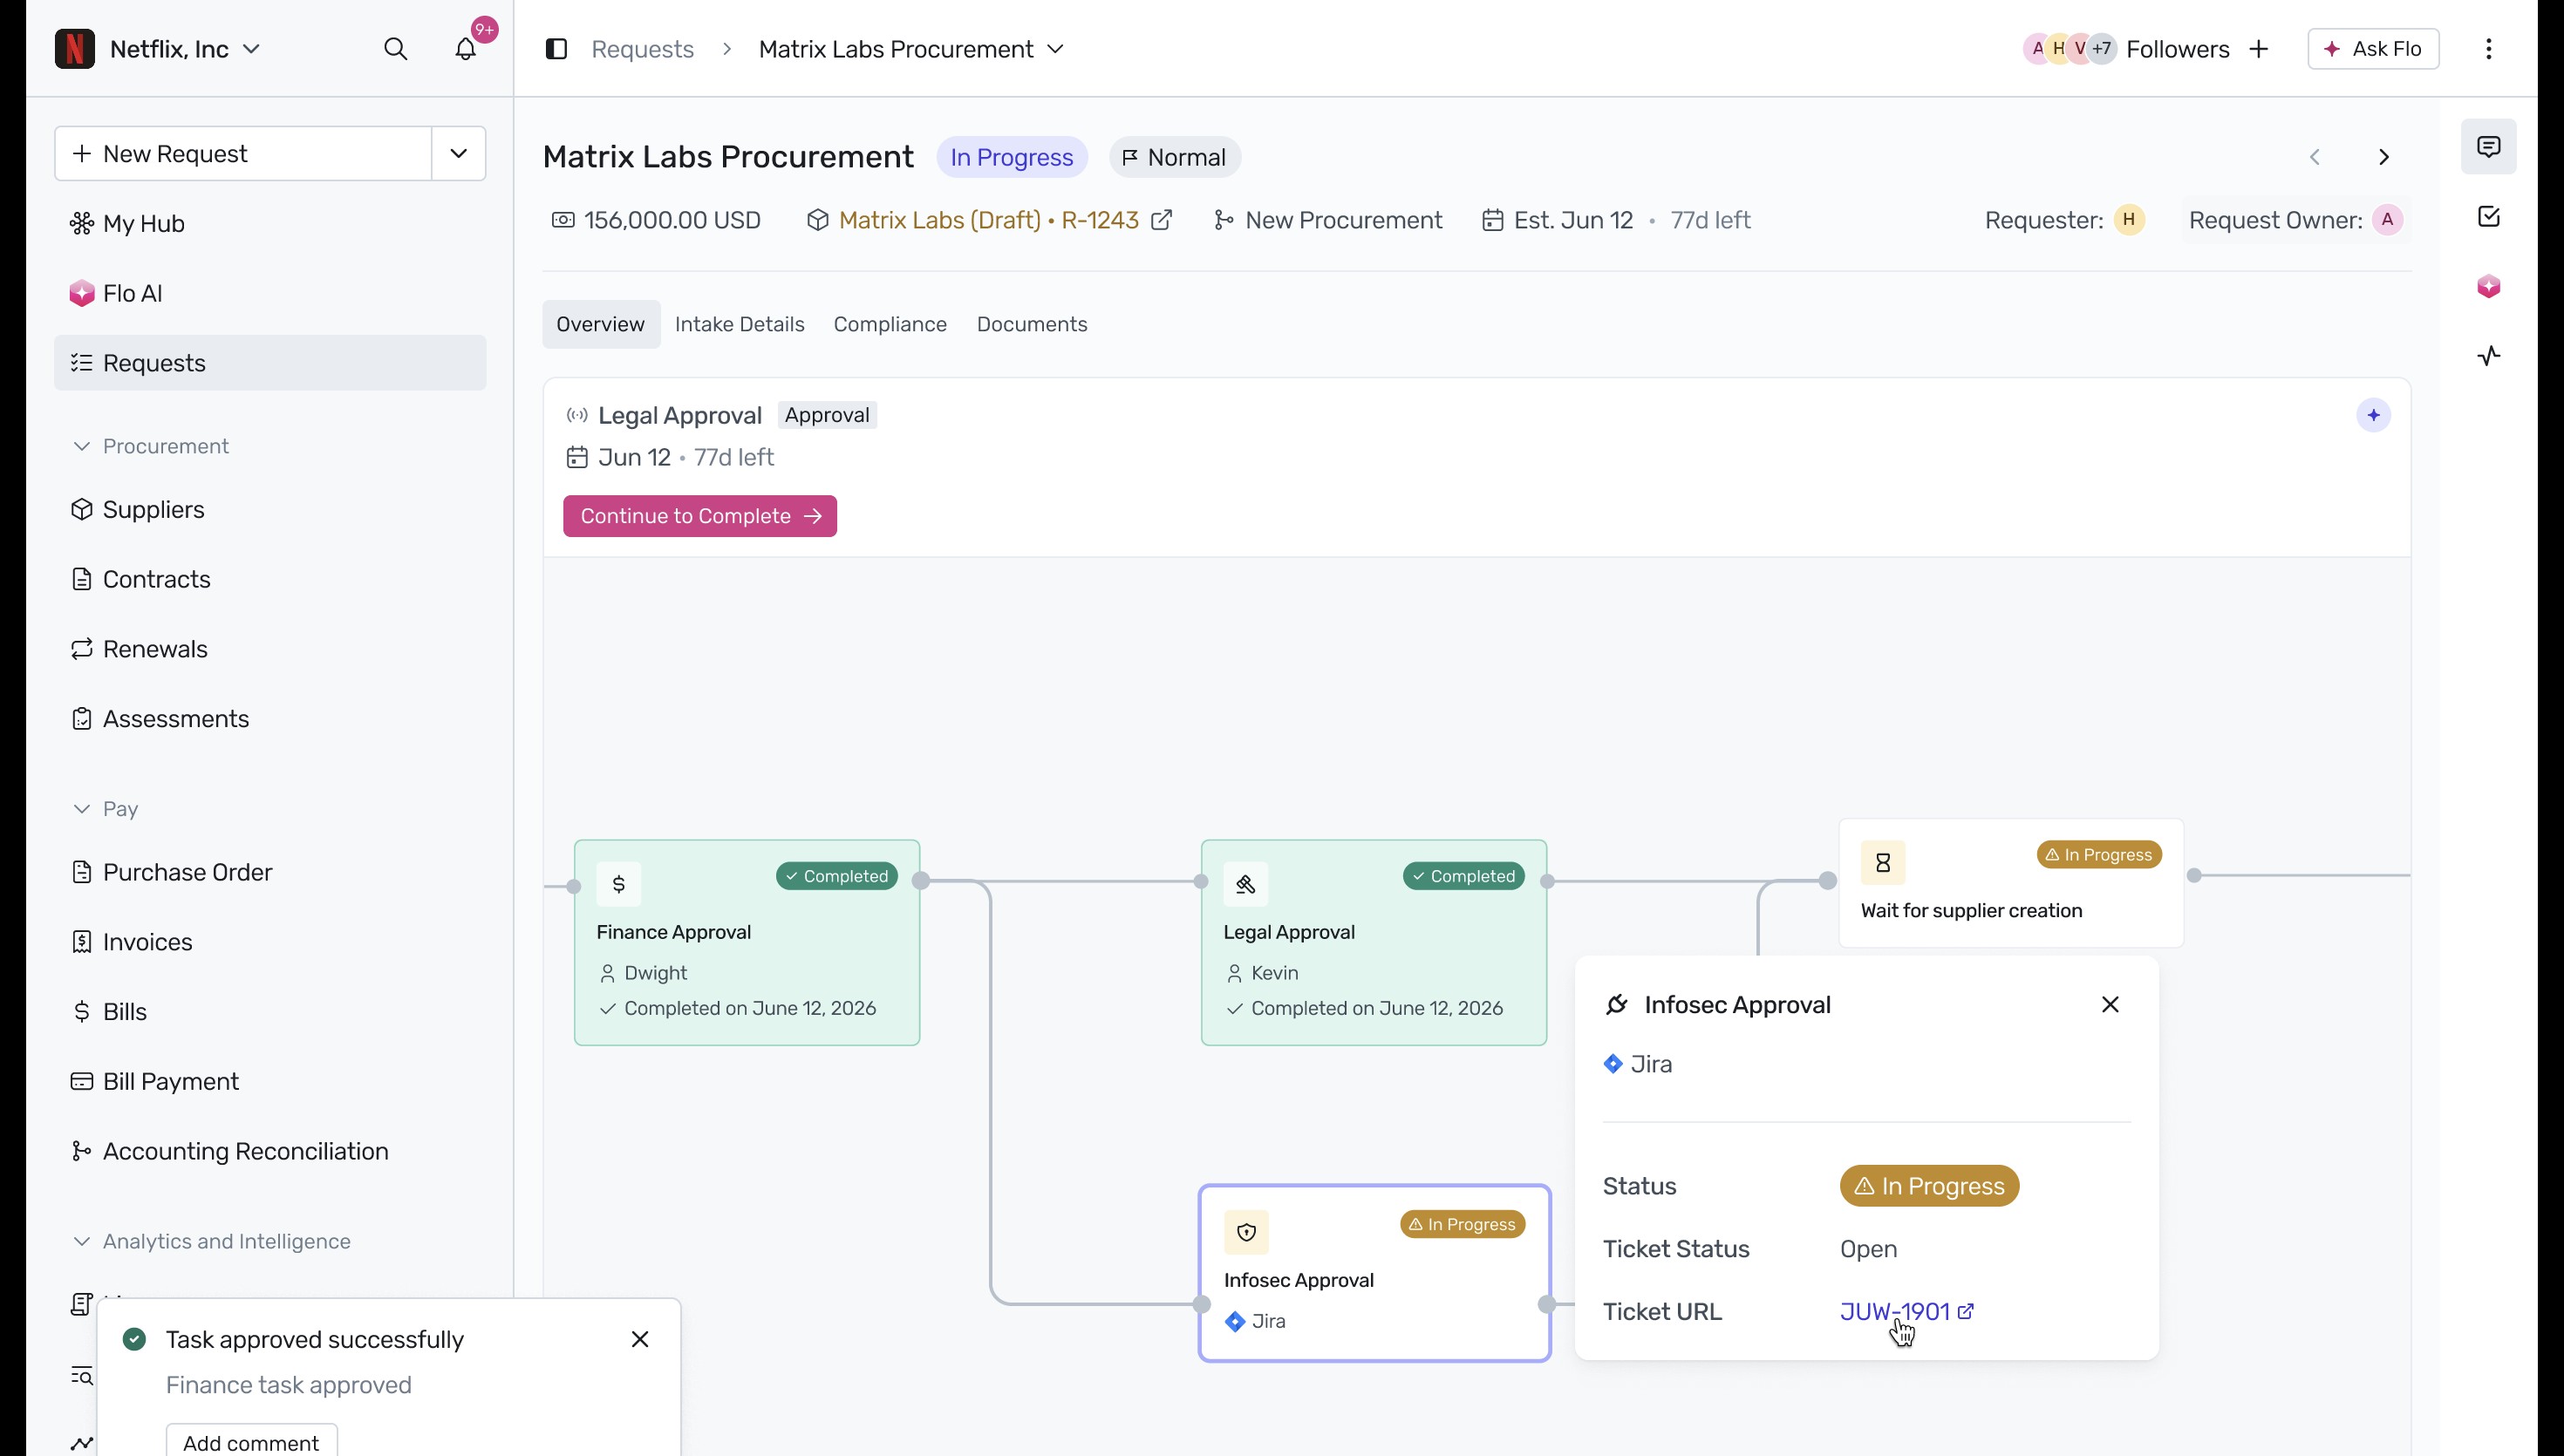
Track Infosec Approval via Jira: While the legal process is underway, you can track the progress of the Infosec review. This task is linked directly to a Jira ticket, allowing for seamless cross-platform tracking using the Jira Service Management Orchestration Integration. Click on the Infosec Approval node to open the details popover, where you can view the live ticket status and click the Jira ticket link.
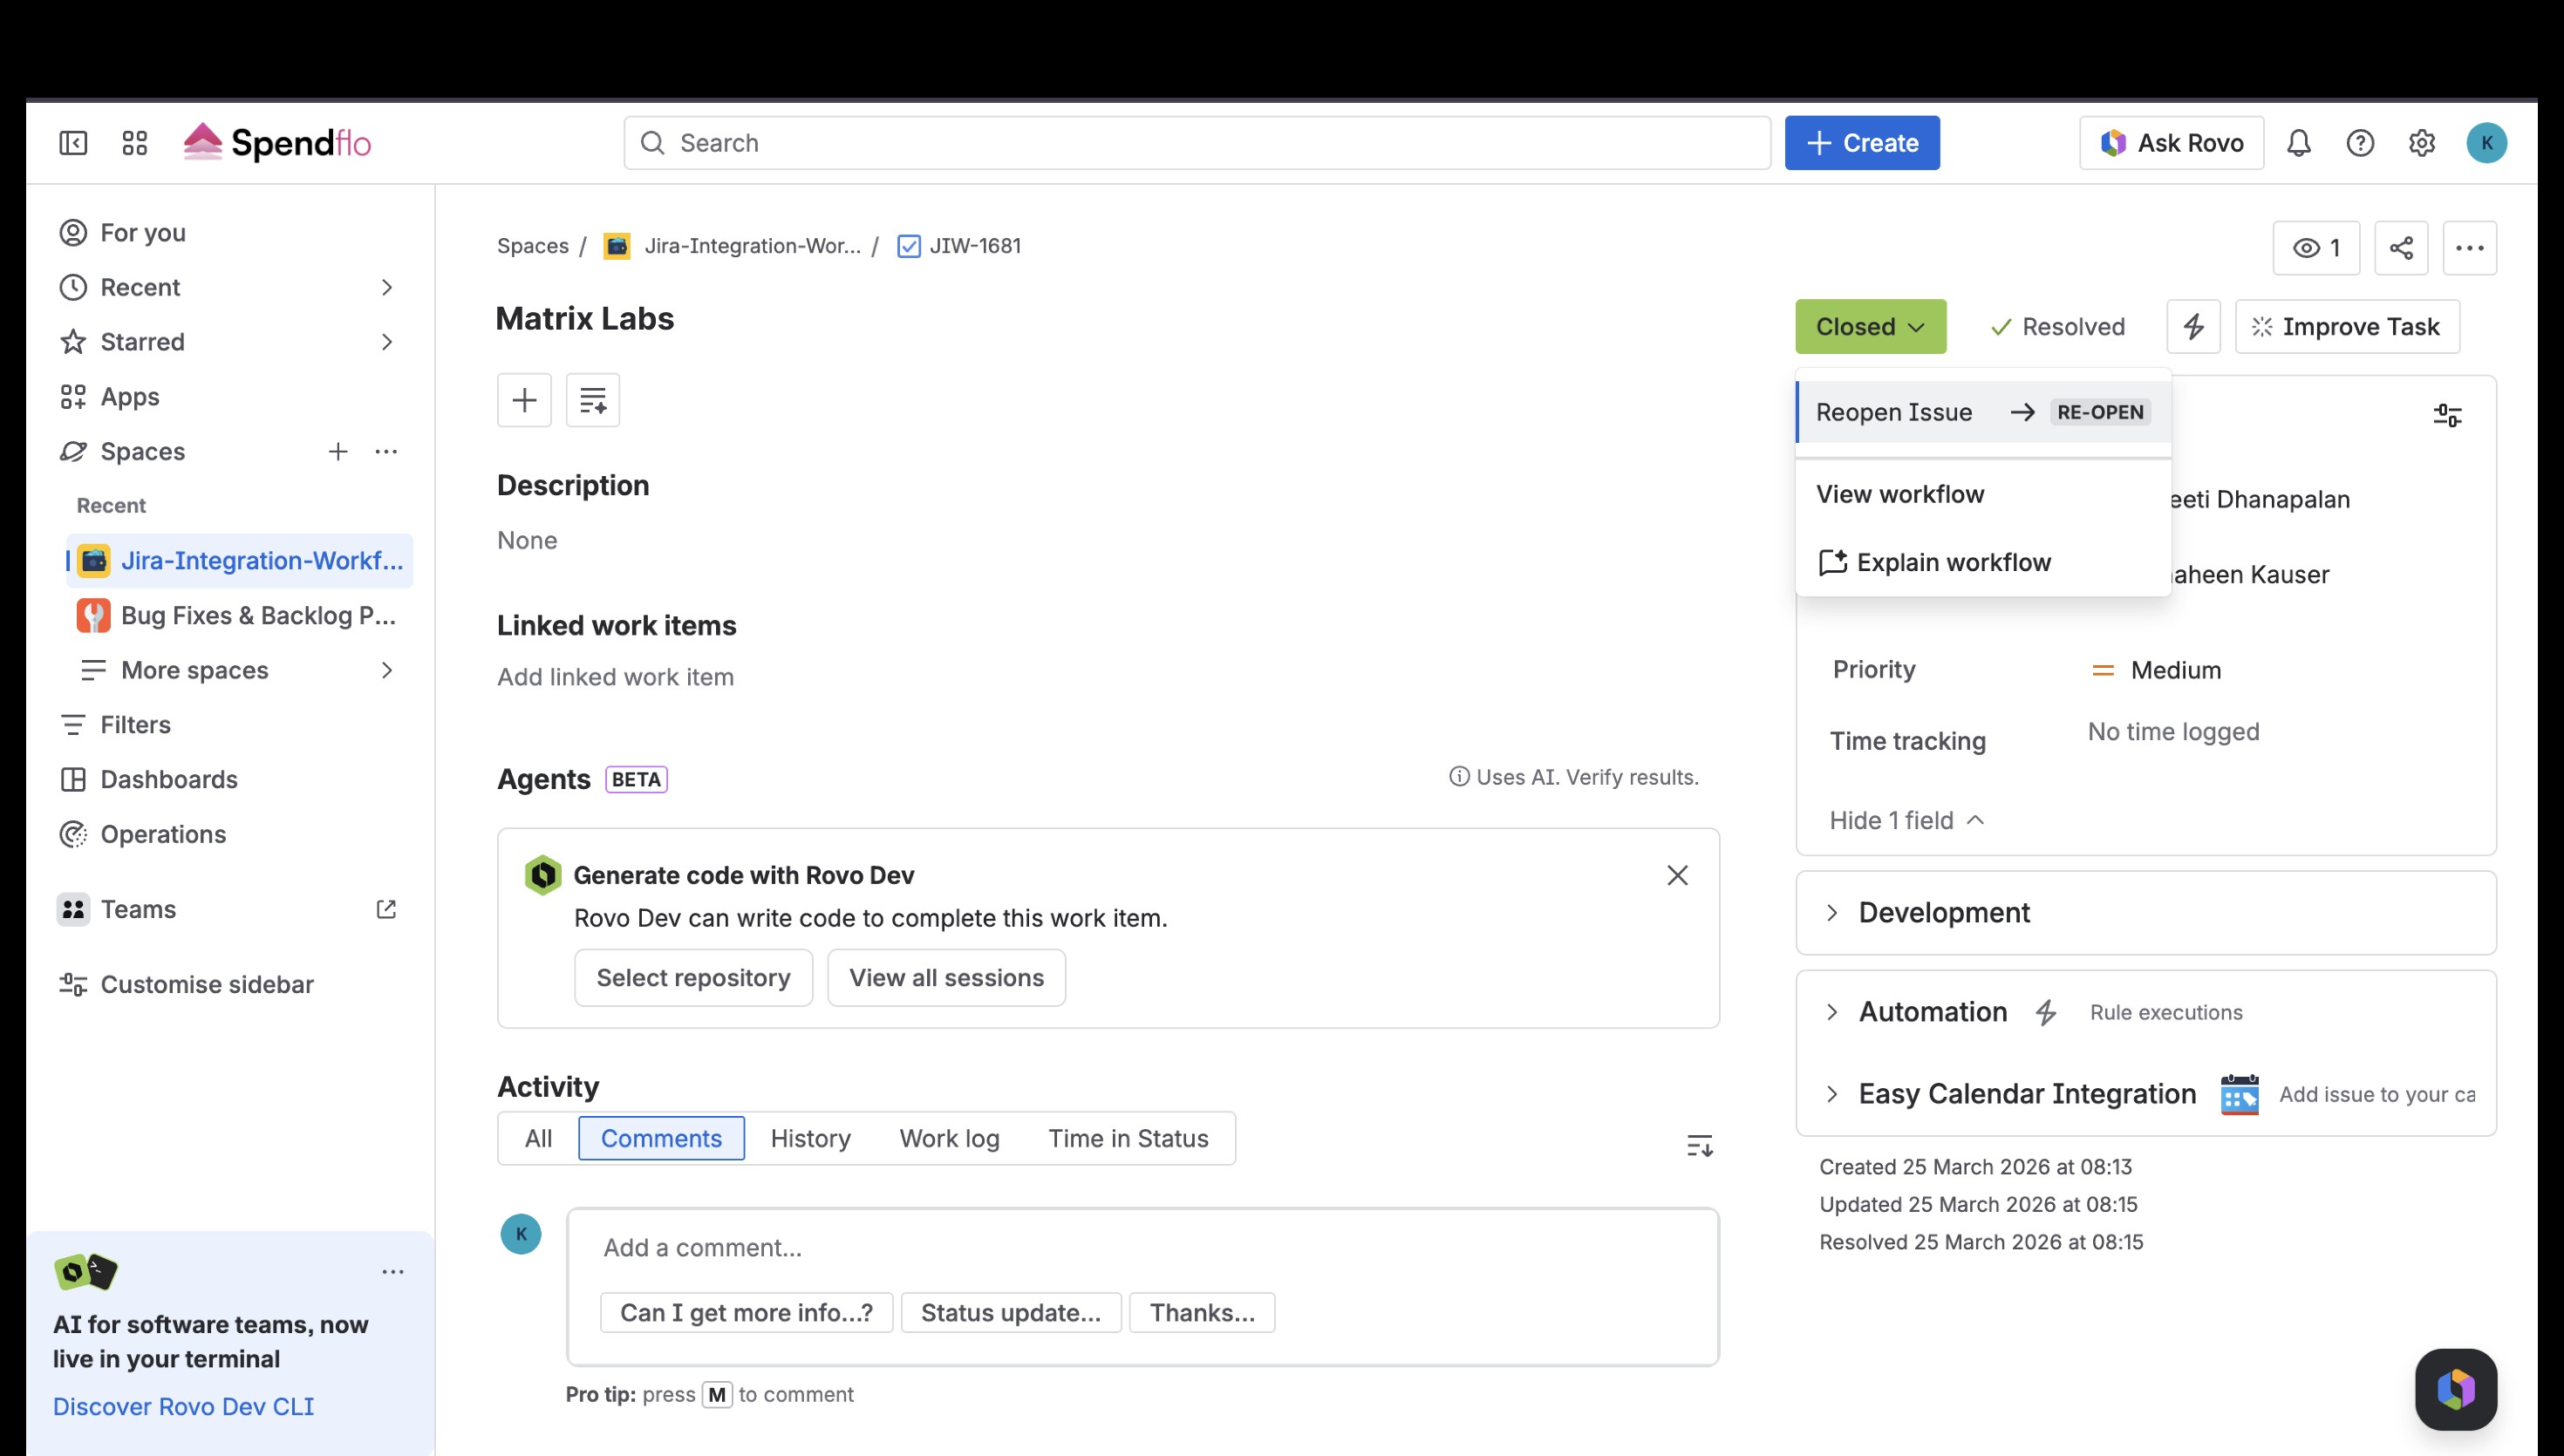
Resolve the Jira Ticket: Clicking the ticket link takes you directly to Jira, where the security team manages and resolves the issue. Once the issue is resolved and marked as closed in Jira, the status automatically syncs back to your procurement workflow. Verify that the Jira ticket is resolved and closed to automatically complete the Infosec Approval step.
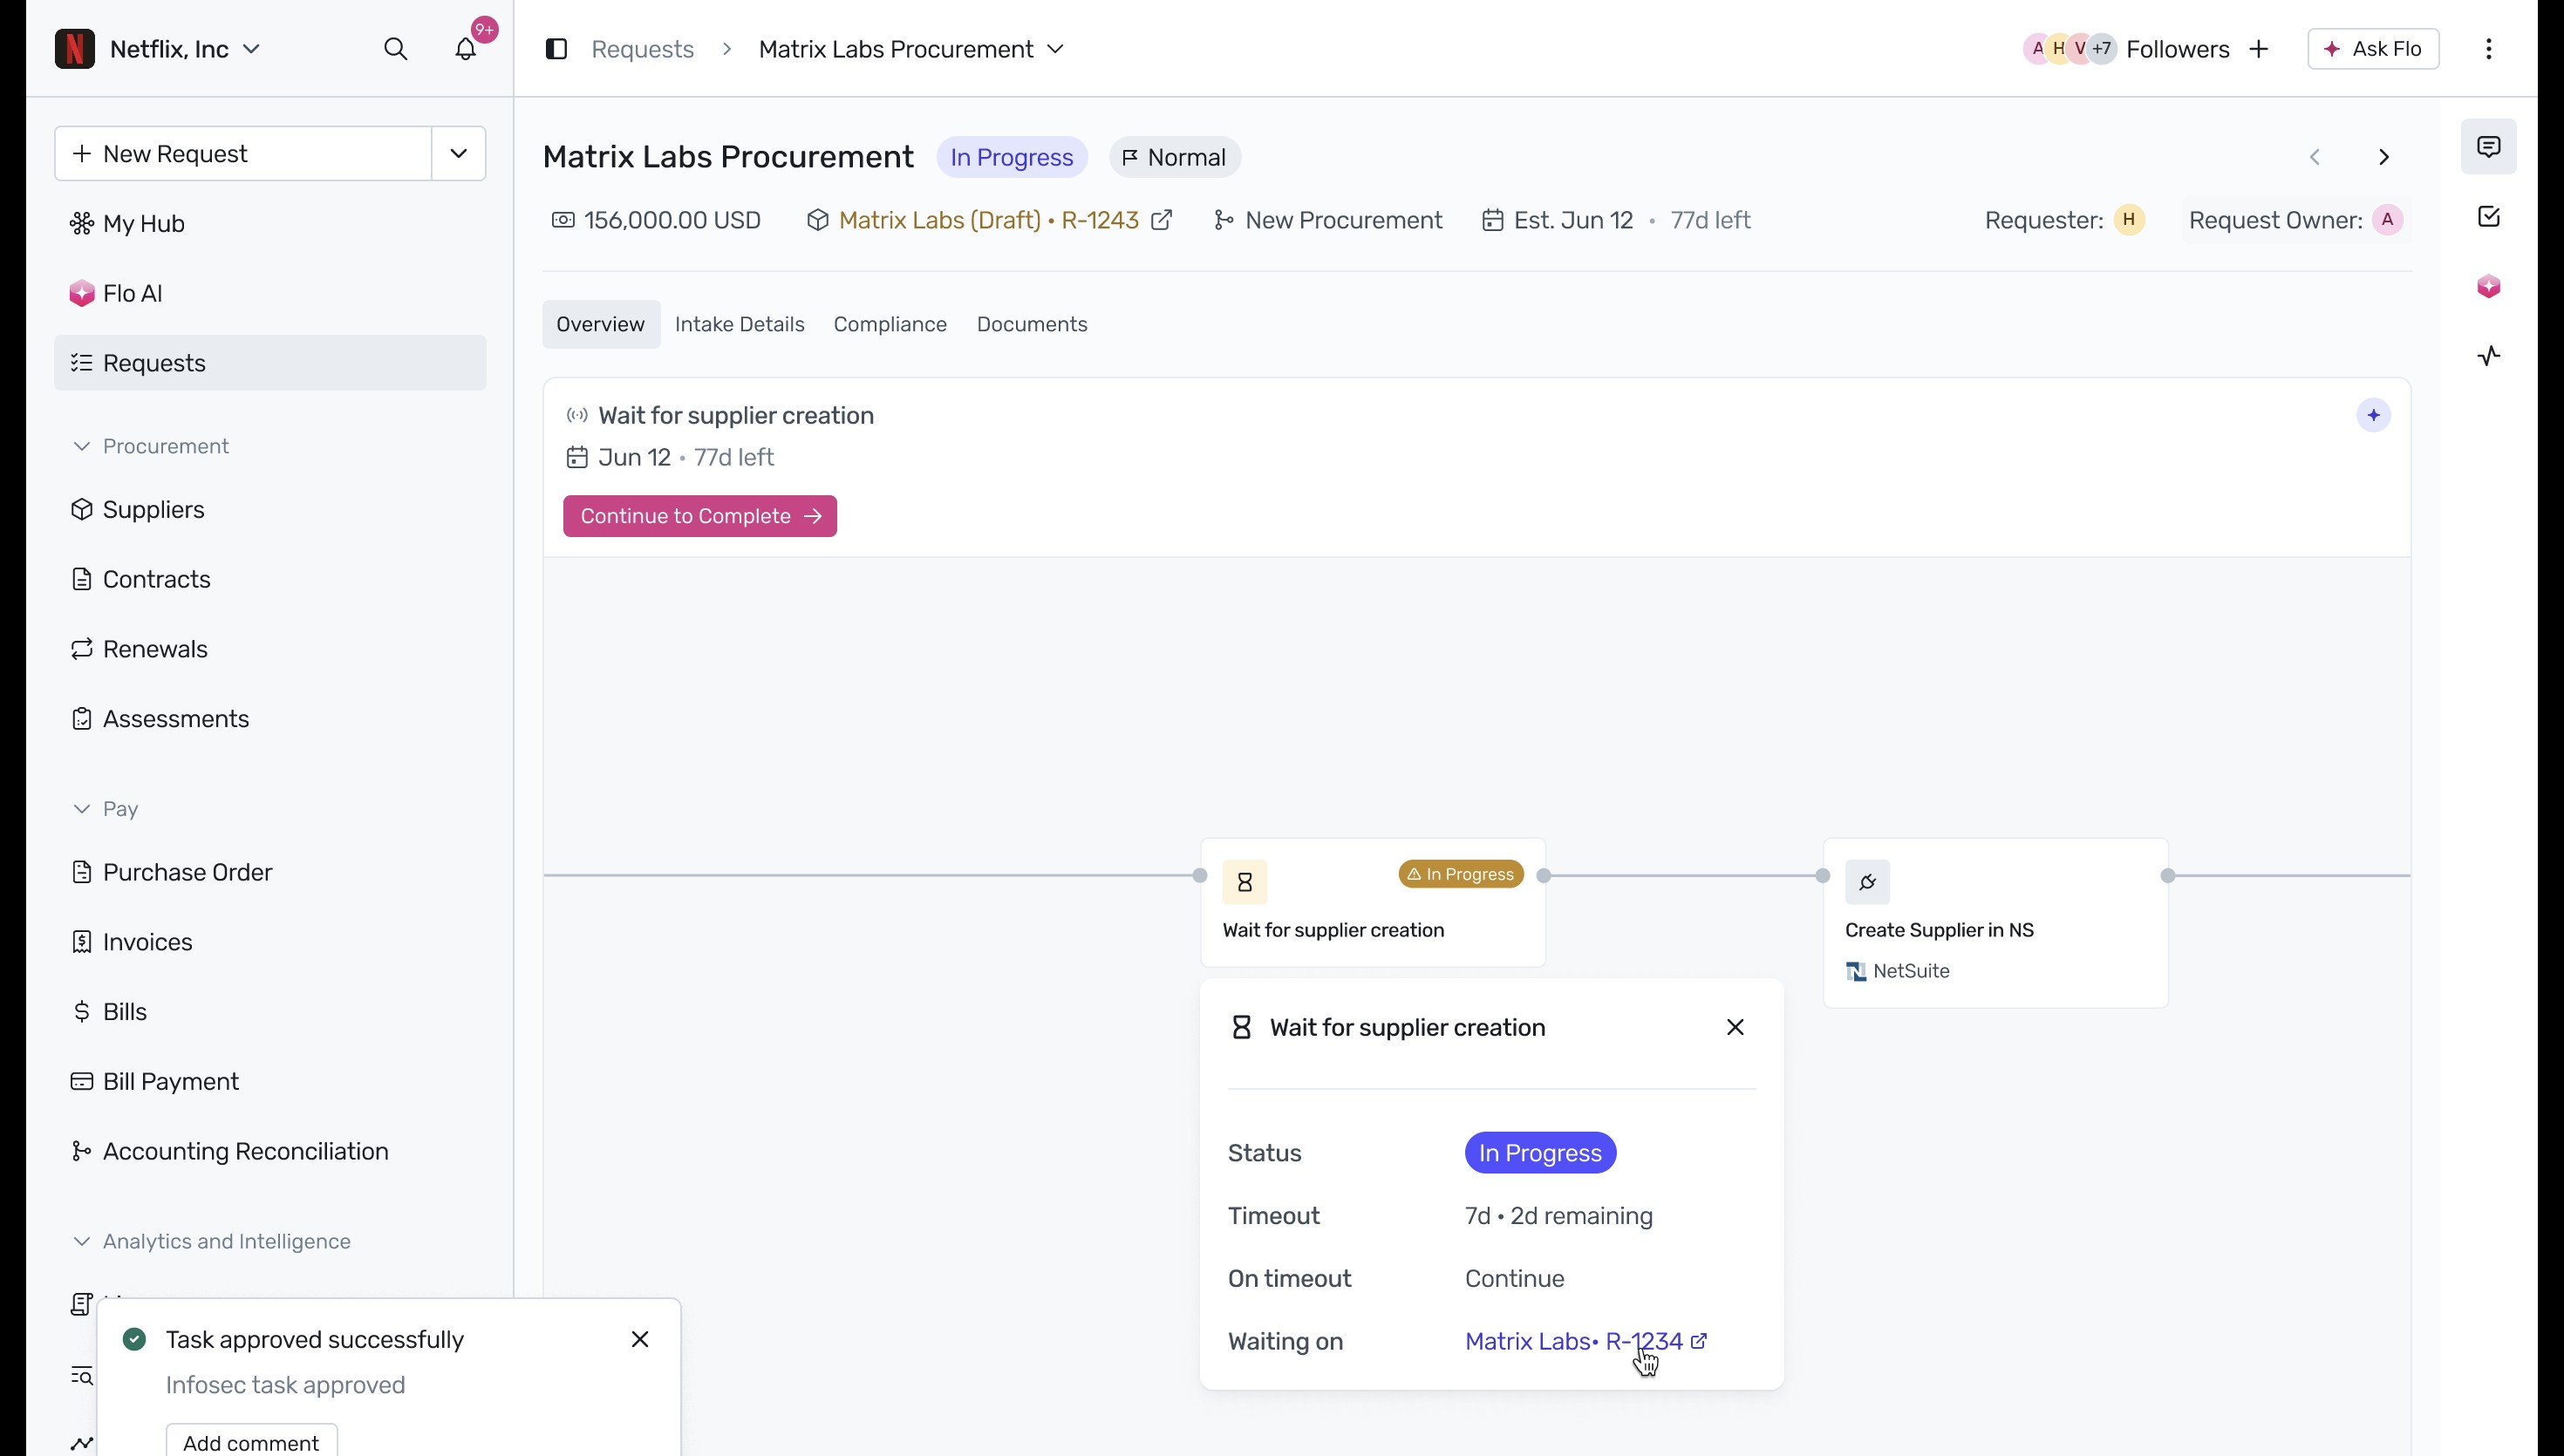
Monitor Supplier Creation Dependencies: With the parallel approvals completed, the workflow moves to the Wait for supplier creation stage. This stage acts as a gate, waiting for the supplier onboarding process to finish before NetSuite supplier creation is triggered. Click on the Wait for supplier creation node and click the linked onboarding request to inspect its status.
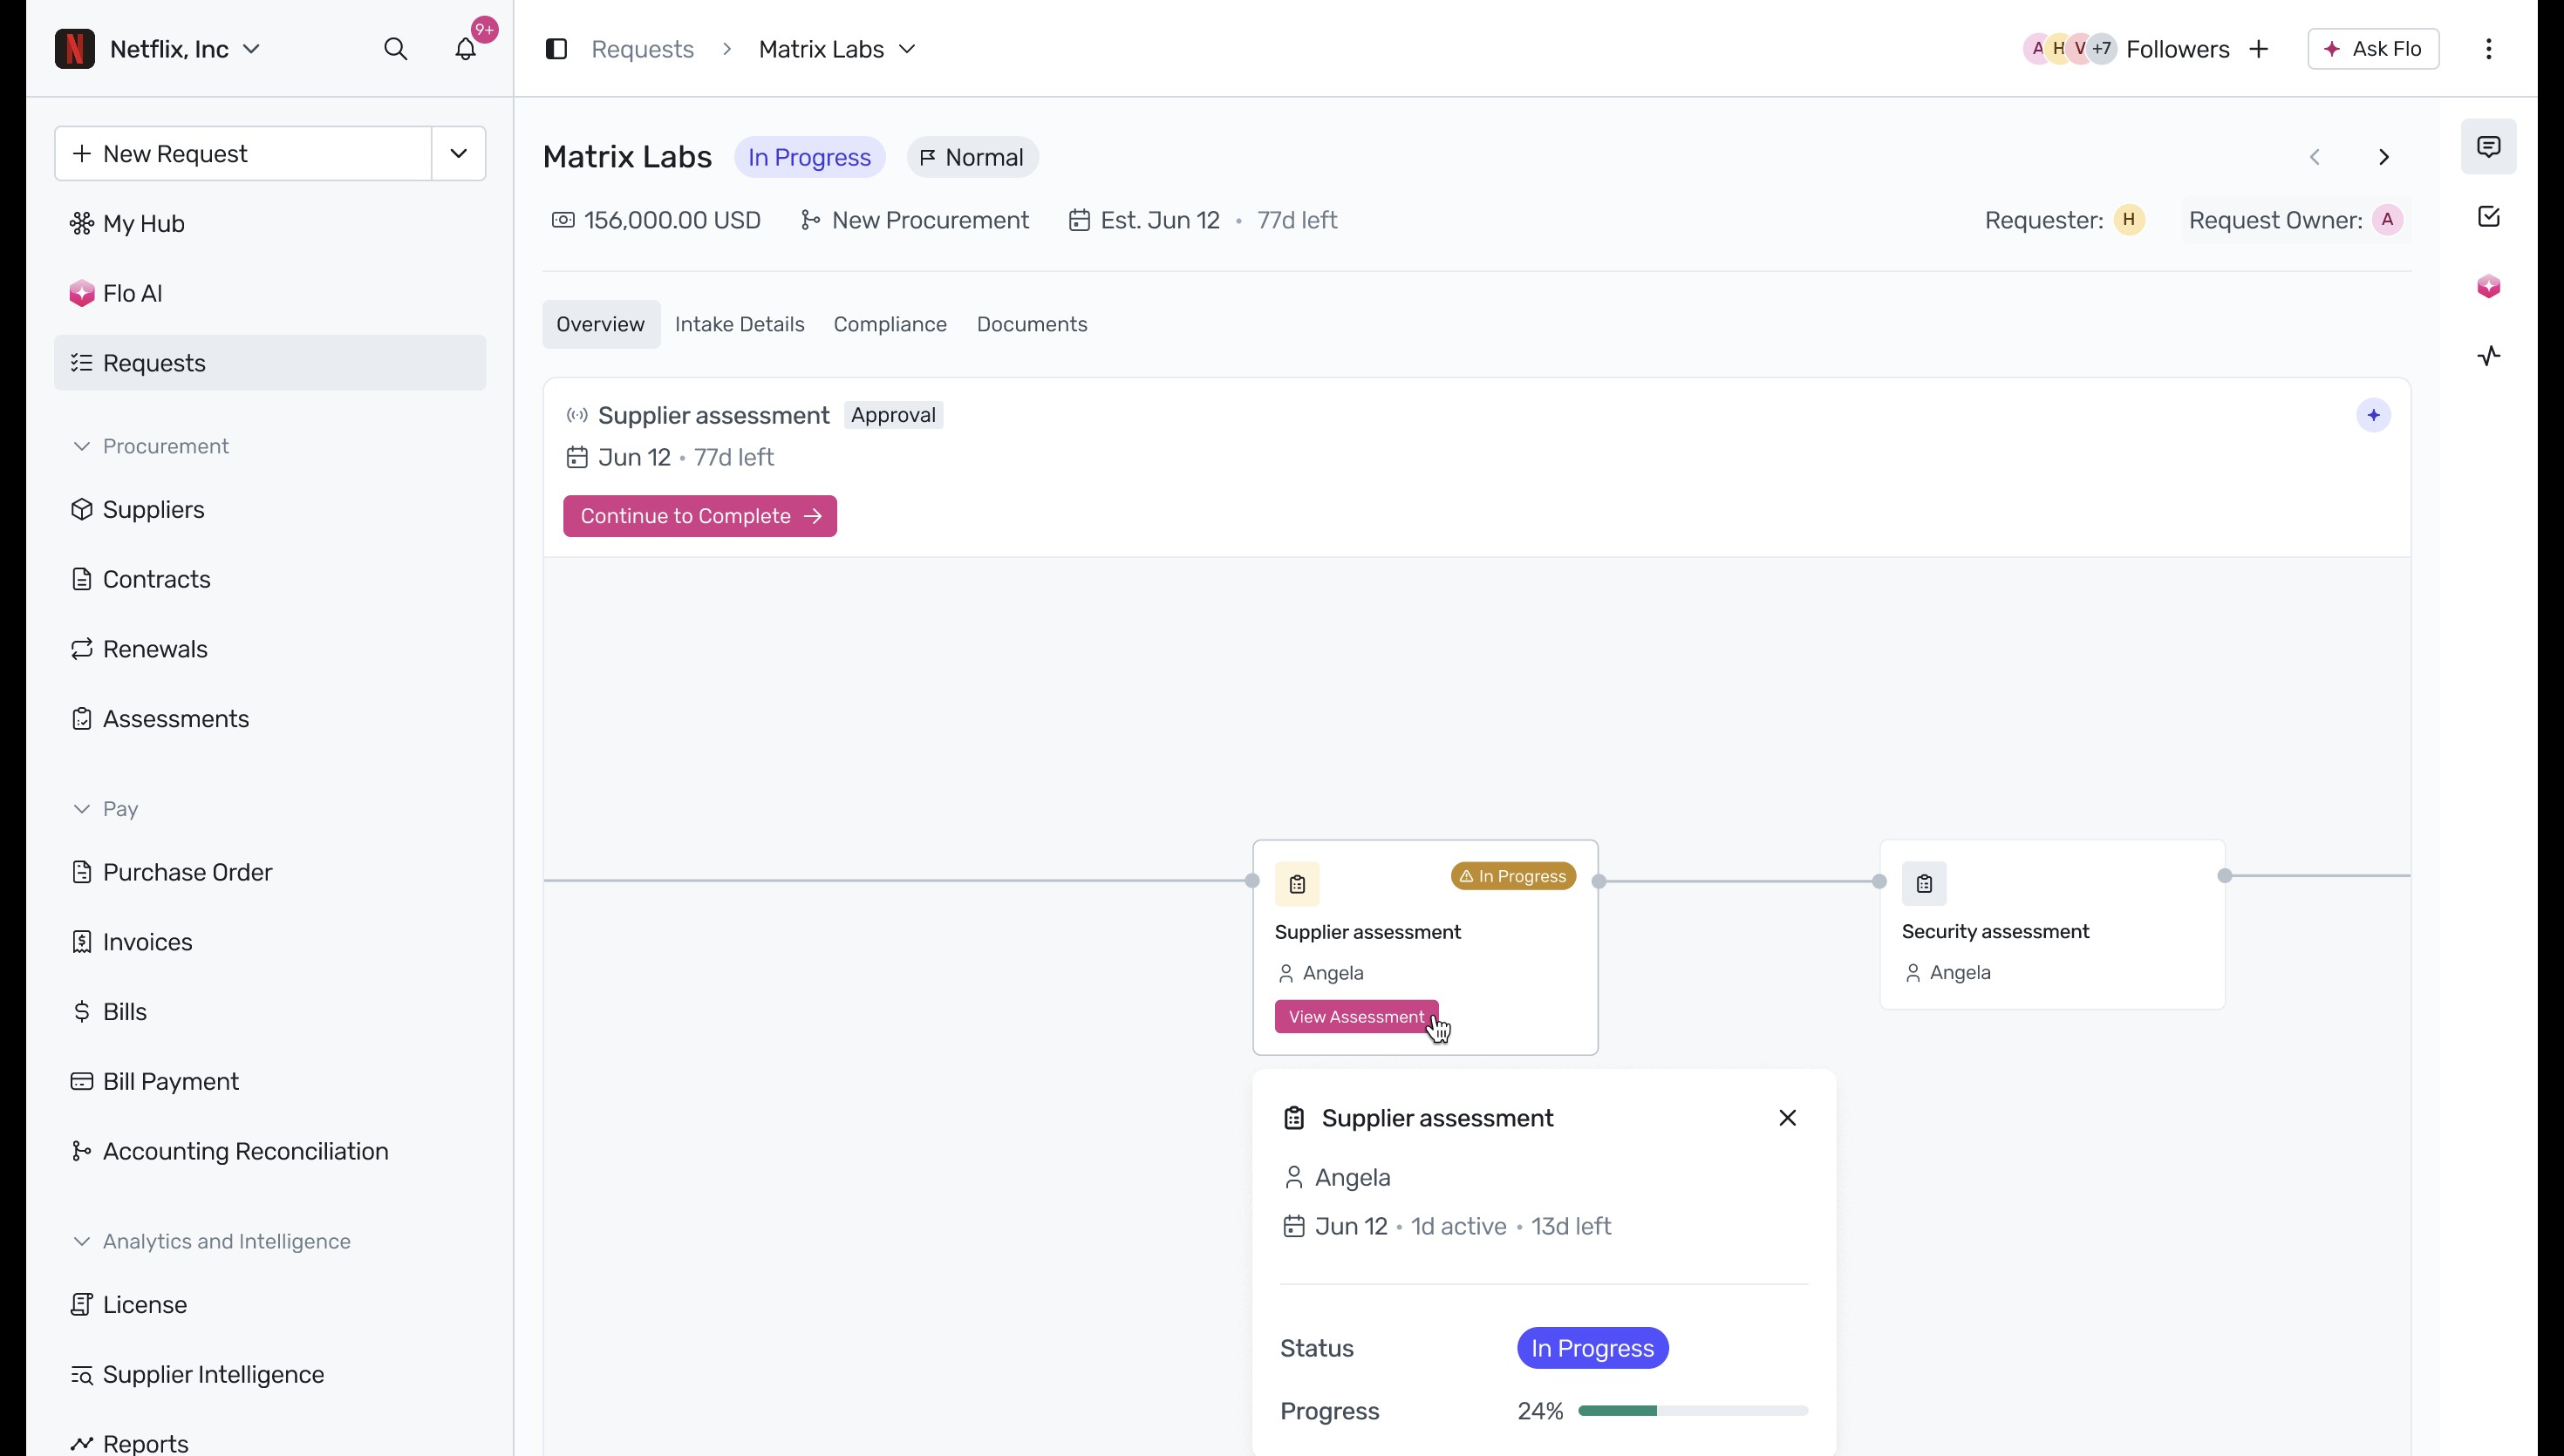
Review Supplier Onboarding Progress: Navigating to the linked request allows you to monitor the active Supplier Assessment and security evaluation workflows. You can learn more about this in our guide on Processing a vendor assessment review. Once these onboarding assessments are fully completed, the main procurement workflow automatically resumes. Review the progress of the active supplier assessments to ensure onboarding is on track.
Next Steps
Now that you understand how approval chains are executed, you can explore more about Spendflo's capabilities. Learn how to configure your own workflows in our About workflows guide, or read about How to add a sequential task and How to add a parallel task to customize your approval paths.
Was this article helpful?
That’s Great!
Thank you for your feedback
Sorry! We couldn't be helpful
Thank you for your feedback
Feedback sent
We appreciate your effort and will try to fix the article