Overview
Spendflo integrates with Ironclad to streamline contract orchestration as part of your procurement workflows. Once connected, you can launch draft contract workflows in Ironclad directly from a task in Spendflo — without switching tools or duplicating data.

Prerequisites
Before setting up the integration, make sure the following is ready:
You must have an Administrator role in Ironclad to generate API credentials.
You must have Admin access in Spendflo to connect integrations.
Your Ironclad instance must have API access enabled.
Part 1: Getting Your Ironclad API Credentials
Spendflo connects to Ironclad using the Client Credentials method. You will need a Client ID and Client Secret from Ironclad before setting up the connection in Spendflo.
Step 1: Access the Ironclad API Settings
Log into your Ironclad account as an Administrator.
Click your profile icon in the top-right corner and go to Company Settings.
Navigate to API (or Integrations → API Access, depending on your Ironclad version).
Under OAuth 2.0 Clients, click Create New Client or use an existing client configured for Spendflo.
Step 2: Configure the OAuth Client
Set the grant type to Authorization Code. Once saved, Ironclad will display your Client ID and Client Secret. Copy and store these securely — you will need them in the next step.
In the Redirect URI field, enter https://api.truto.one/connect/ironclad/callback.
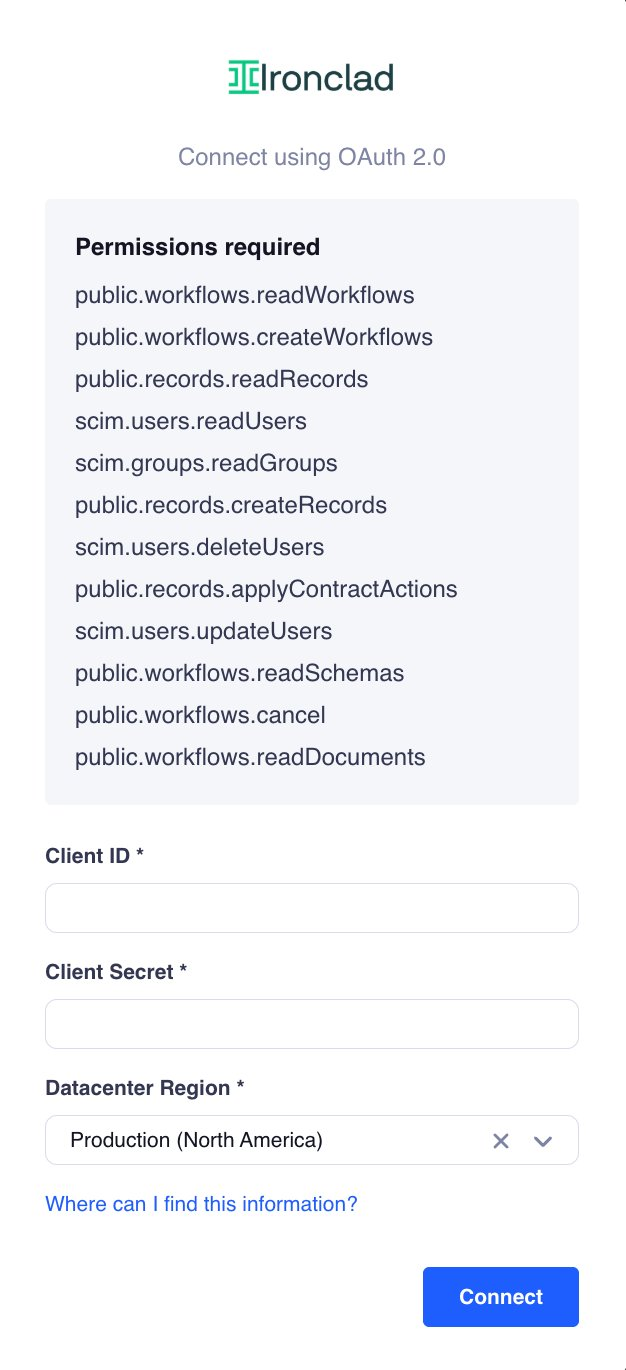
When creating or reviewing your OAuth client, ensure the following permissions are included. These are required for the integration to work correctly:
public.workflows.readWorkflows
public.workflows.createWorkflows
public.records.readRecords
scim.users.readUsers
scim.groups.readGroups
public.records.createRecords
scim.users.deleteUsers
public.records.applyContractActions
scim.users.updateUsers
public.workflows.readSchemas
public.workflows.cancel
public.workflows.readDocuments
Note: The Client Secret is typically only shown once at creation. If you lose it, you will need to regenerate it in Ironclad.
Part 2: Connecting Ironclad in Spendflo
Once your credentials are ready, follow these steps to connect Ironclad from within Spendflo.
In Spendflo, click the Settings icon in the top-right corner and navigate to Integrations in the left menu.
Select the CLM (Contract Lifecycle Management) tab to view available integrations.
Find Ironclad in the list and click Connect.
The Ironclad connector modal will open, showing the permissions that will be granted and the fields you need to fill in:
public.workflows.readWorkflows
public.workflows.createWorkflows
public.records.readRecords
scim.users.readUsers
scim.groups.readGroups
public.records.createRecords
scim.users.deleteUsers
public.records.applyContractActions
scim.users.updateUsers
public.workflows.readSchemas
public.workflows.cancel
public.workflows.readDocuments
Fill in the following fields. You can find these values in your Ironclad account as described in Part 1:
Client ID – The Client ID from your Ironclad OAuth client.
Client Secret – The Client Secret from your Ironclad OAuth client.
Datacenter Region – Select your Ironclad datacenter region (e.g., Production – North America or Production – Europe).
Once all details are filled in, click Save Changes.
Note: If you click on “Publish” instead of “Save Changes” it will be submitted for review adn then you can proceed with the integration only after the review is complete.
After saving, a verification email will be sent to your registered email address. Open the email and click the approval link to grant access.
Once you approve, you will be automatically redirected back to Spendflo. The Ironclad integration will now be active and ready to use.
Part 3: Launching a Contract Workflow from Spendflo
Once Ironclad is connected, you can trigger draft contract workflows directly from any task in Spendflo that has been configured with the Ironclad integration step.
How It Works
When a task with an Ironclad integration step is reached in a Spendflo workflow, the assigned user can initiate a contract workflow in Ironclad without leaving Spendflo. The relevant procurement data from the request is passed through automatically, eliminating the need to re-enter information in Ironclad.
Steps to Launch a Contract
Open the relevant request in Spendflo and navigate to the task with the Ironclad integration step.
Click the Ironclad action button within the task to initiate the contract workflow.
Select the Ironclad workflow template you want to use. The available templates are pulled directly from your Ironclad account.
Review and fill in any required contract fields. Fields already available in the Spendflo request may be pre-populated.
Submit to create the draft contract workflow in Ironclad. The contract will be available in your Ironclad account as a draft for further review and signature.
Known Limitations
Conditional questions in Ironclad are not supported. If an Ironclad workflow template uses conditional logic, those questions will appear as standard questions without the conditions applied when accessed through Spendflo.


Was this article helpful?
That’s Great!
Thank you for your feedback
Sorry! We couldn't be helpful
Thank you for your feedback
Feedback sent
We appreciate your effort and will try to fix the article