Overview
Spendflo streamlines the procurement process by allowing users to raise requests efficiently and enabling approvers to review them across multiple platforms, including the Spendflo app, Slack, and Email. This guide outlines the steps to create a request and manage the approval workflow.
Creating a New Request
Follow these steps to initiate a new procurement request:
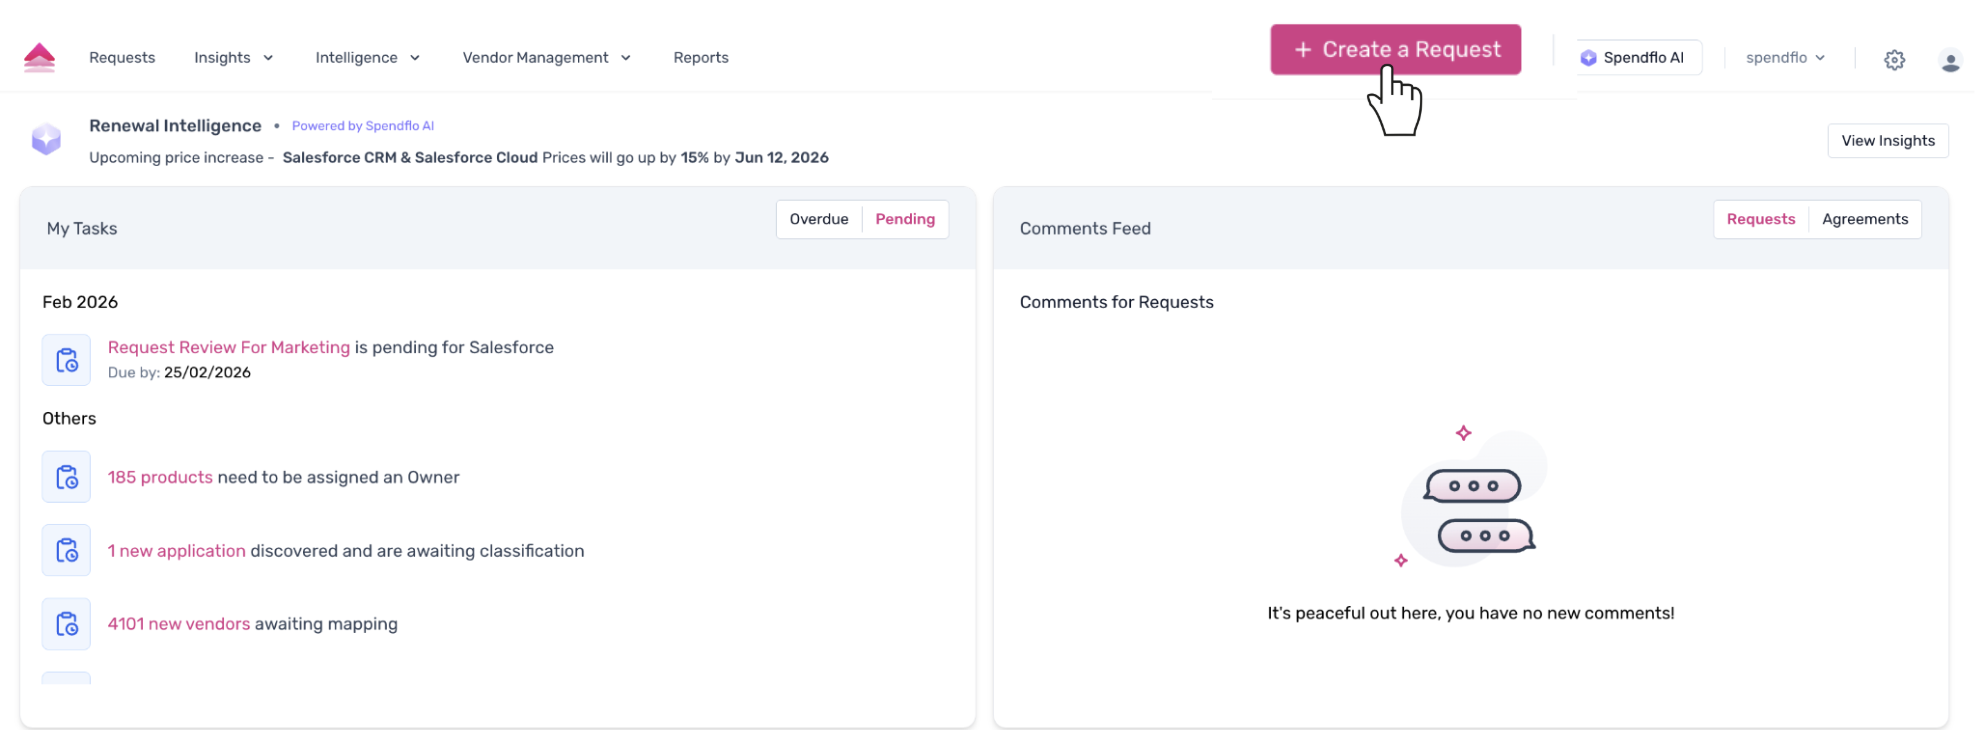
1. From the main Spendflo dashboard, click the + Create a Request button located in the upper right corner of the screen.
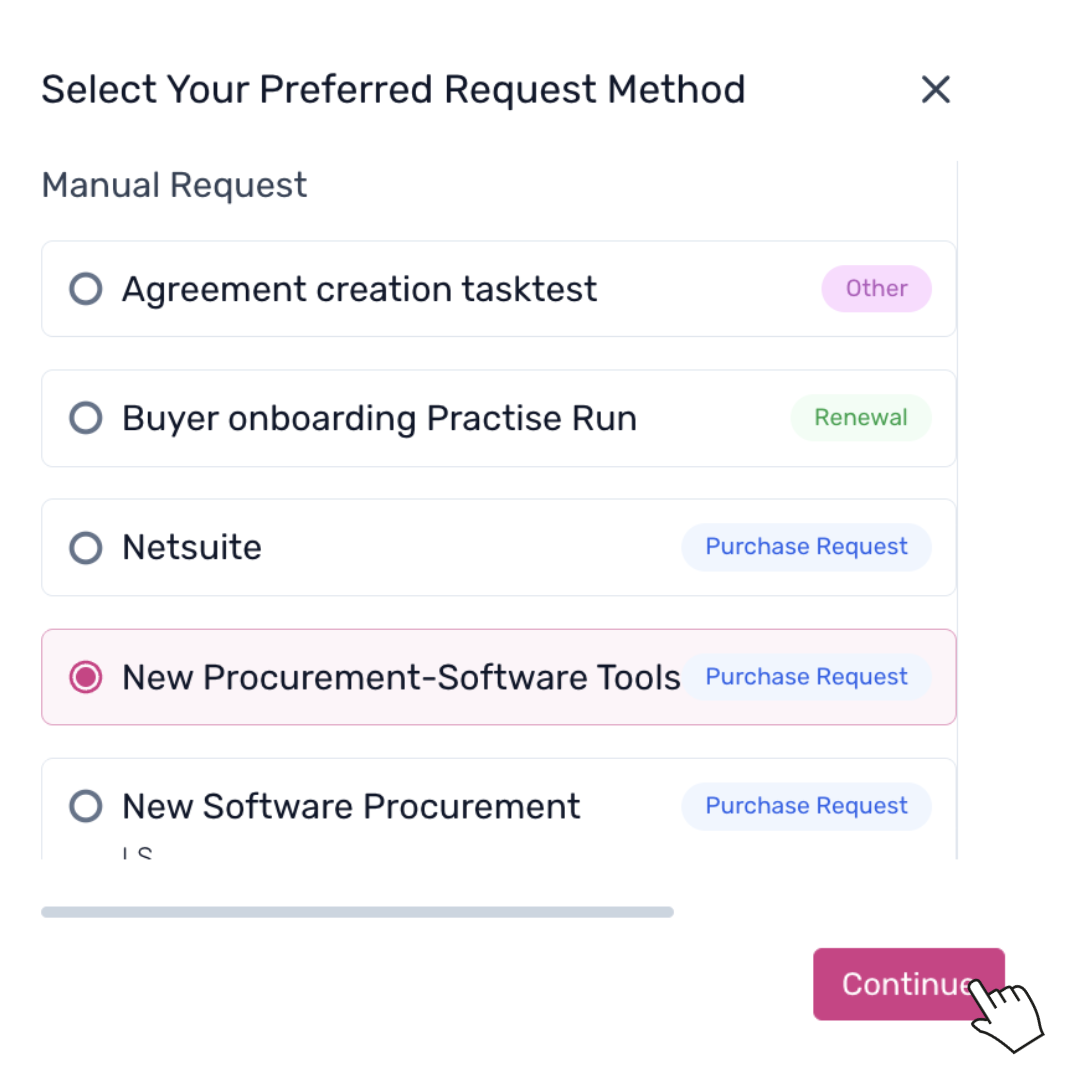
2. A pop-up window will appear displaying different request types. Select New Procurement-Software Tools and click Continue.
3. Complete the intake form by first selecting the department requiring the software (e.g., "Marketing") and clicking Continue.
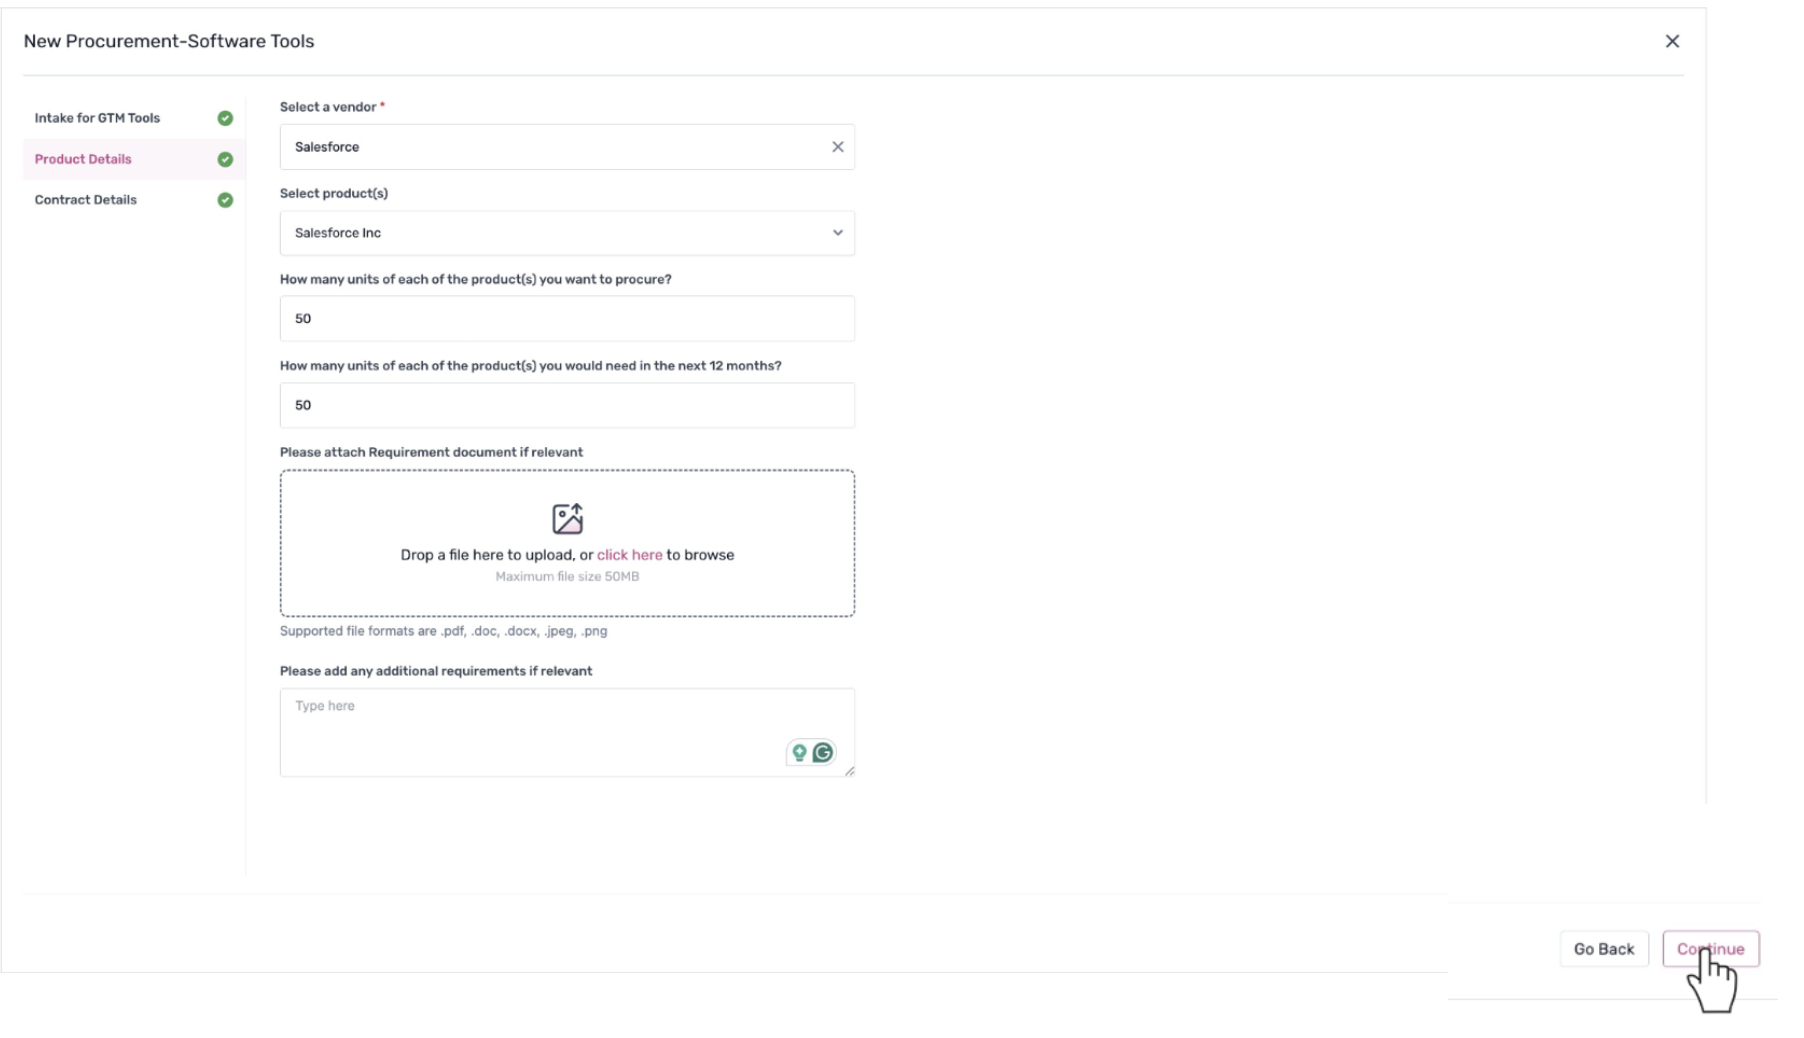
4. On the Product Details screen, provide the necessary vendor and product information:
- Select the Vendor (e.g., "Salesforce").
- Select the Product.
- Enter the quantity to procure now and the estimated quantity for the next 12 months.
- Add any additional requirements or documents if needed.
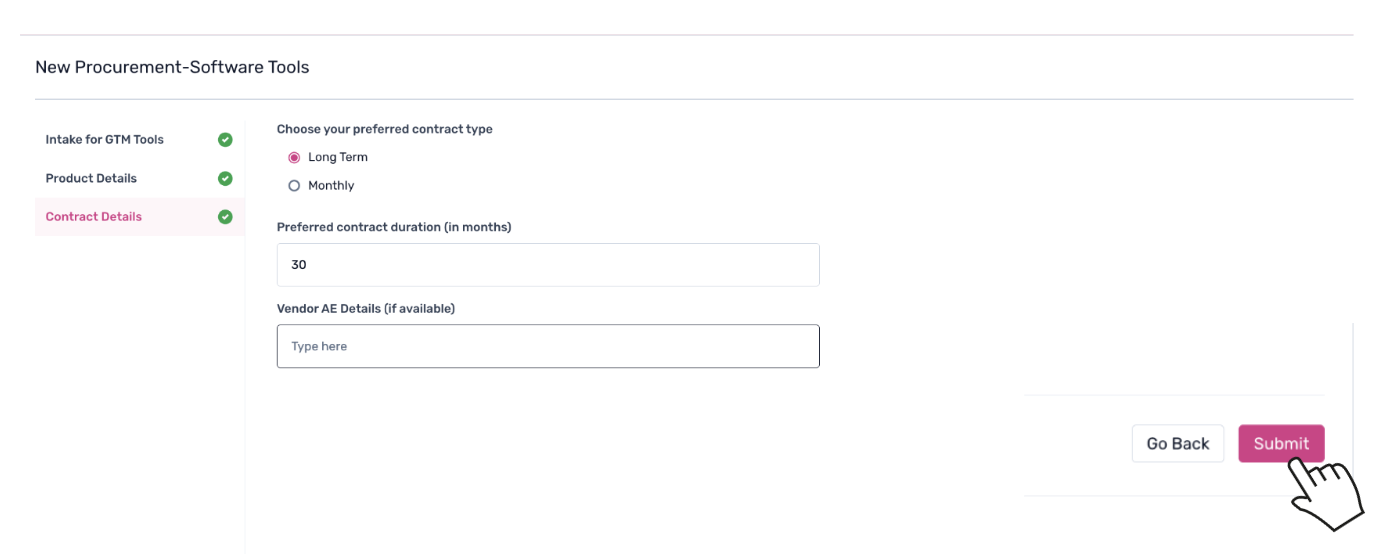
5. Proceed to the Contract Details section. Select your preferred contract type and enter the contract duration in months.
6. Click Submit to create the request.
Initiating the Approval Workflow
Once the request is created, you will be redirected to the request details page where you can manage the workflow.
- To assign a task owner, click the edit icon next to the task, search for the user's name, select them, and click Save.
You can review all submitted information by clicking on the Intake Details tab.

- To move the request to the approval stage, click the Start 'Request Review For Marketing' button. This initiates the approval workflow and notifies the assigned approvers.
Approving Requests via Slack and Email
Spendflo offers cross-platform approval capabilities, ensuring stakeholders can act on requests quickly without needing to log in to the platform every time.
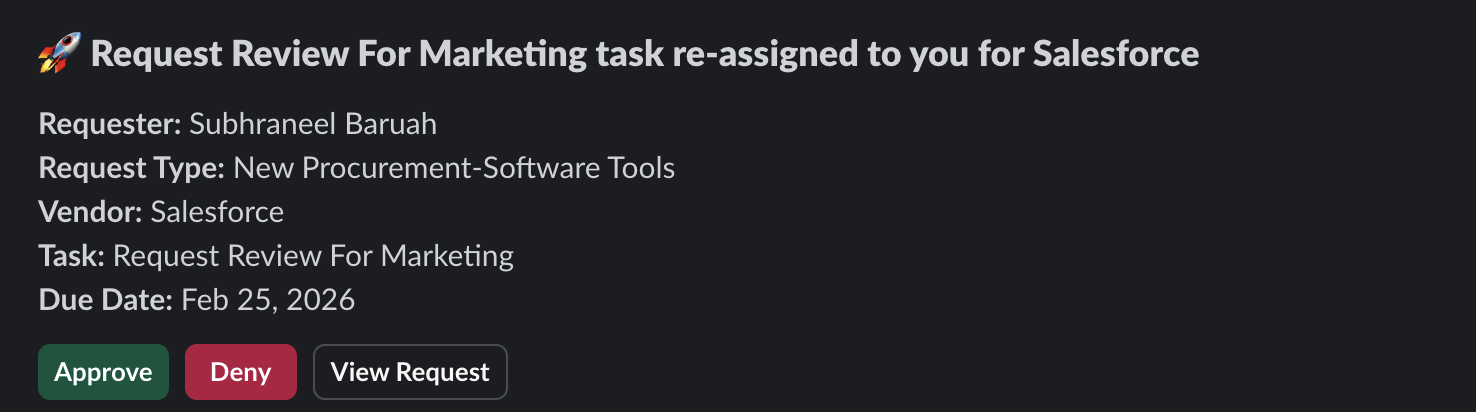
Slack Approvals
If the Slack integration is enabled, approvers will receive a notification directly in their Slack workspace. The notification provides key details such as the Requester, Request Type, Vendor, and Due Date. Approvers can click Approve or Deny directly within the message, or select View Request to see more details.
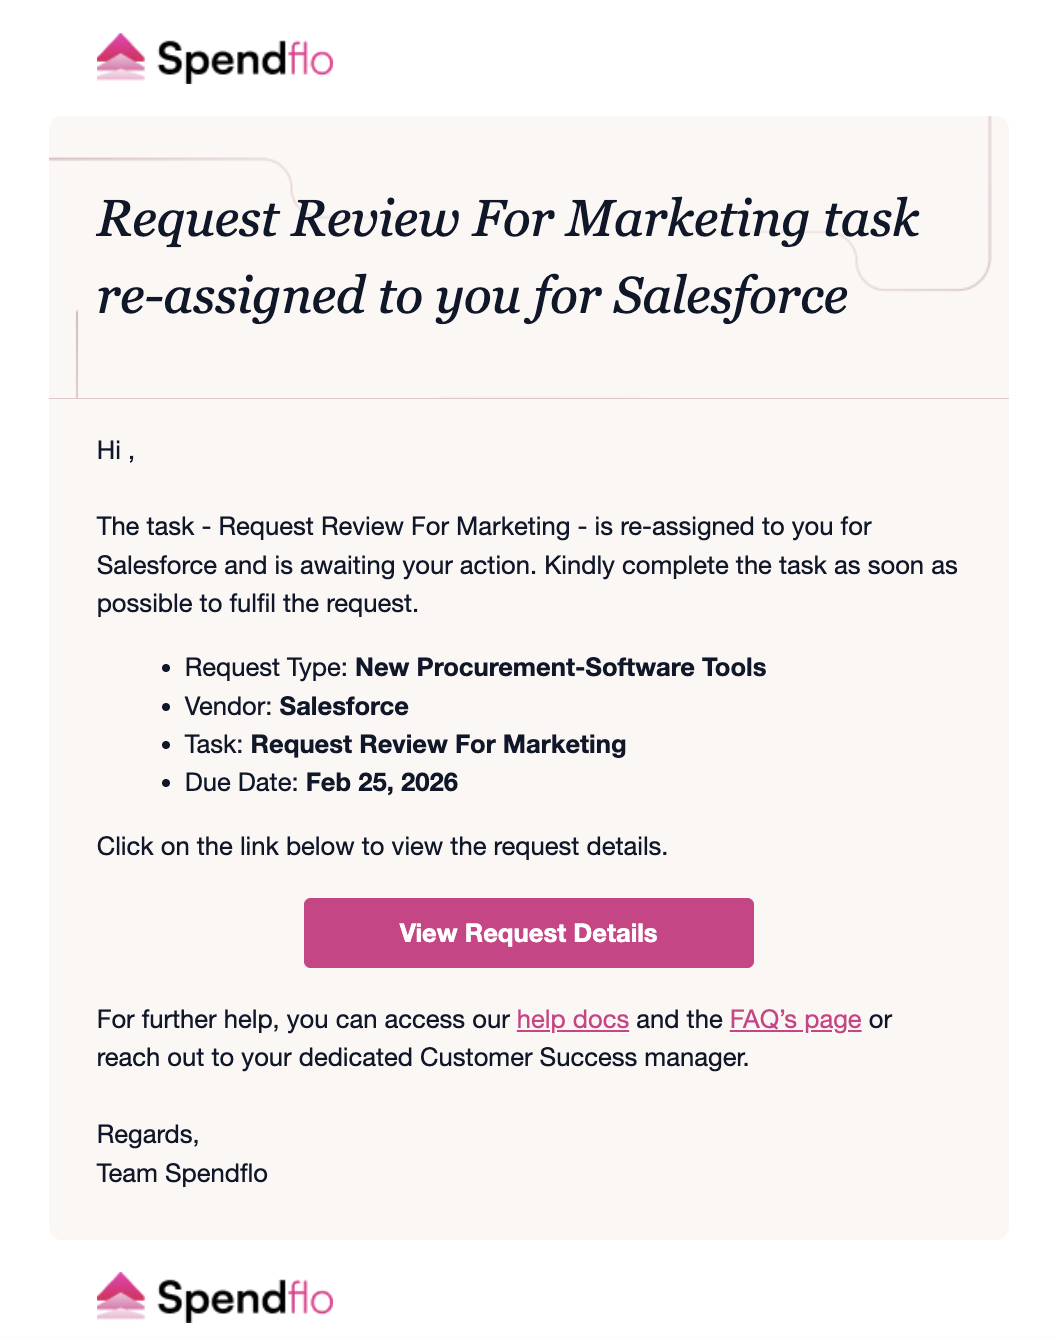
Email Approvals
Approvers also receive an email notification indicating that a task has been assigned to them. The email summarizes the request details and provides a link to View Request Details, allowing them to access the platform and complete the task.
Next Steps
Now that you have raised a request and initiated the approval process, you can track its progress via the Workflow Tasks & Timeline on the request details page. For more information on managing tasks, refer to our guide on managing task approval or denial.
Was this article helpful?
That’s Great!
Thank you for your feedback
Sorry! We couldn't be helpful
Thank you for your feedback
Feedback sent
We appreciate your effort and will try to fix the article