Overview
Spendflo’s integration with DocuSign streamlines the Non-Disclosure Agreement (NDA) process by allowing teams to send documents for e-signature directly within the workflow. This integration eliminates the need to switch between platforms, ensuring a seamless experience for both admins configuring the workflow and end-users sending documents.
Pre-requisites
- Admin Role: You must have an Administrator role in Spendflo to configure workflows.
- DocuSign Integration: The DocuSign integration must be active and connected in your Spendflo instance.
For Admins: Configuring the DocuSign Task
Admins can configure the DocuSign integration as a task within the Workflow Builder. Follow these steps to set up the integration task:
Add the Integration Task
Navigate to your NDA workflow in the Workflow Builder. Add a new task and select Integration Task. Choose DocuSign as the software and select Send Envelope for Signature as the action.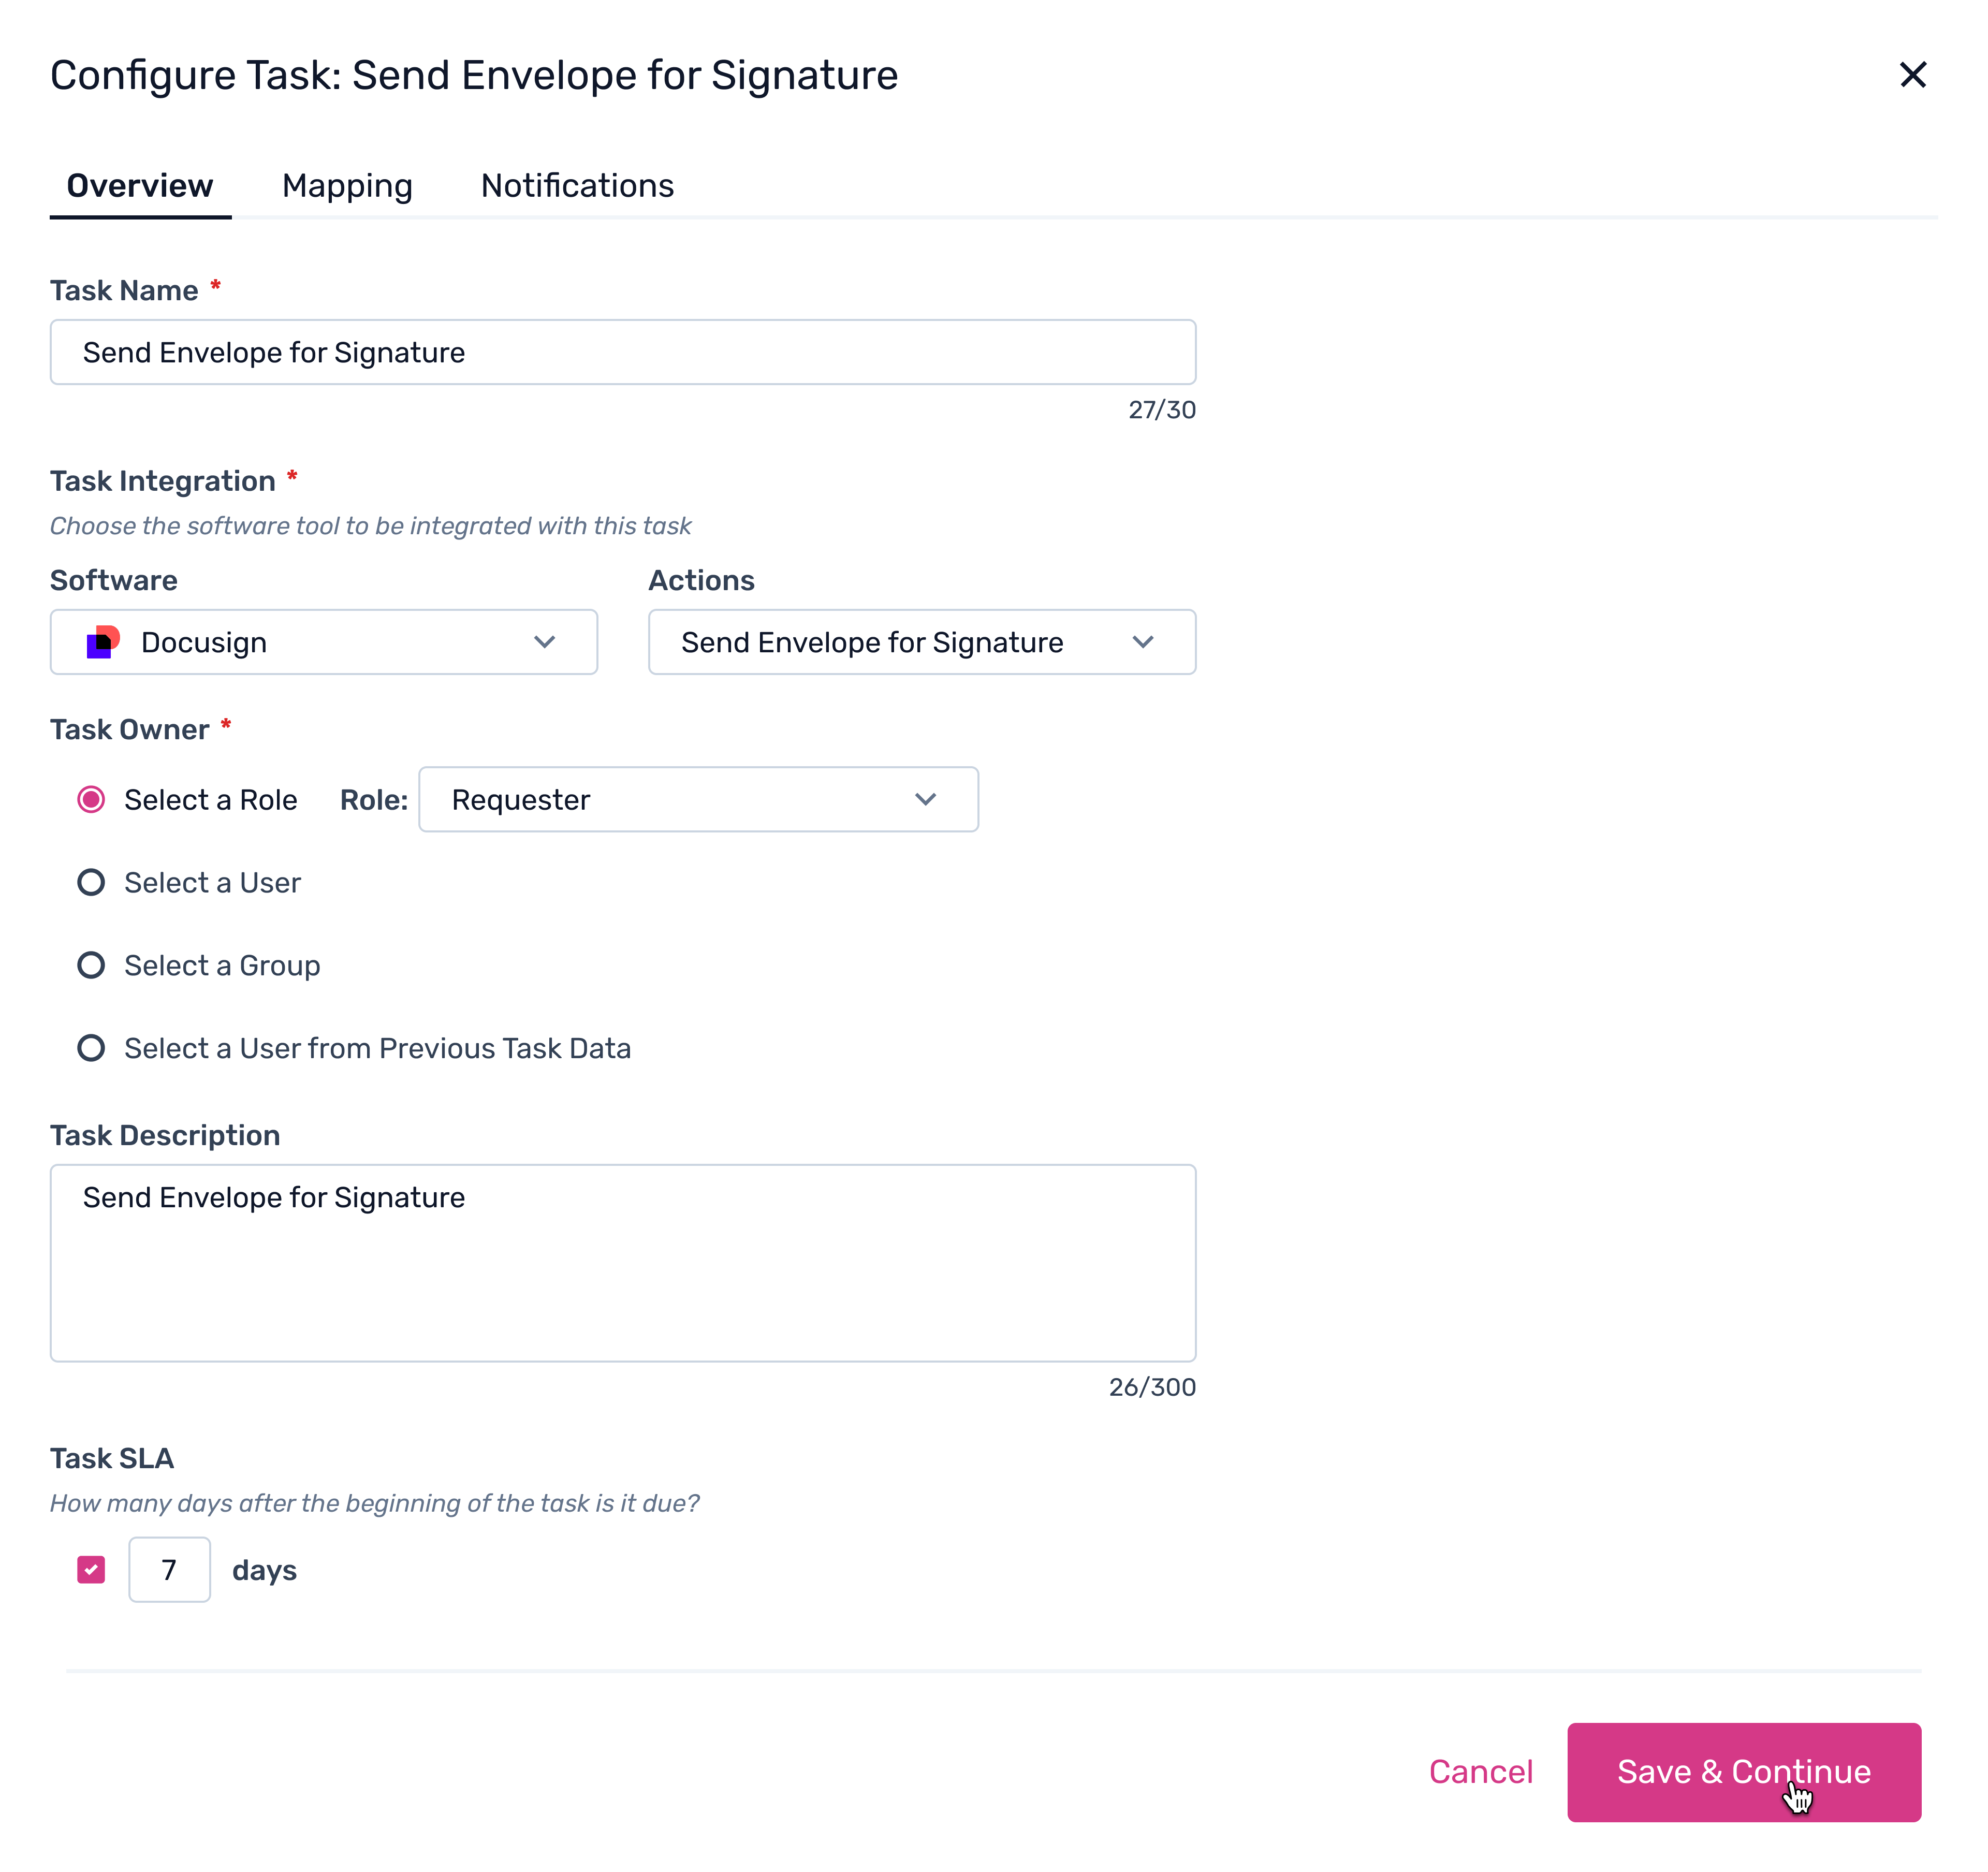
Configure Completion Statuses
In the mapping section, you must define which DocuSign envelope statuses will mark the task as completed in Spendflo. Select the appropriate statuses (e.g., Signed) from the dropdown.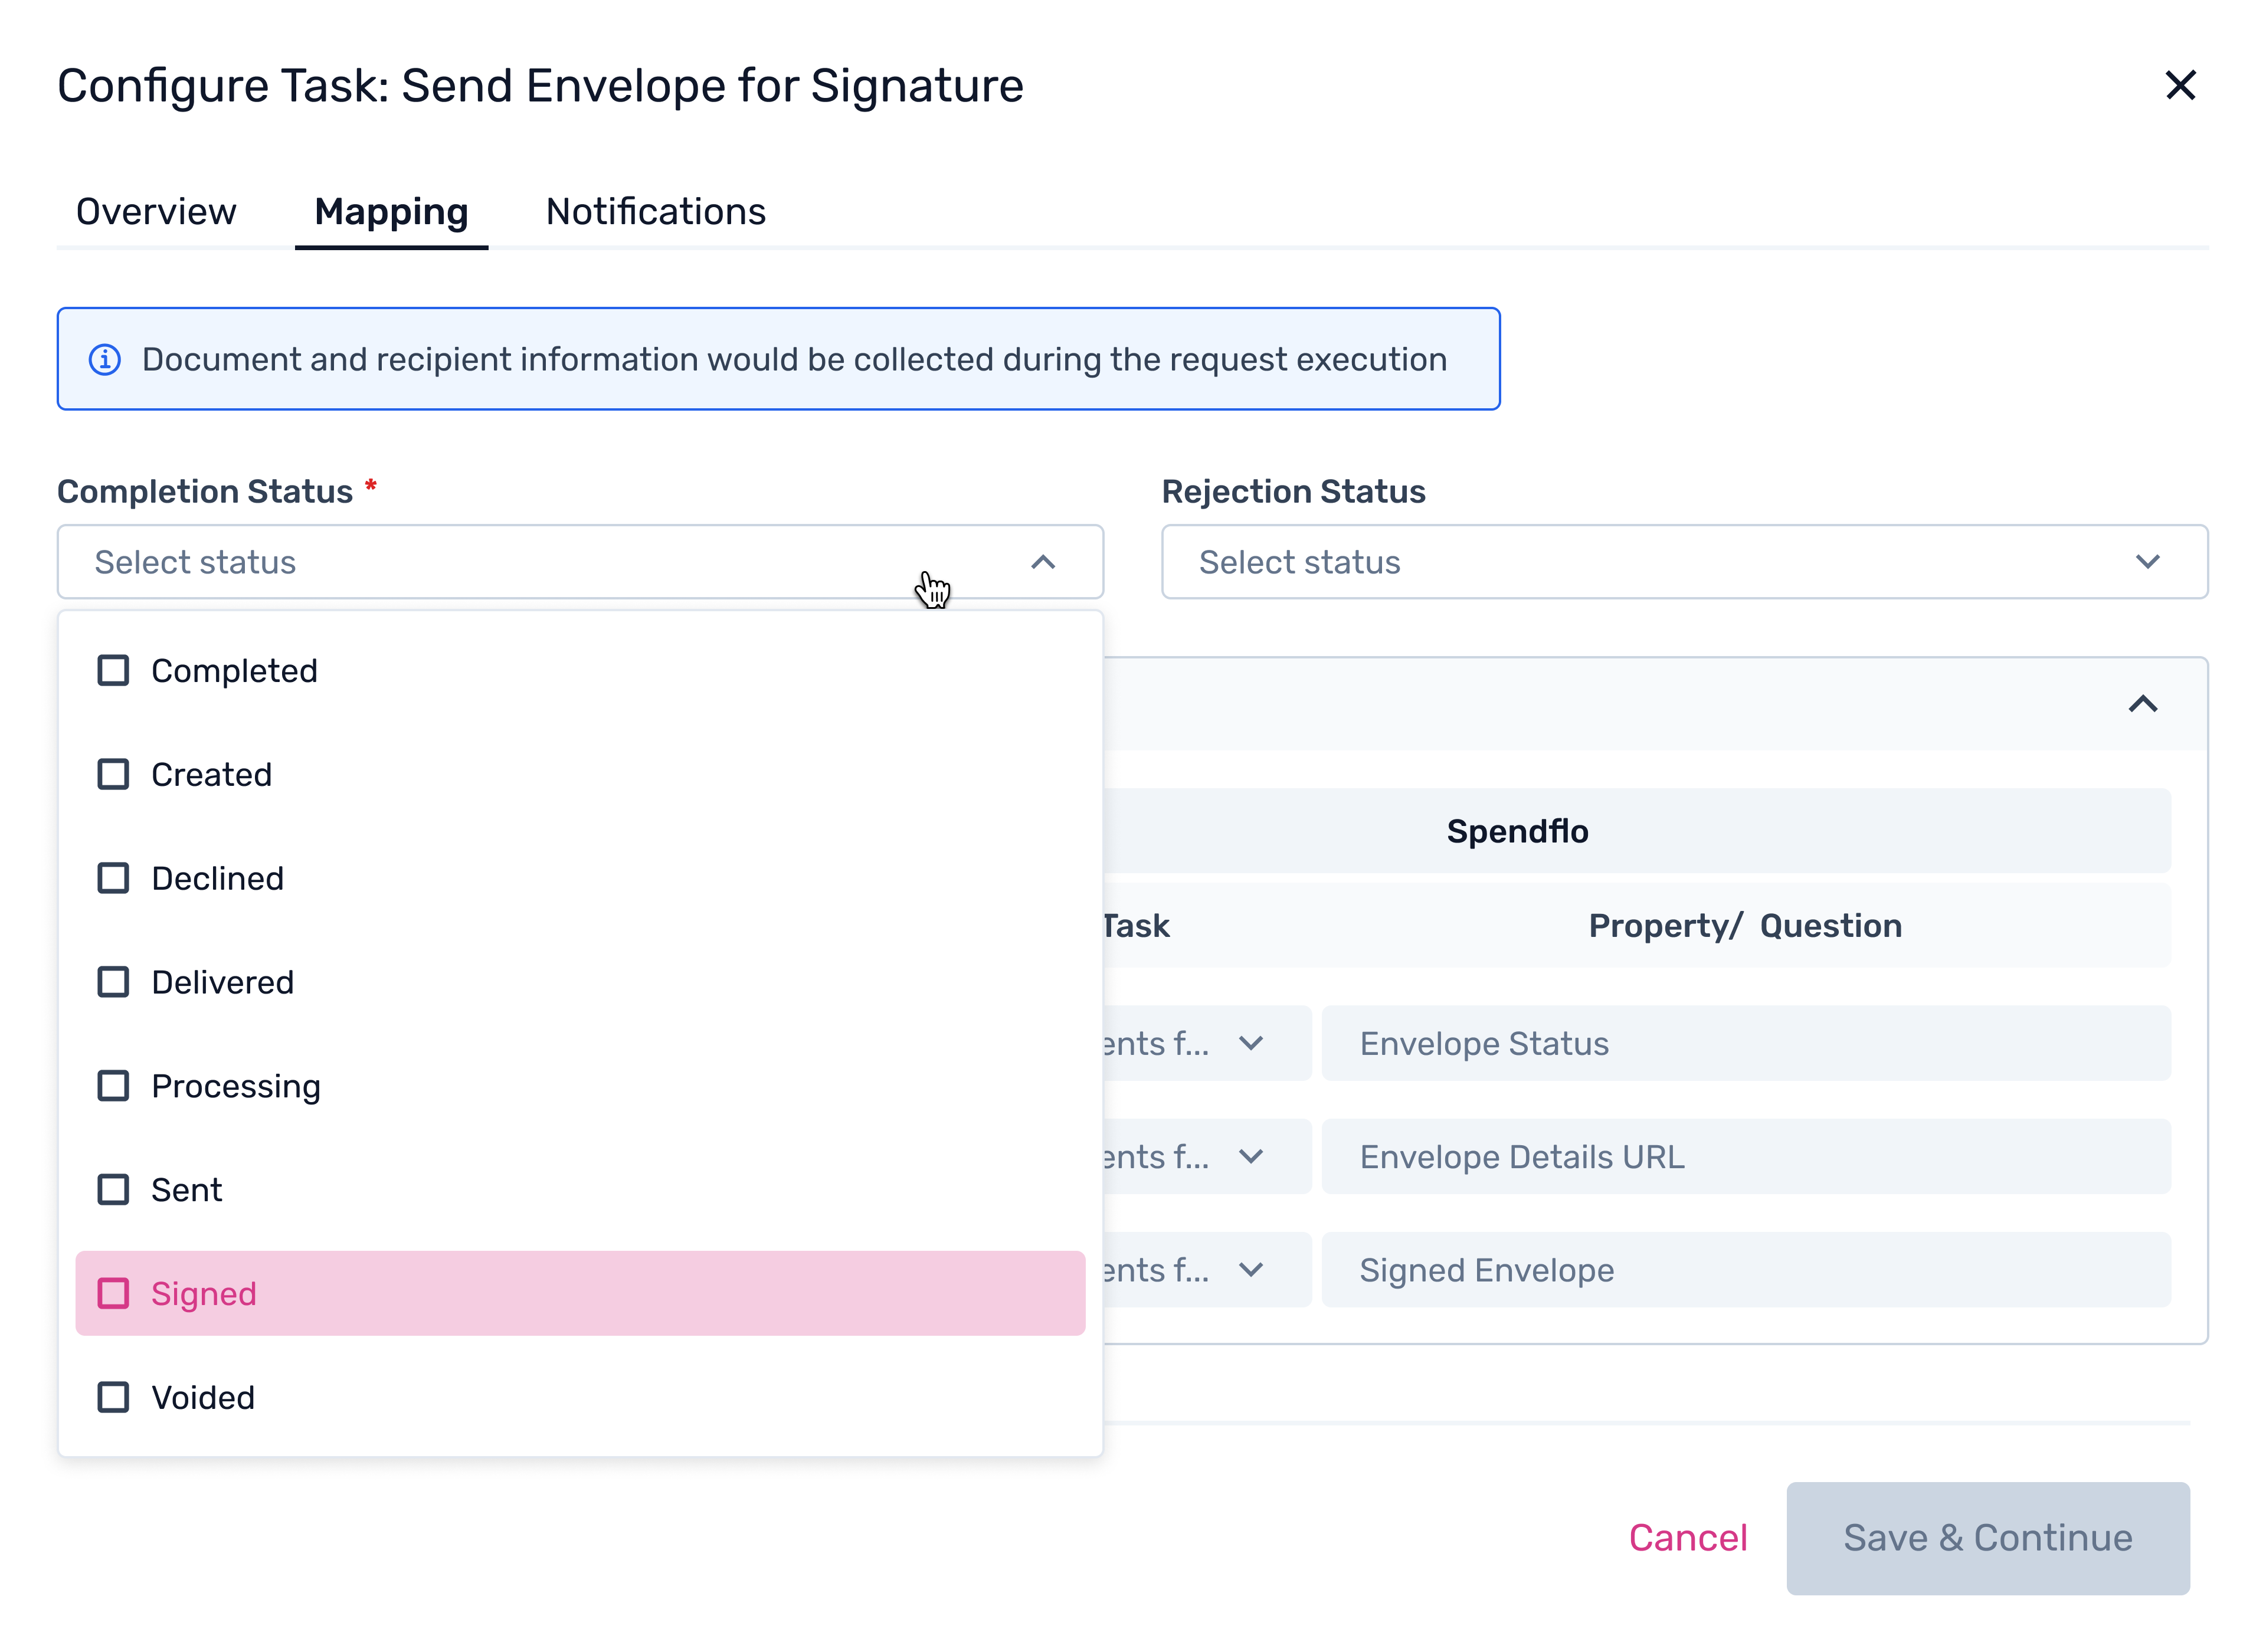
Map Rejection Statuses and Save
Similarly, configure the Rejection Status (e.g., Voided) to determine when the workflow should stop or branch. Ensure the input data from DocuSign (like Envelope Status and Signed Envelope) is mapped correctly to Spendflo properties, then click Save & Continue.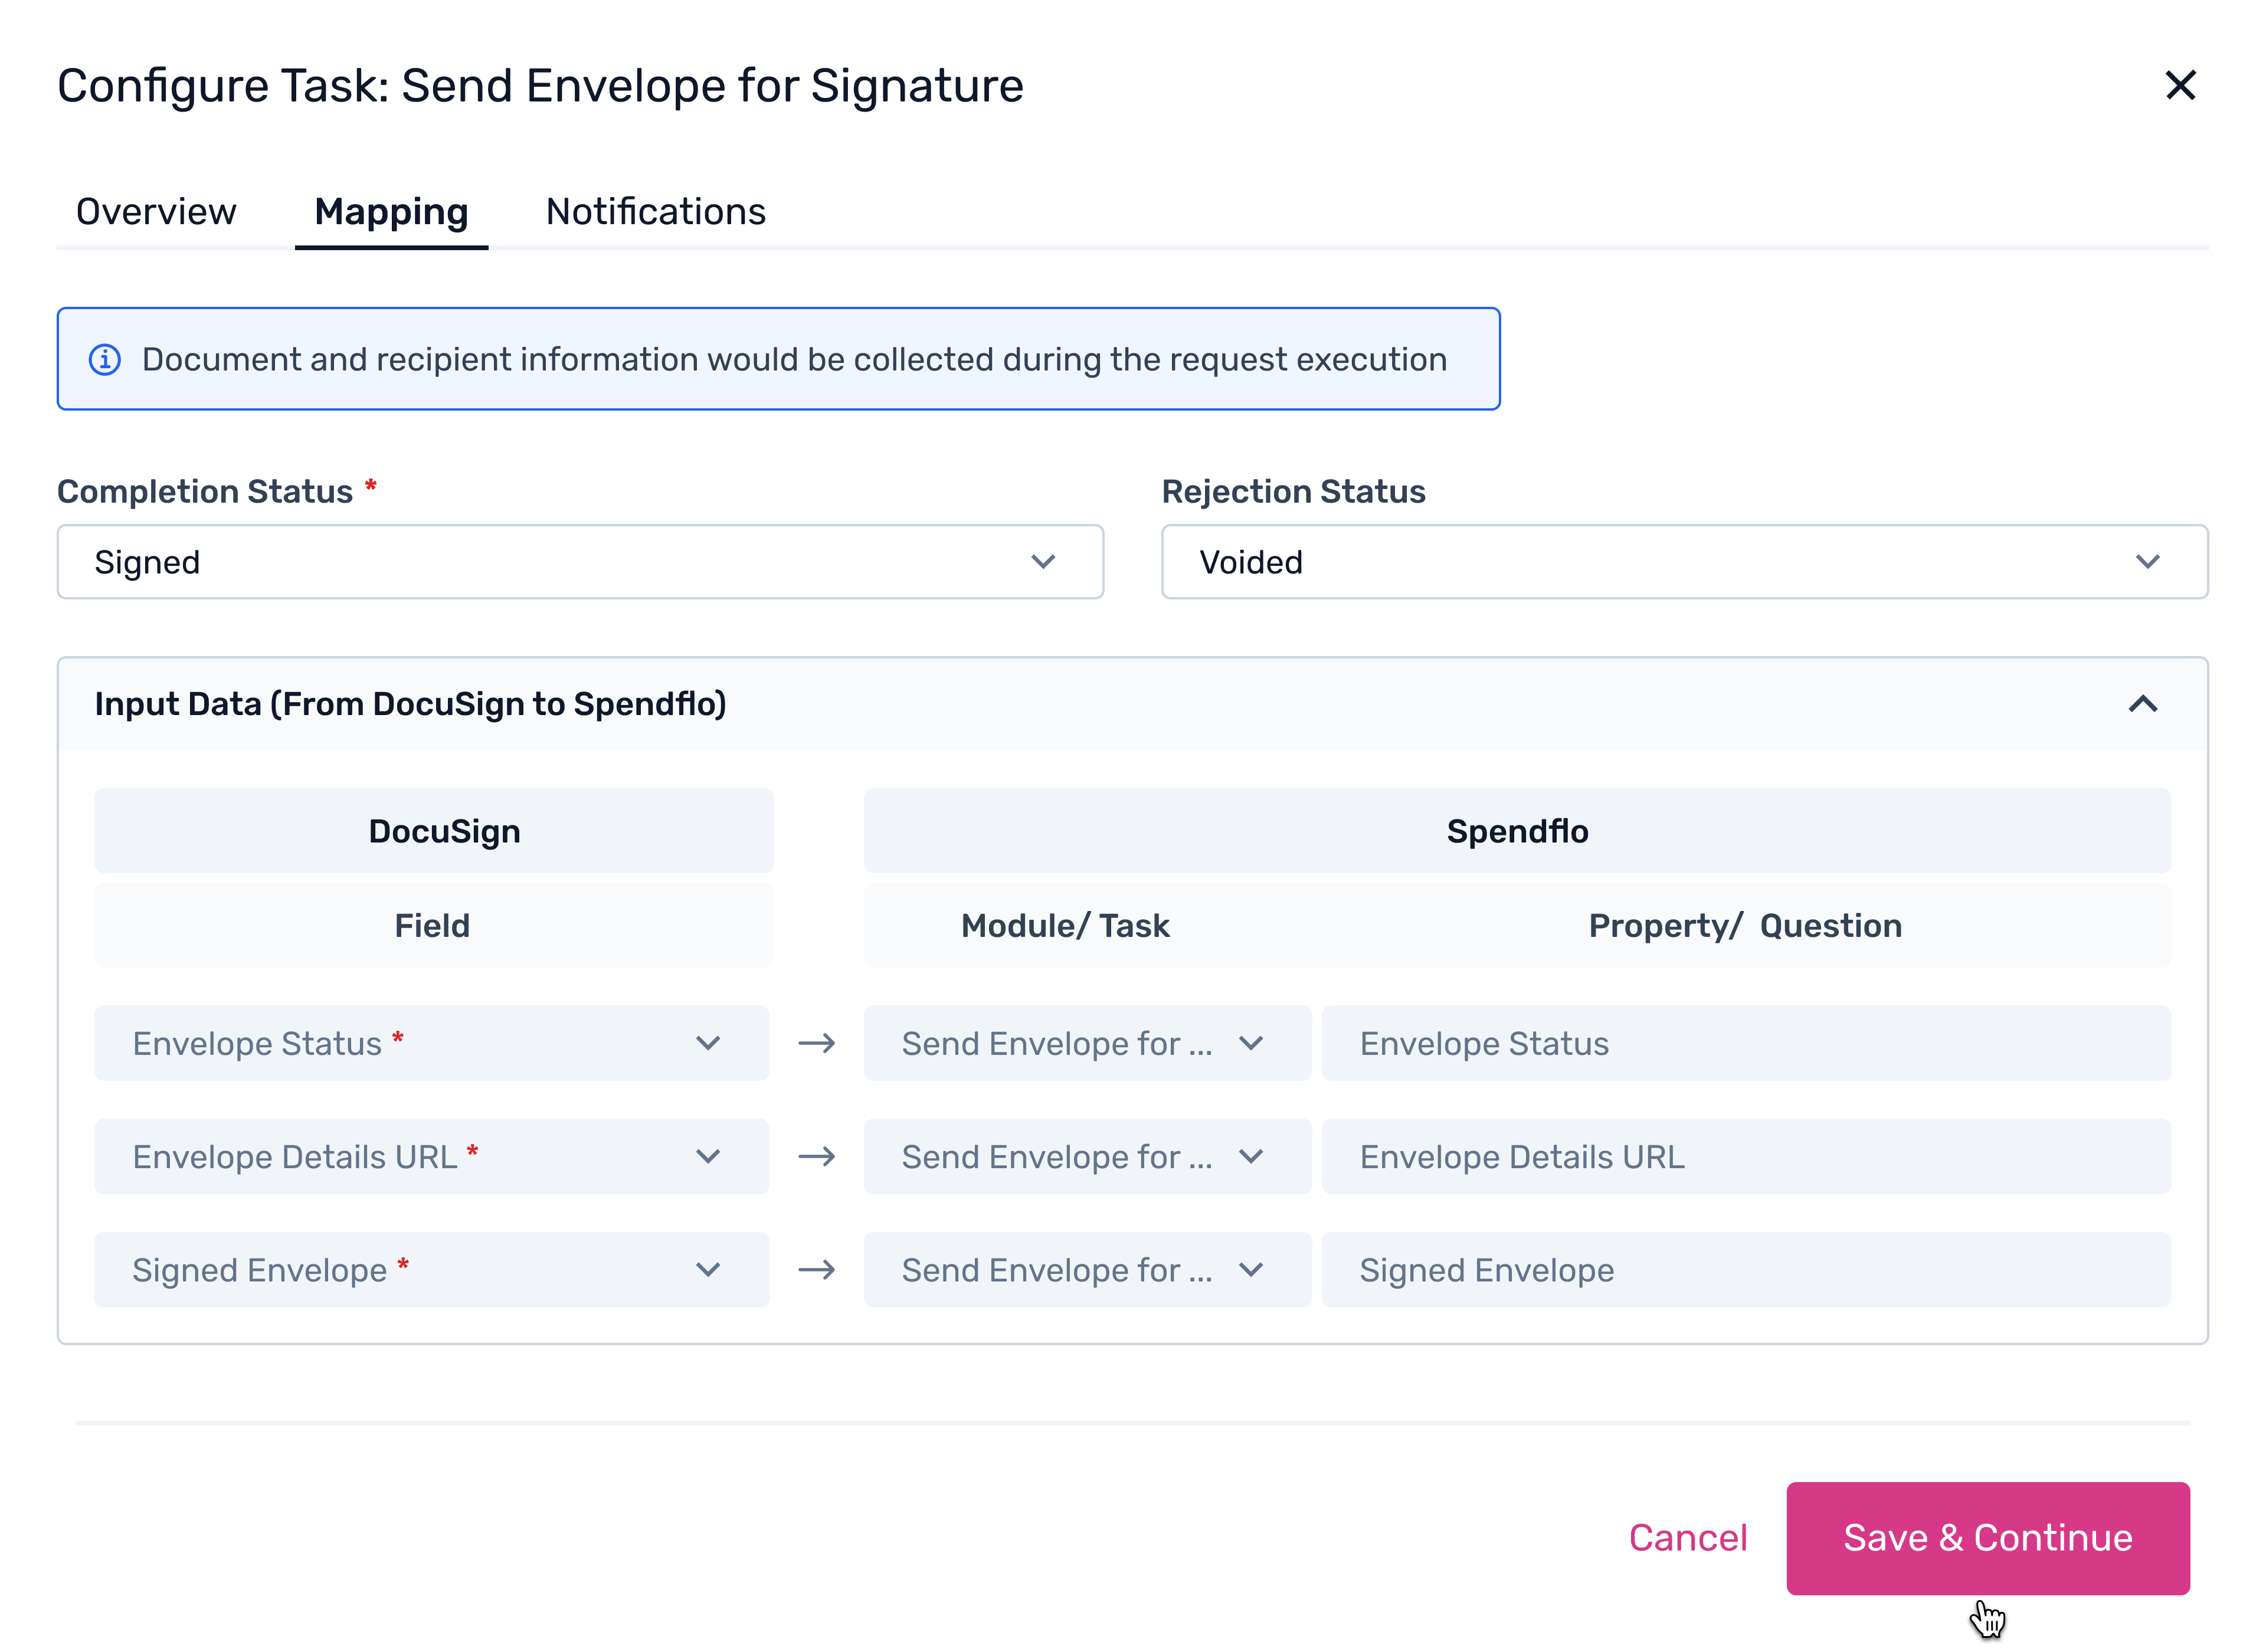
Verify Workflow Setup
Once configured, the DocuSign task will appear in your workflow sequence (typically after approvals and before the final completion step).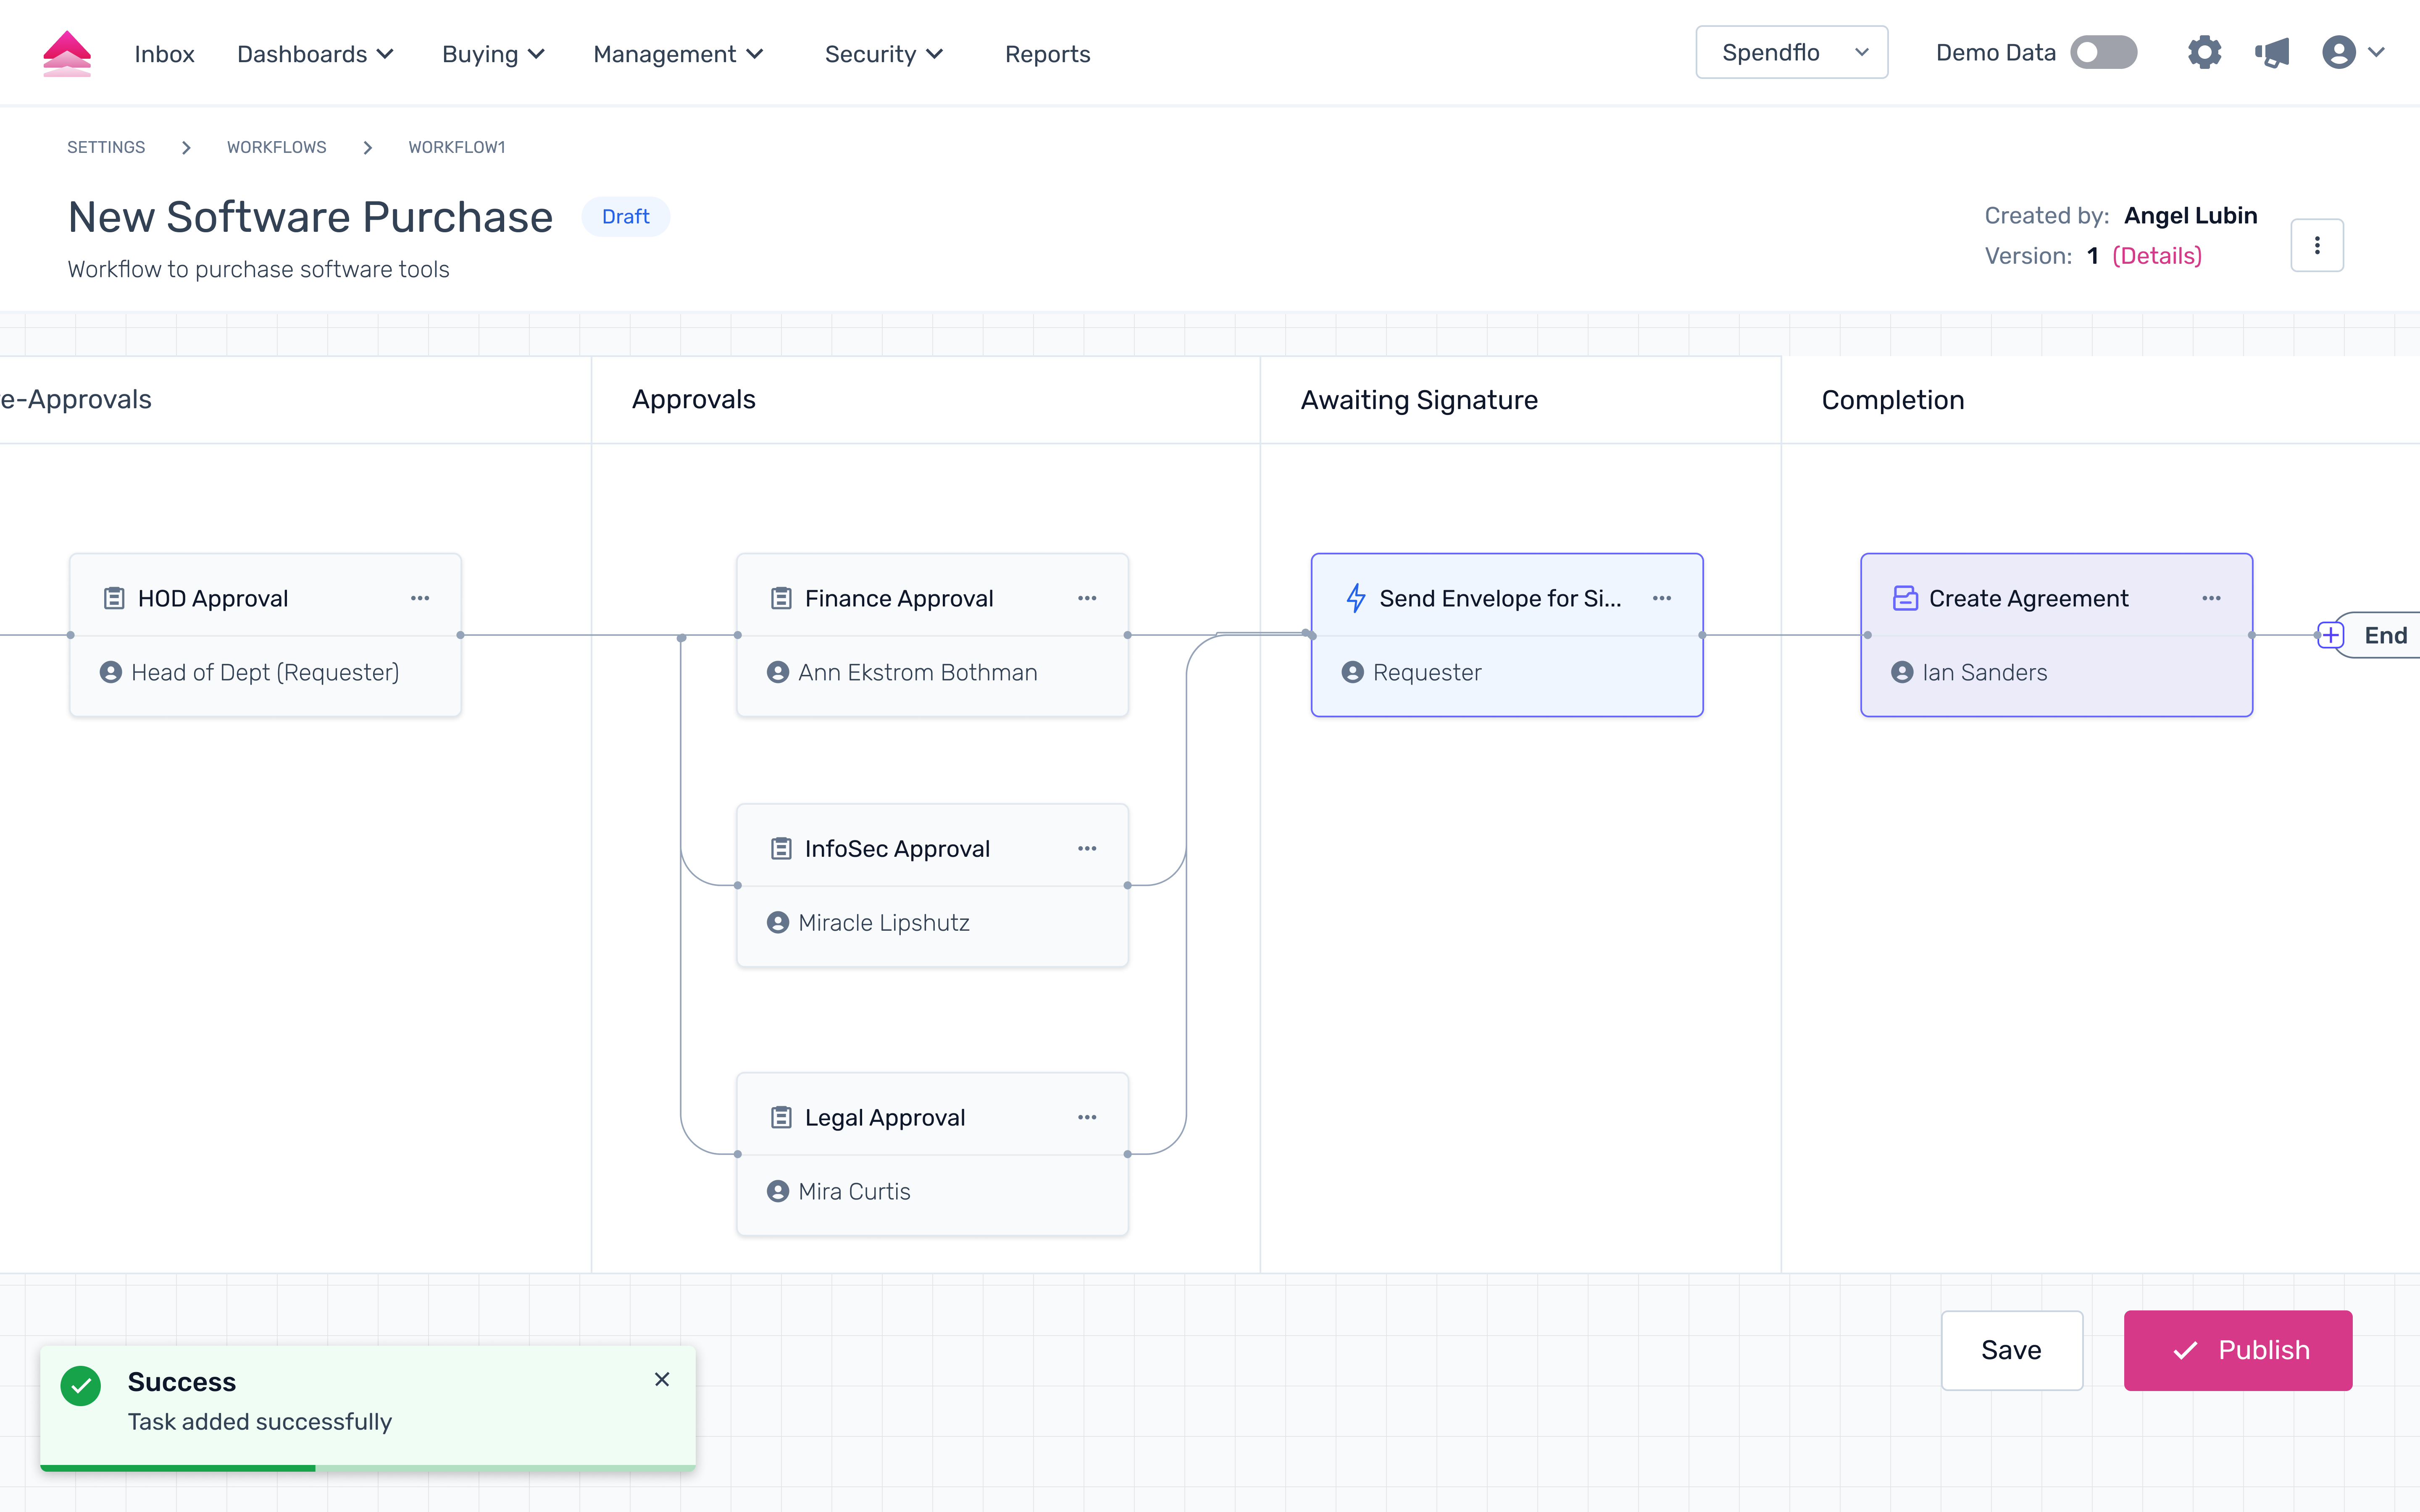
For End Users: Sending the NDA
Once the workflow is live, task owners (such as Legal or the Requester) can initiate the signature process directly from the request page.
Start the Signature Task
When the workflow reaches the signature step, navigate to the request and click the Start "Send Envelope for Signature" button.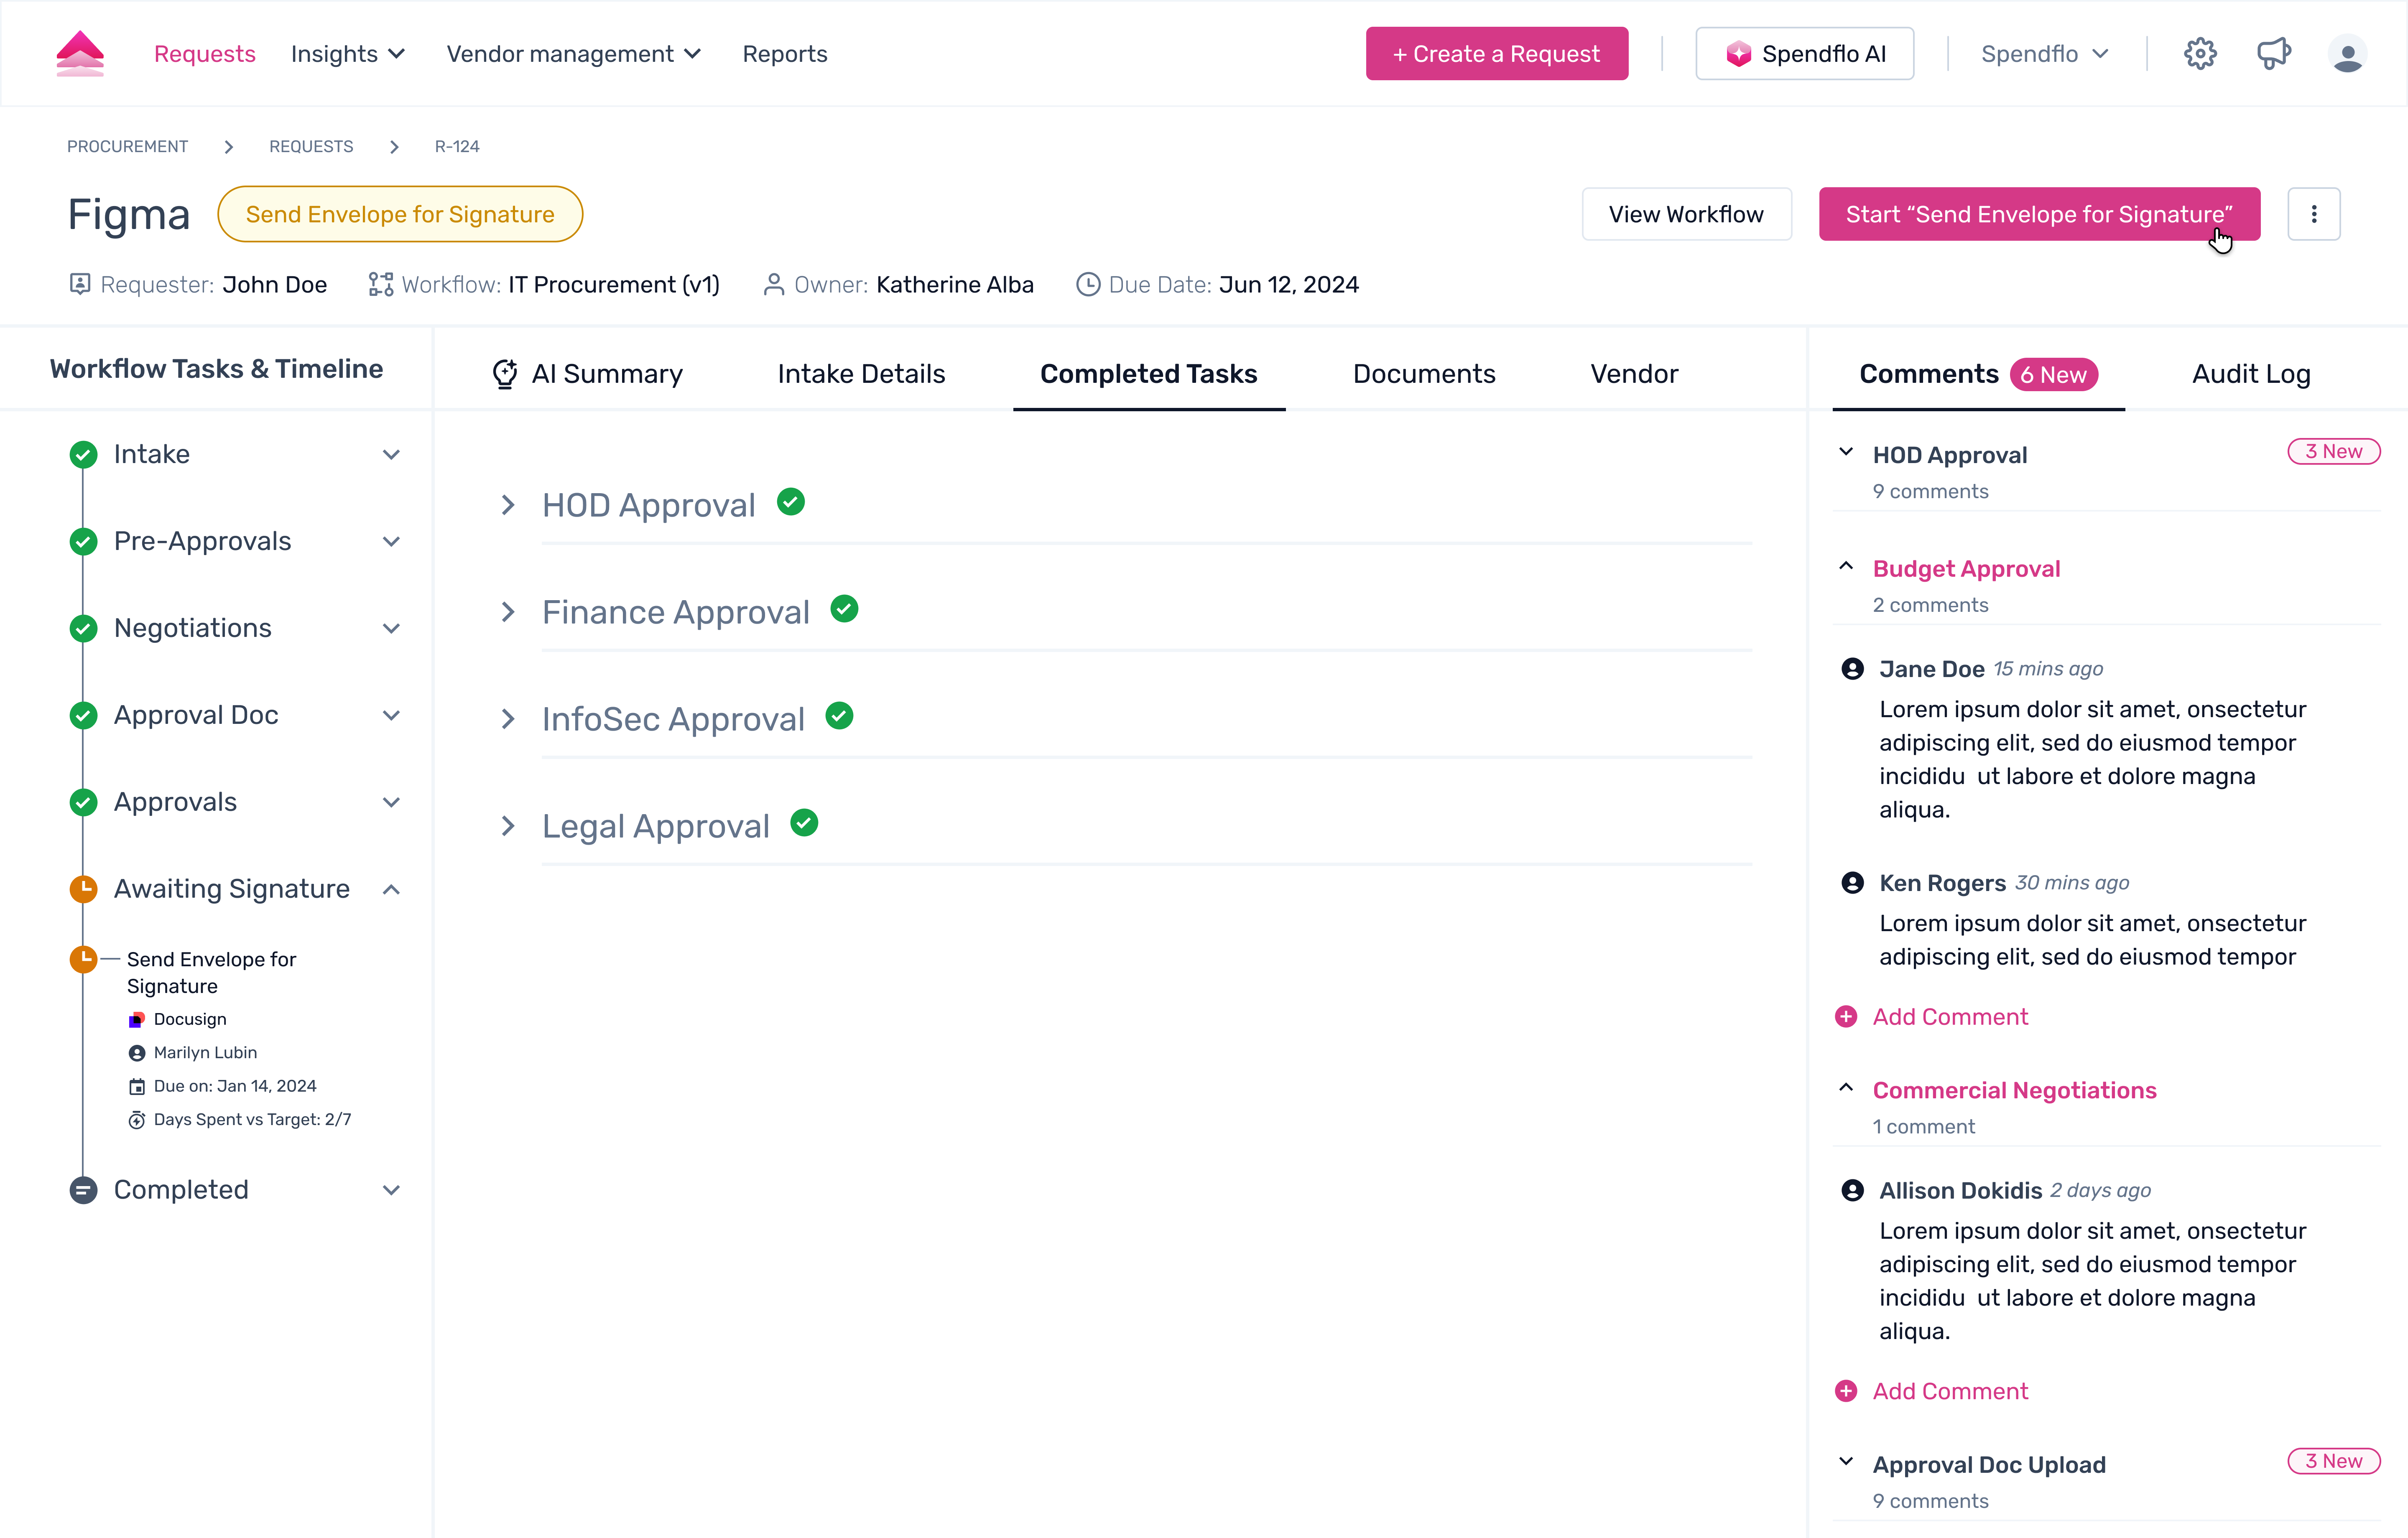
Select Documents
Choose the document you wish to send for signature. You can select from documents already uploaded to the request or generated in a previous step.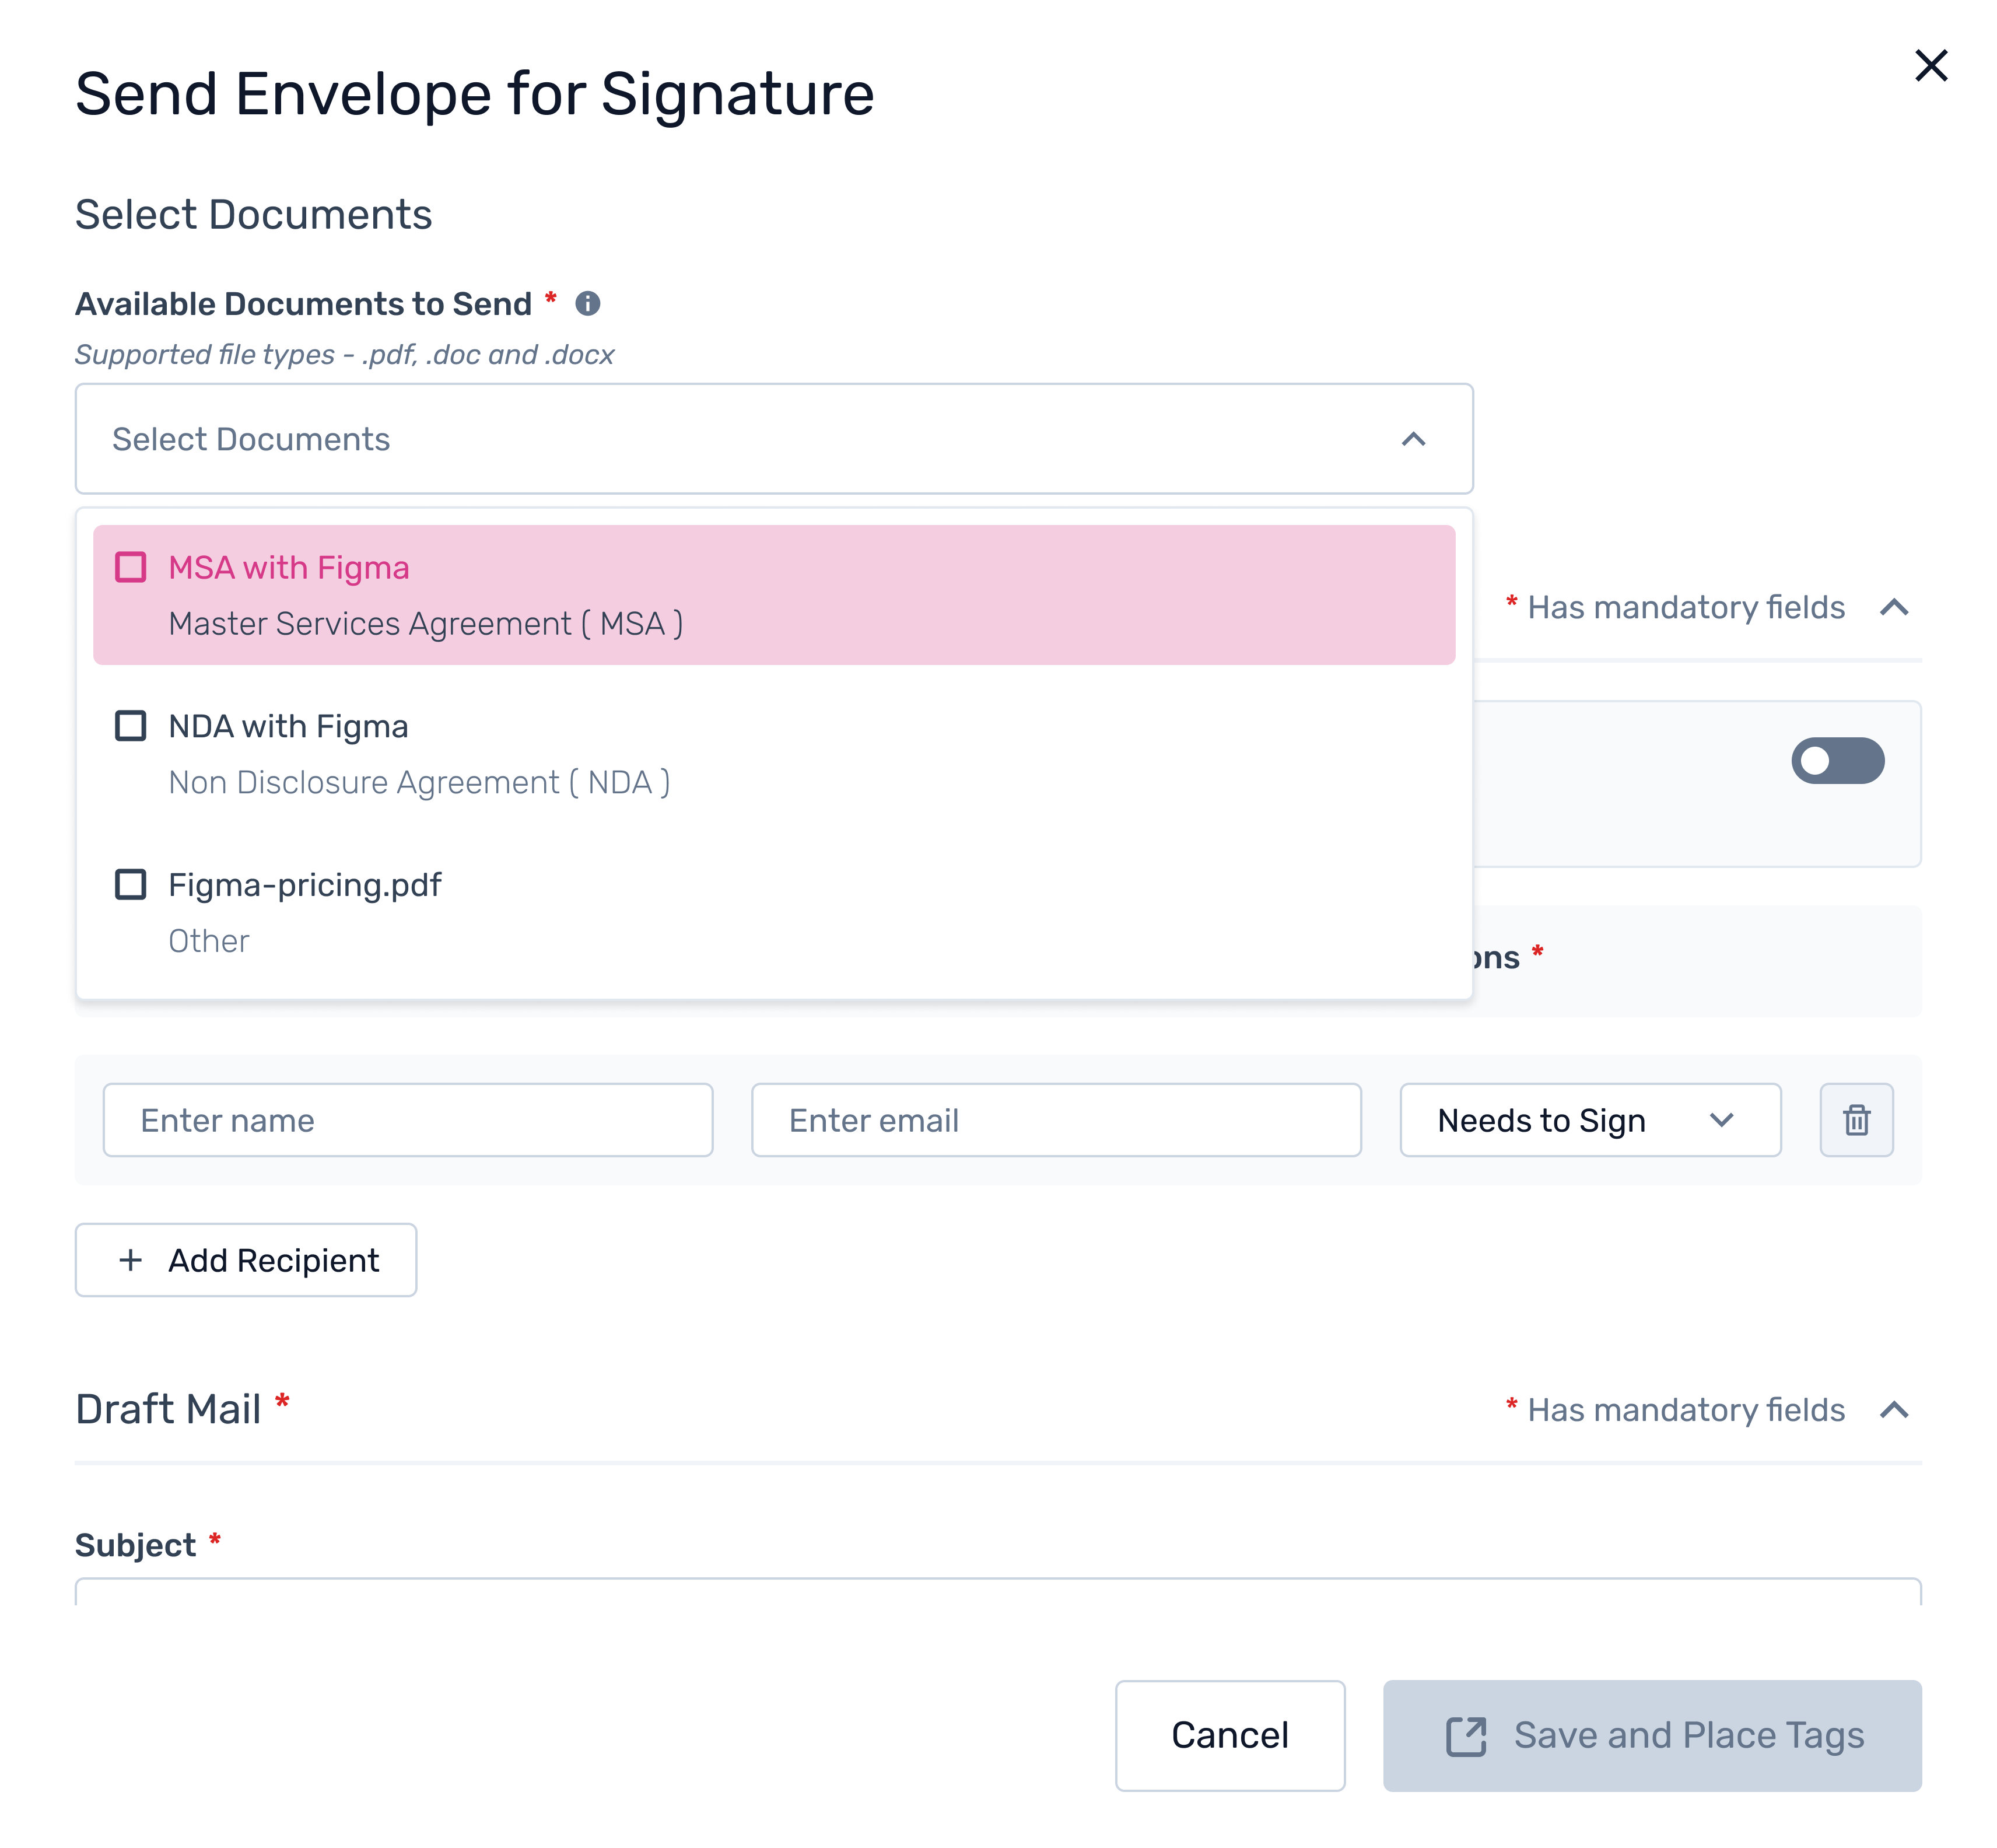
Add Recipients
Enter the details for the recipients who need to sign the document. This typically includes the counterparty and any internal signers.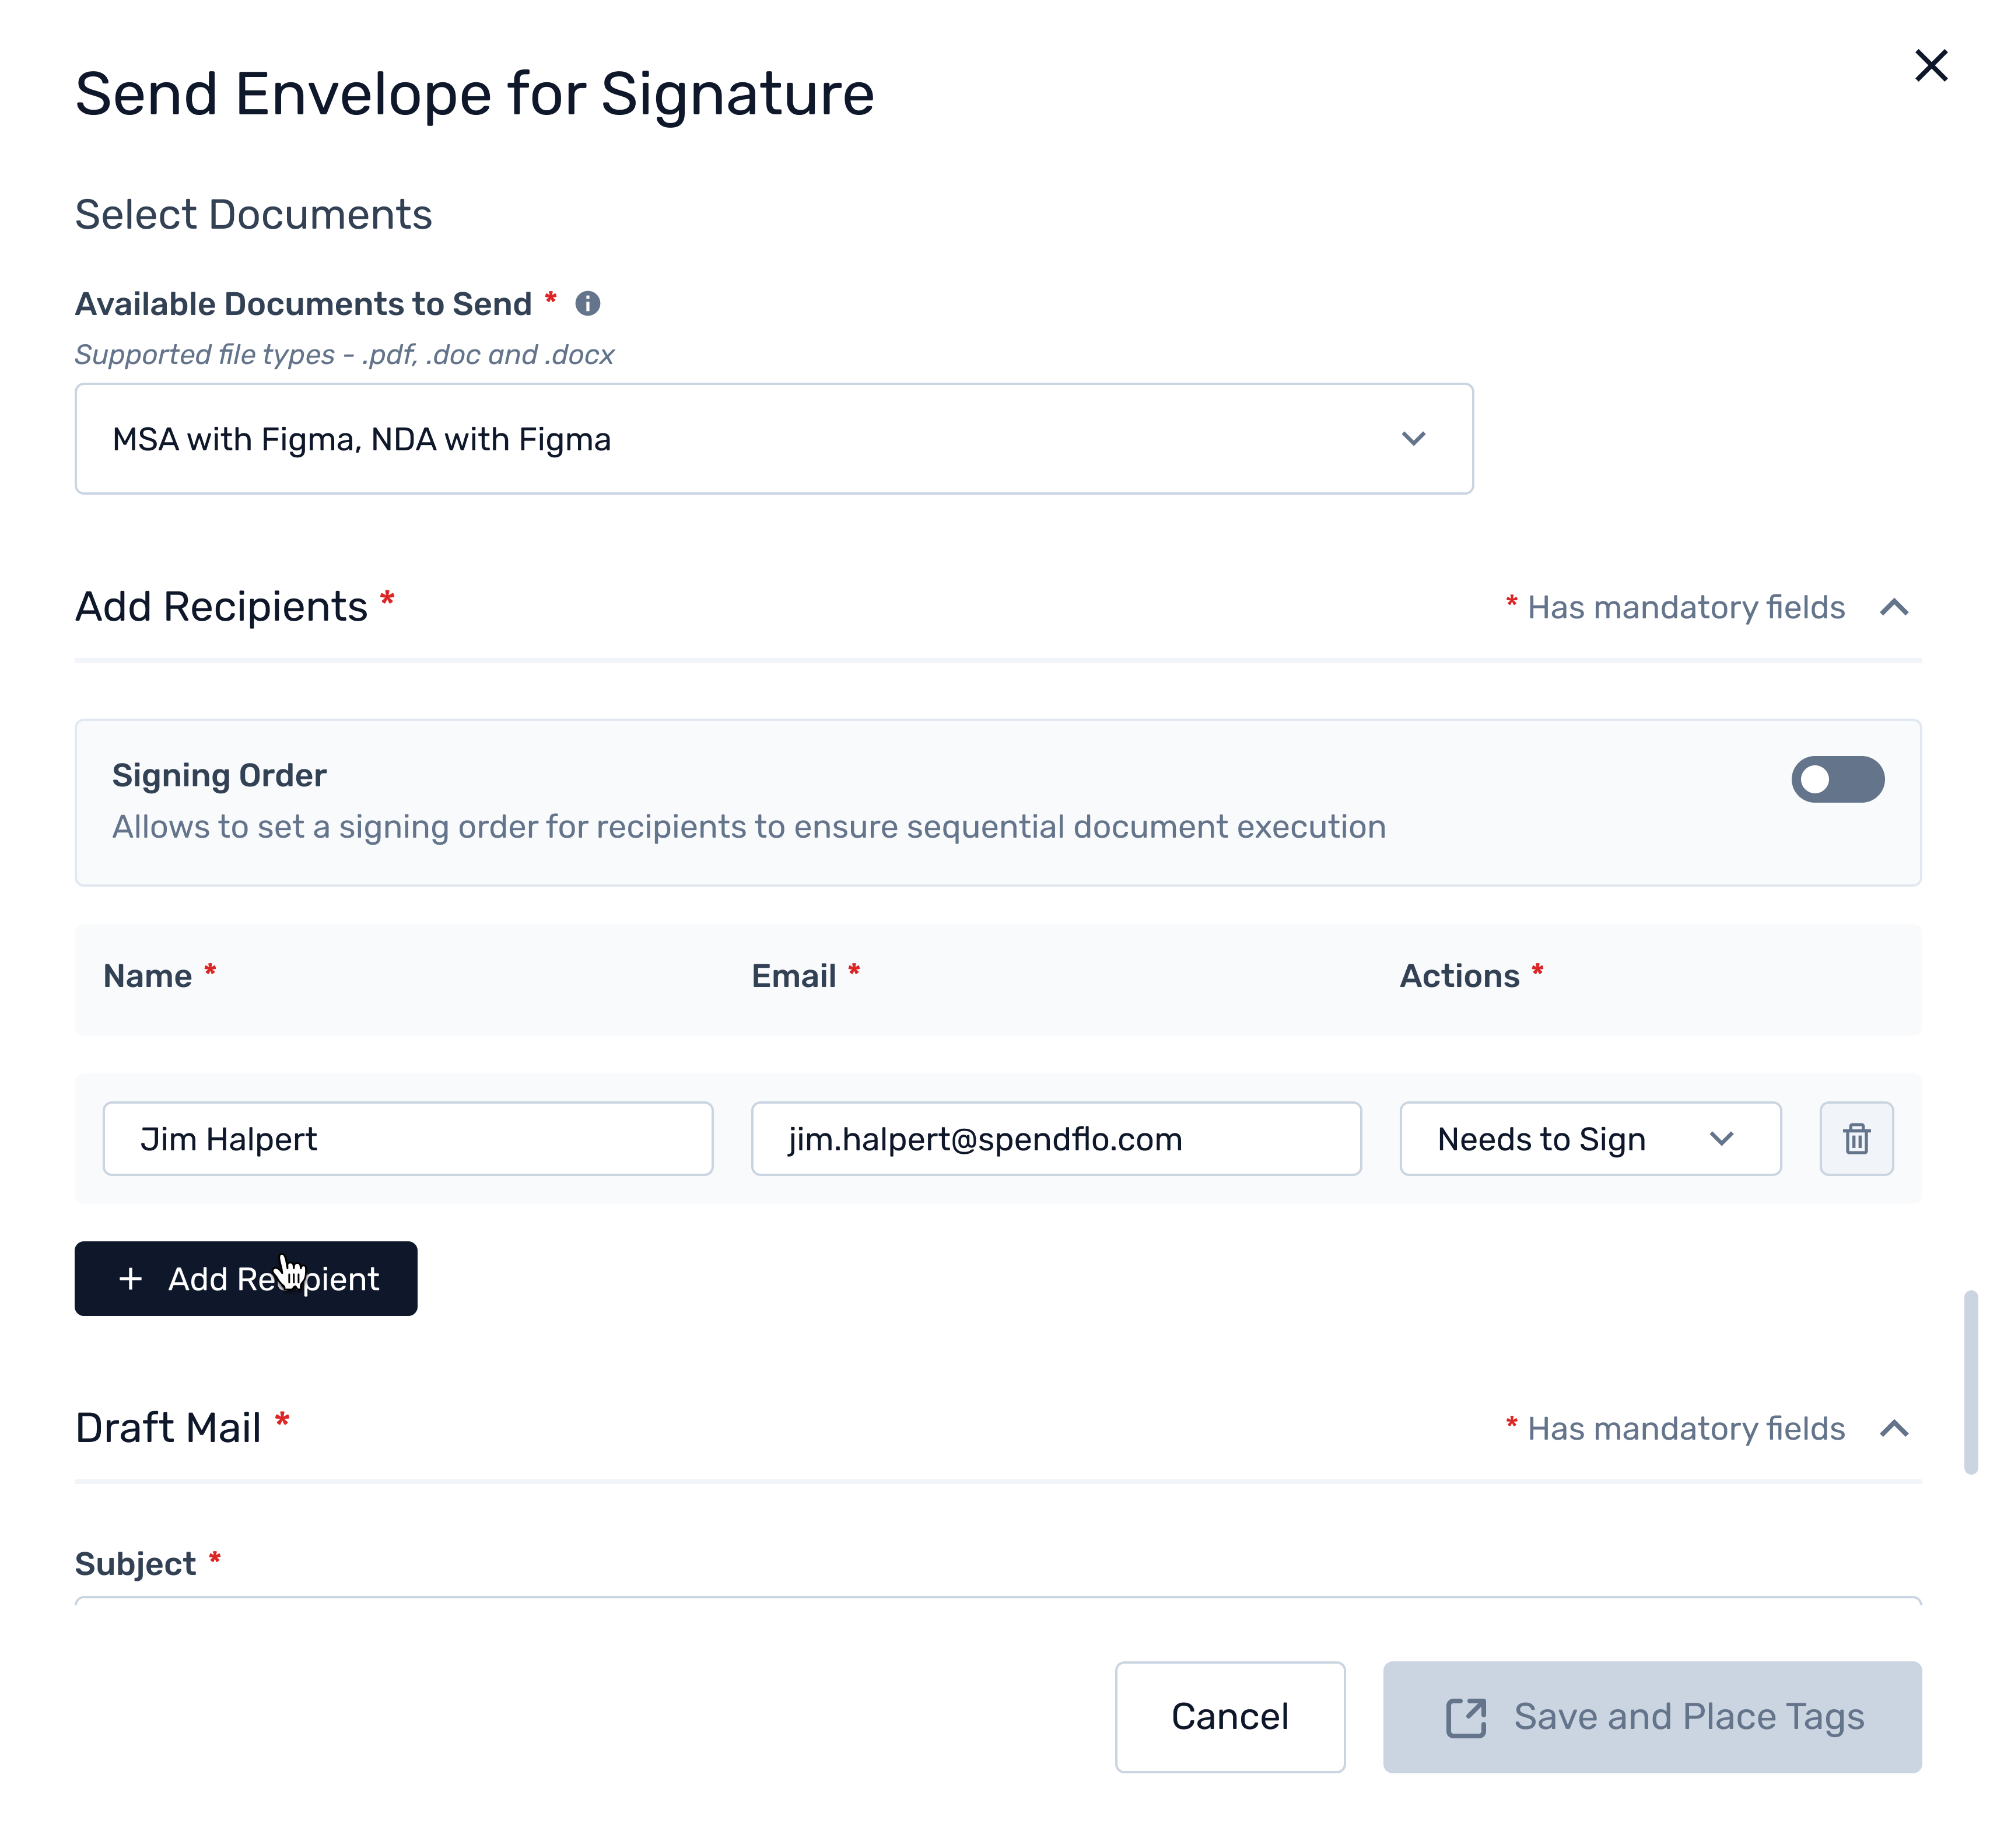
Configure Signing Order (Optional)
If the document requires a specific sequence of signatures, toggle the Signing Order option.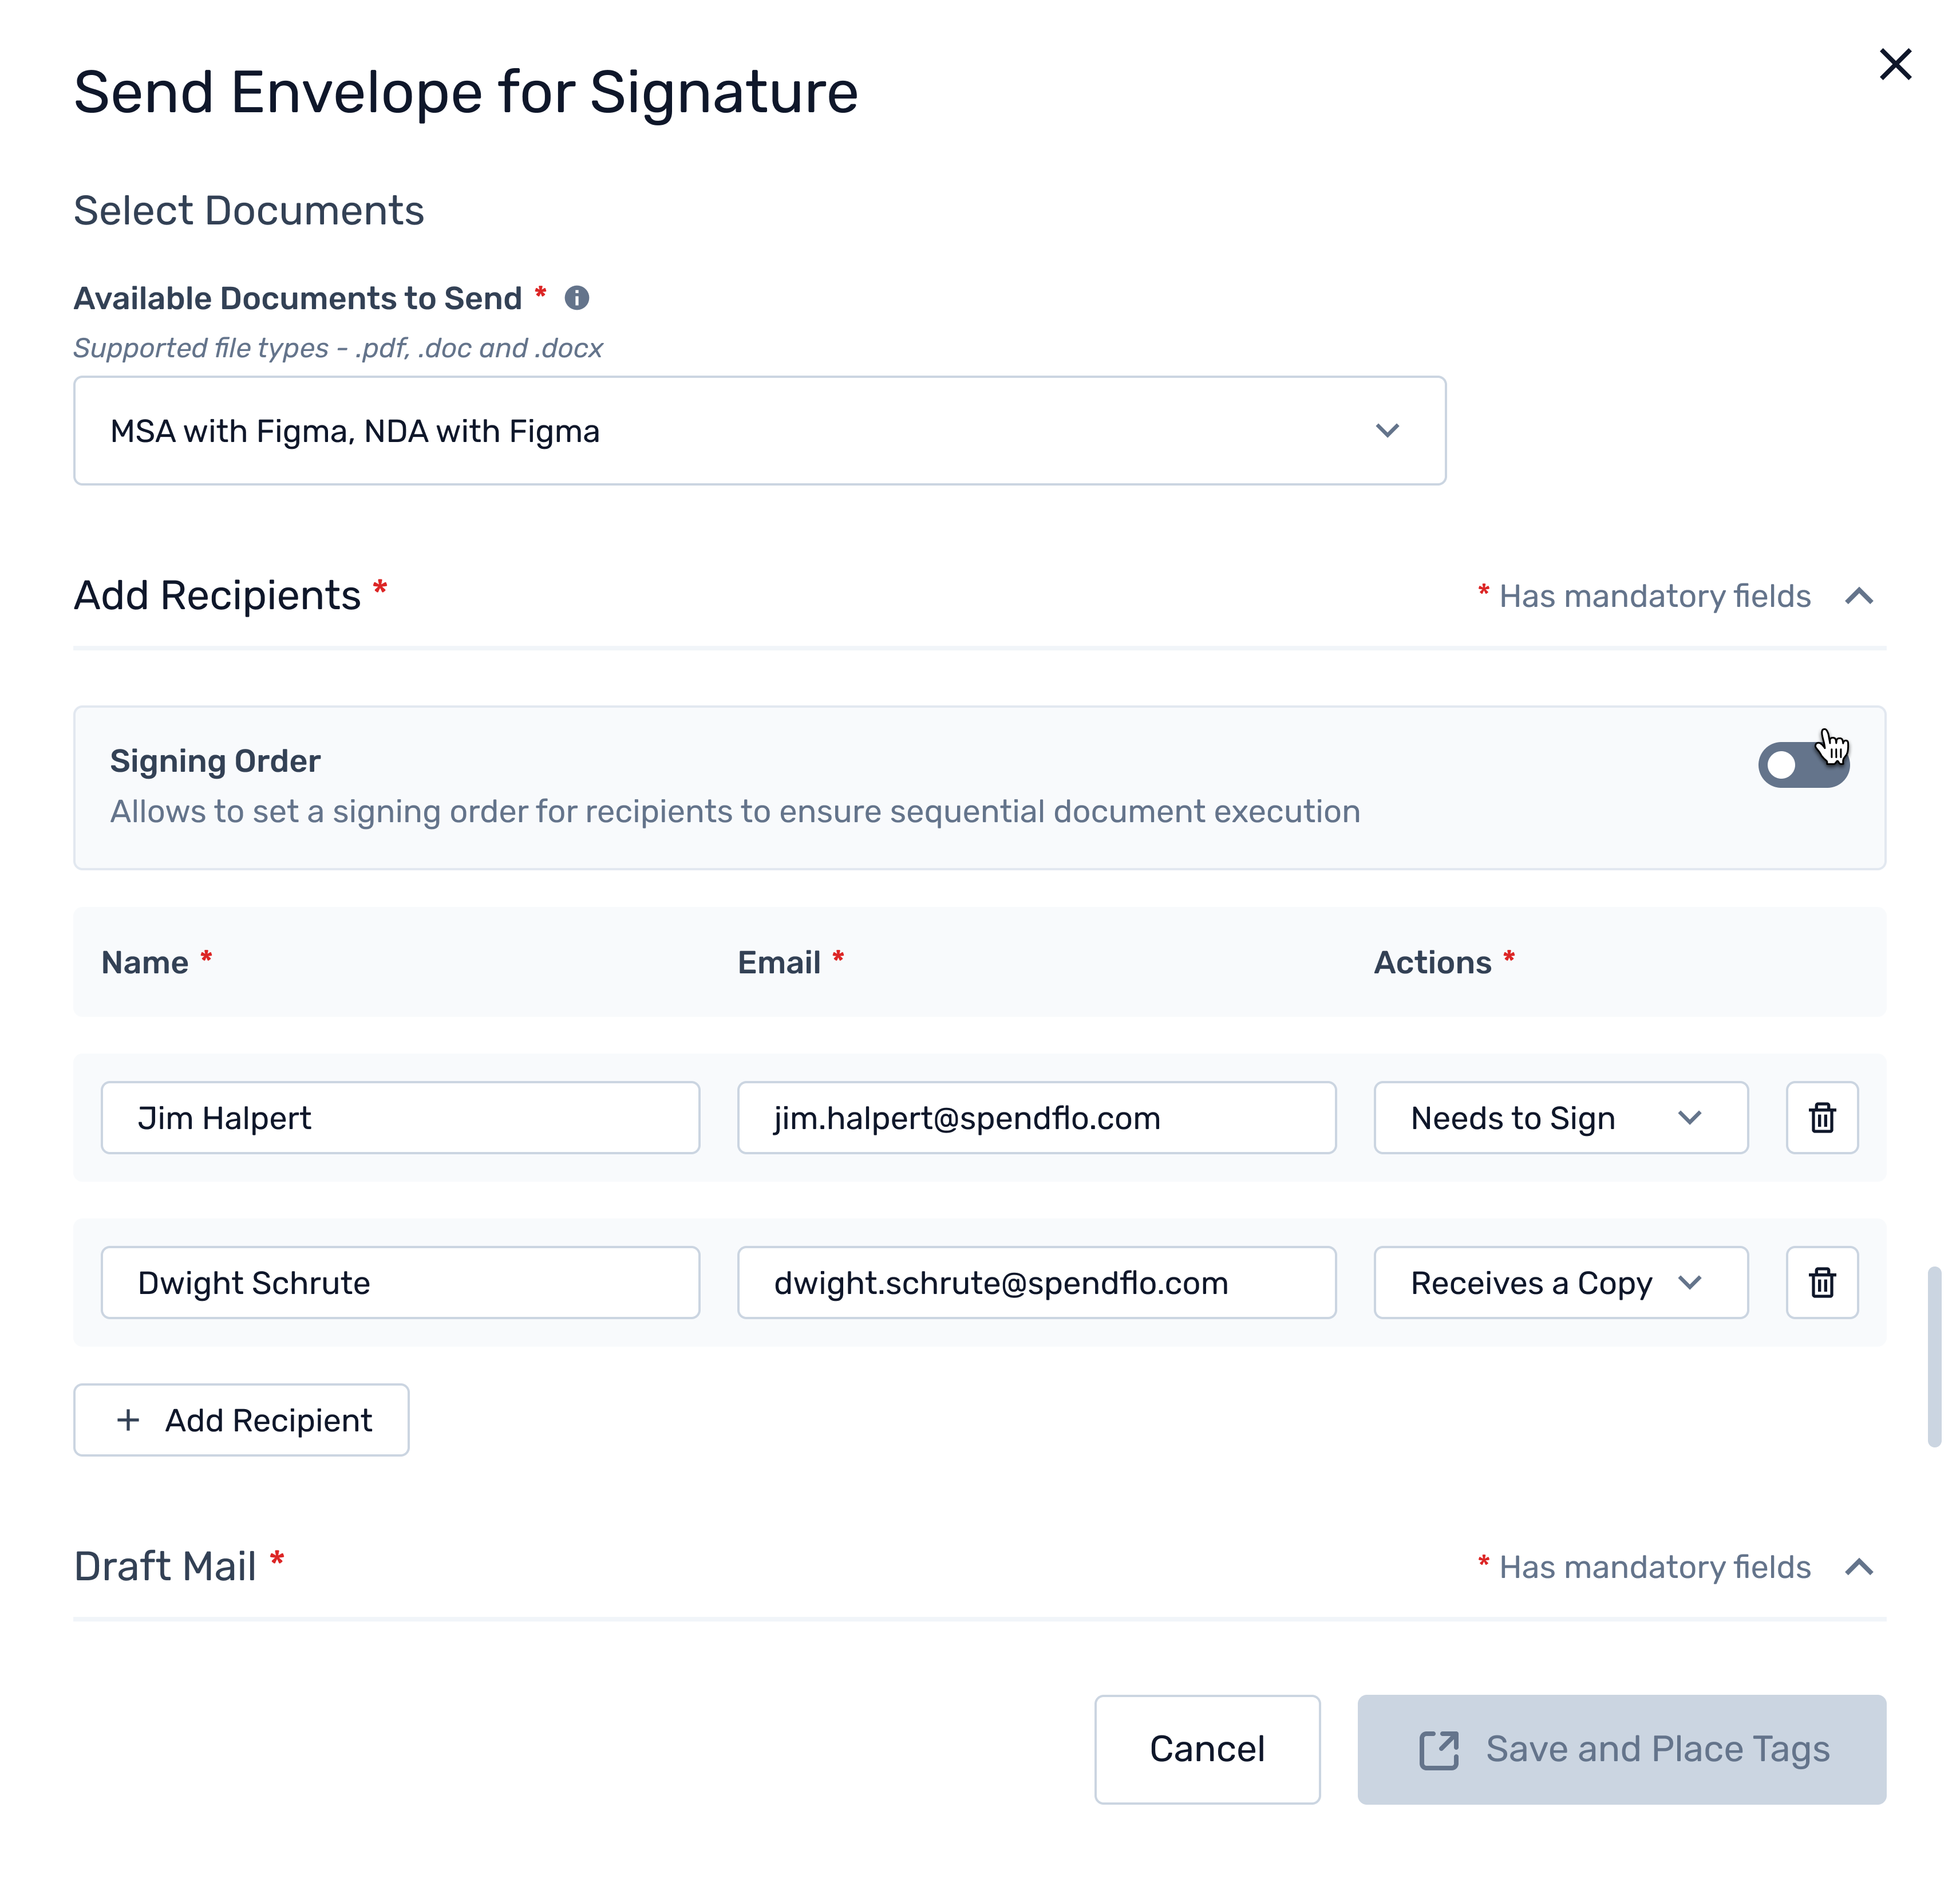
Add Multiple Recipients
You can add multiple rows to include all necessary signers and define their actions (e.g., Needs to Sign, Receives a Copy).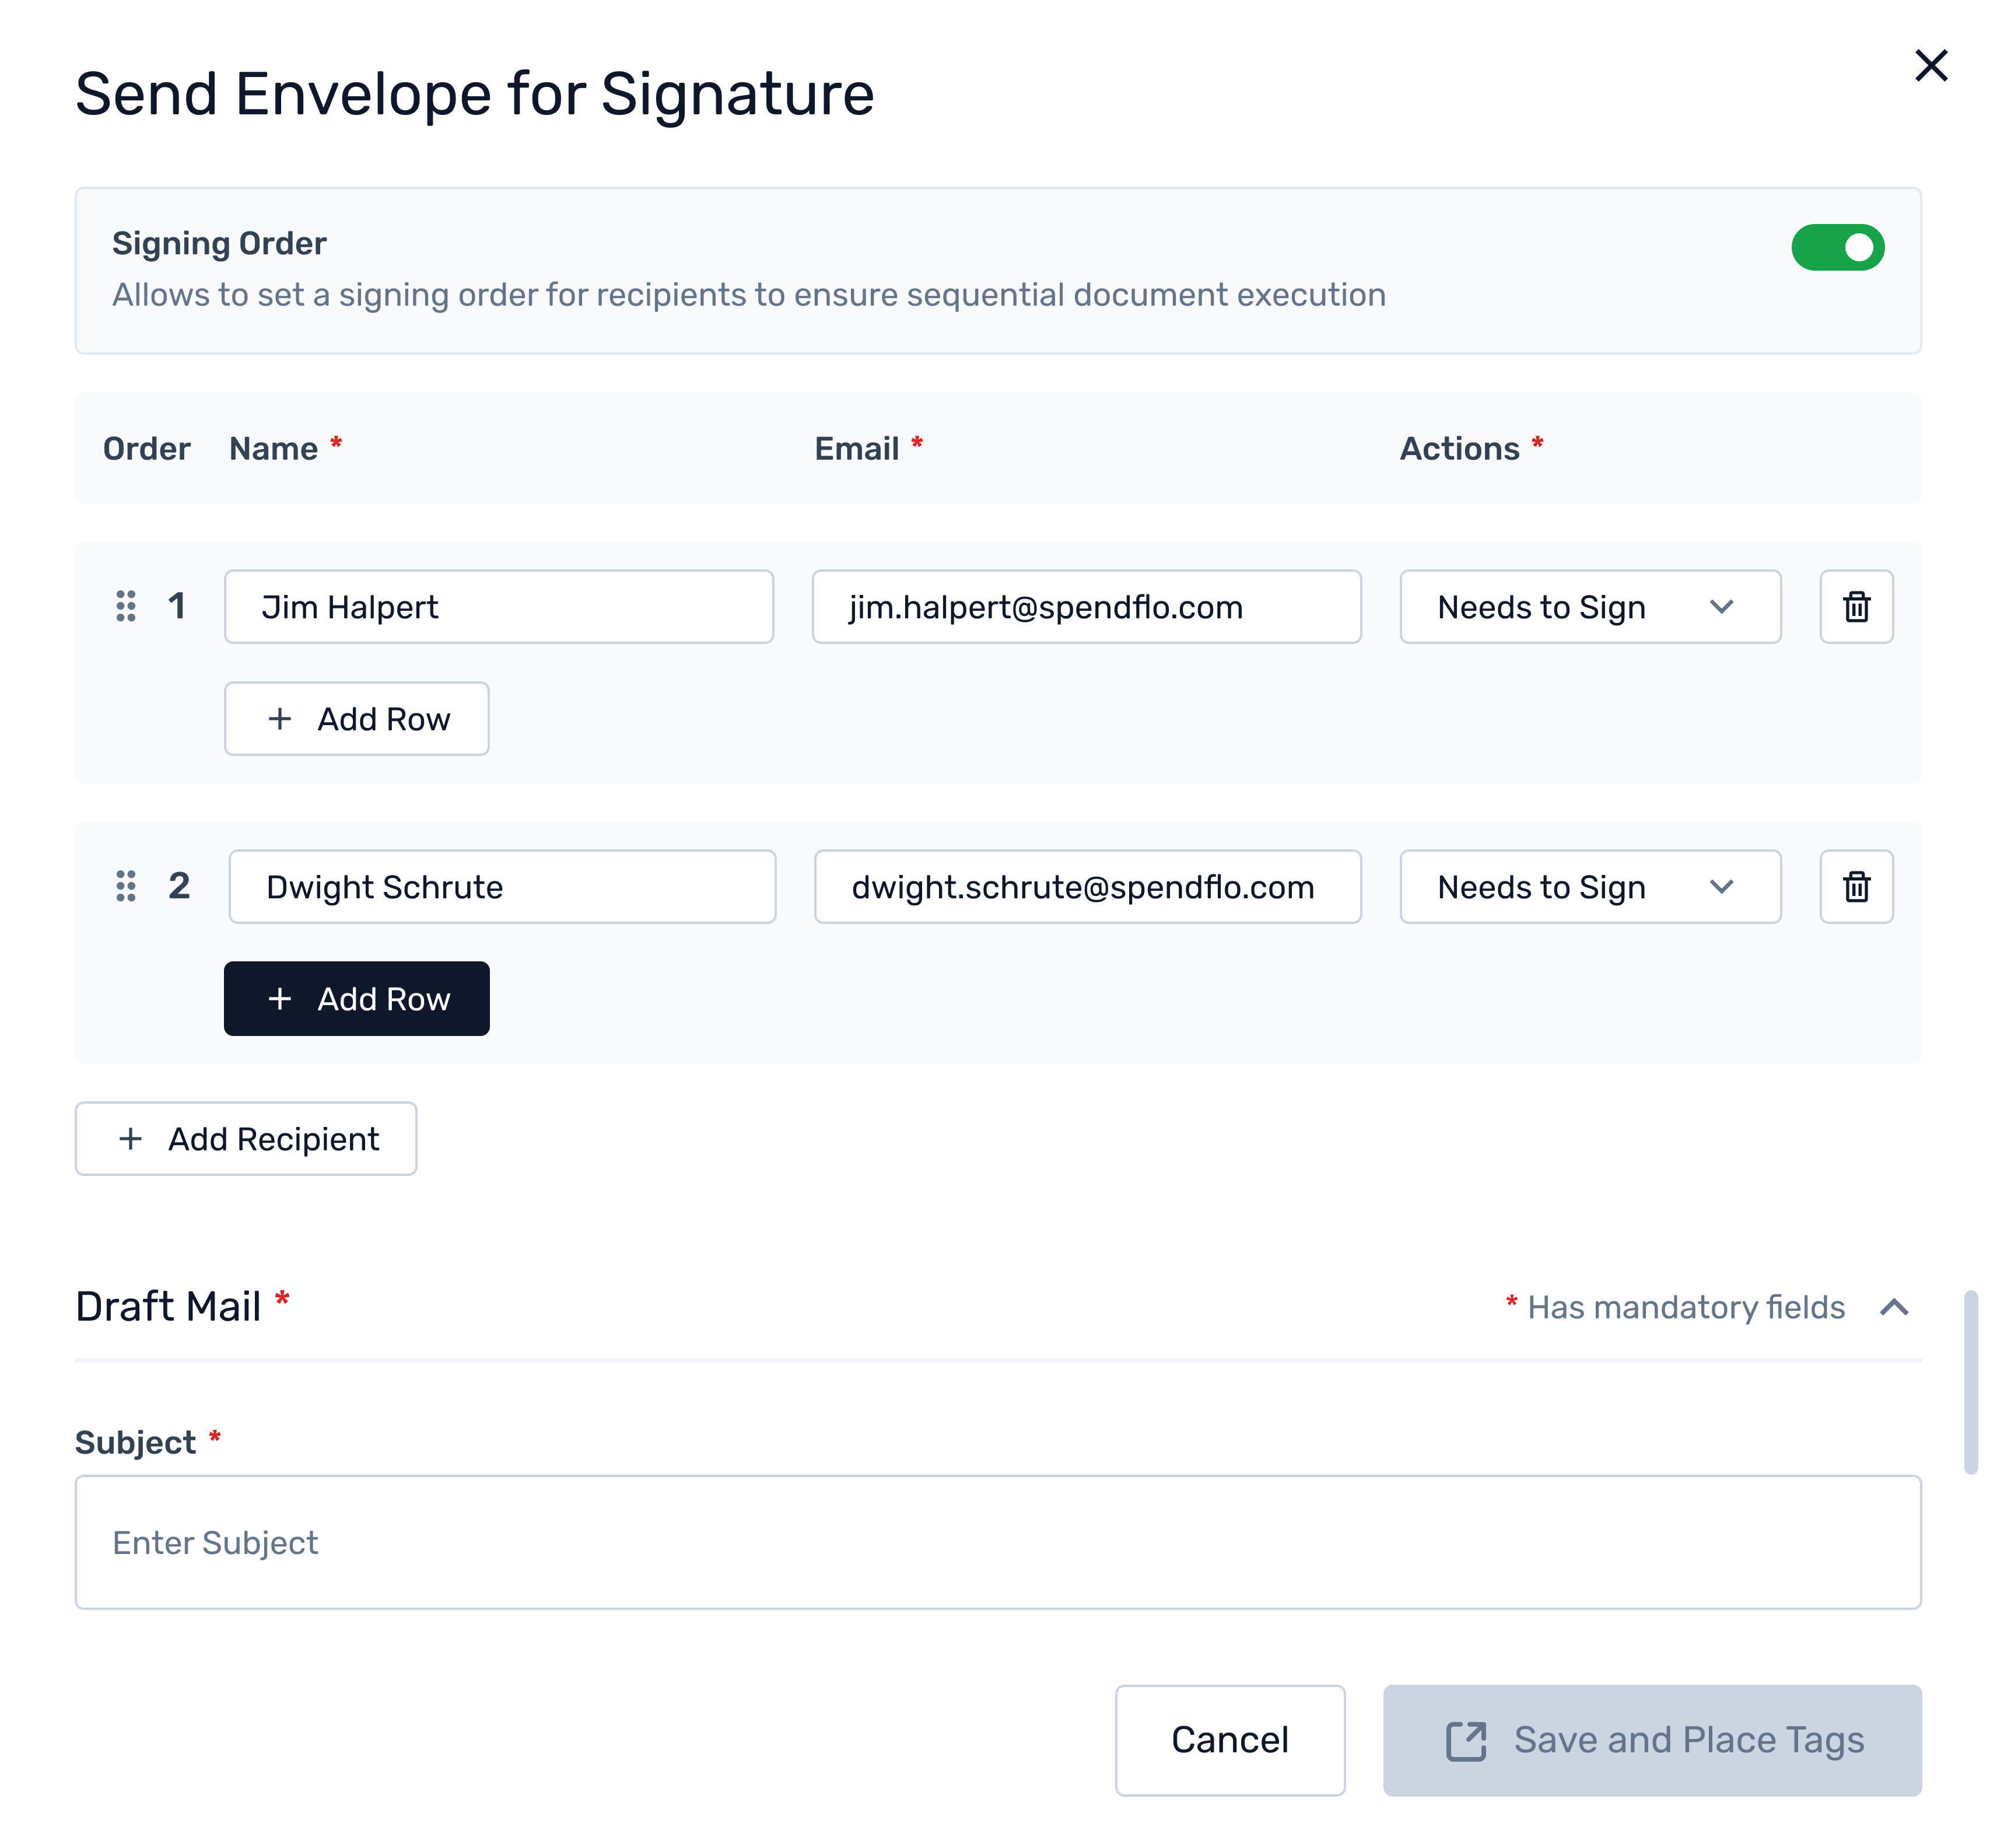
Send for Signature
Review the recipient list and email subject, then proceed to send the envelope. The task status in Spendflo will automatically update based on the actions taken in DocuSign.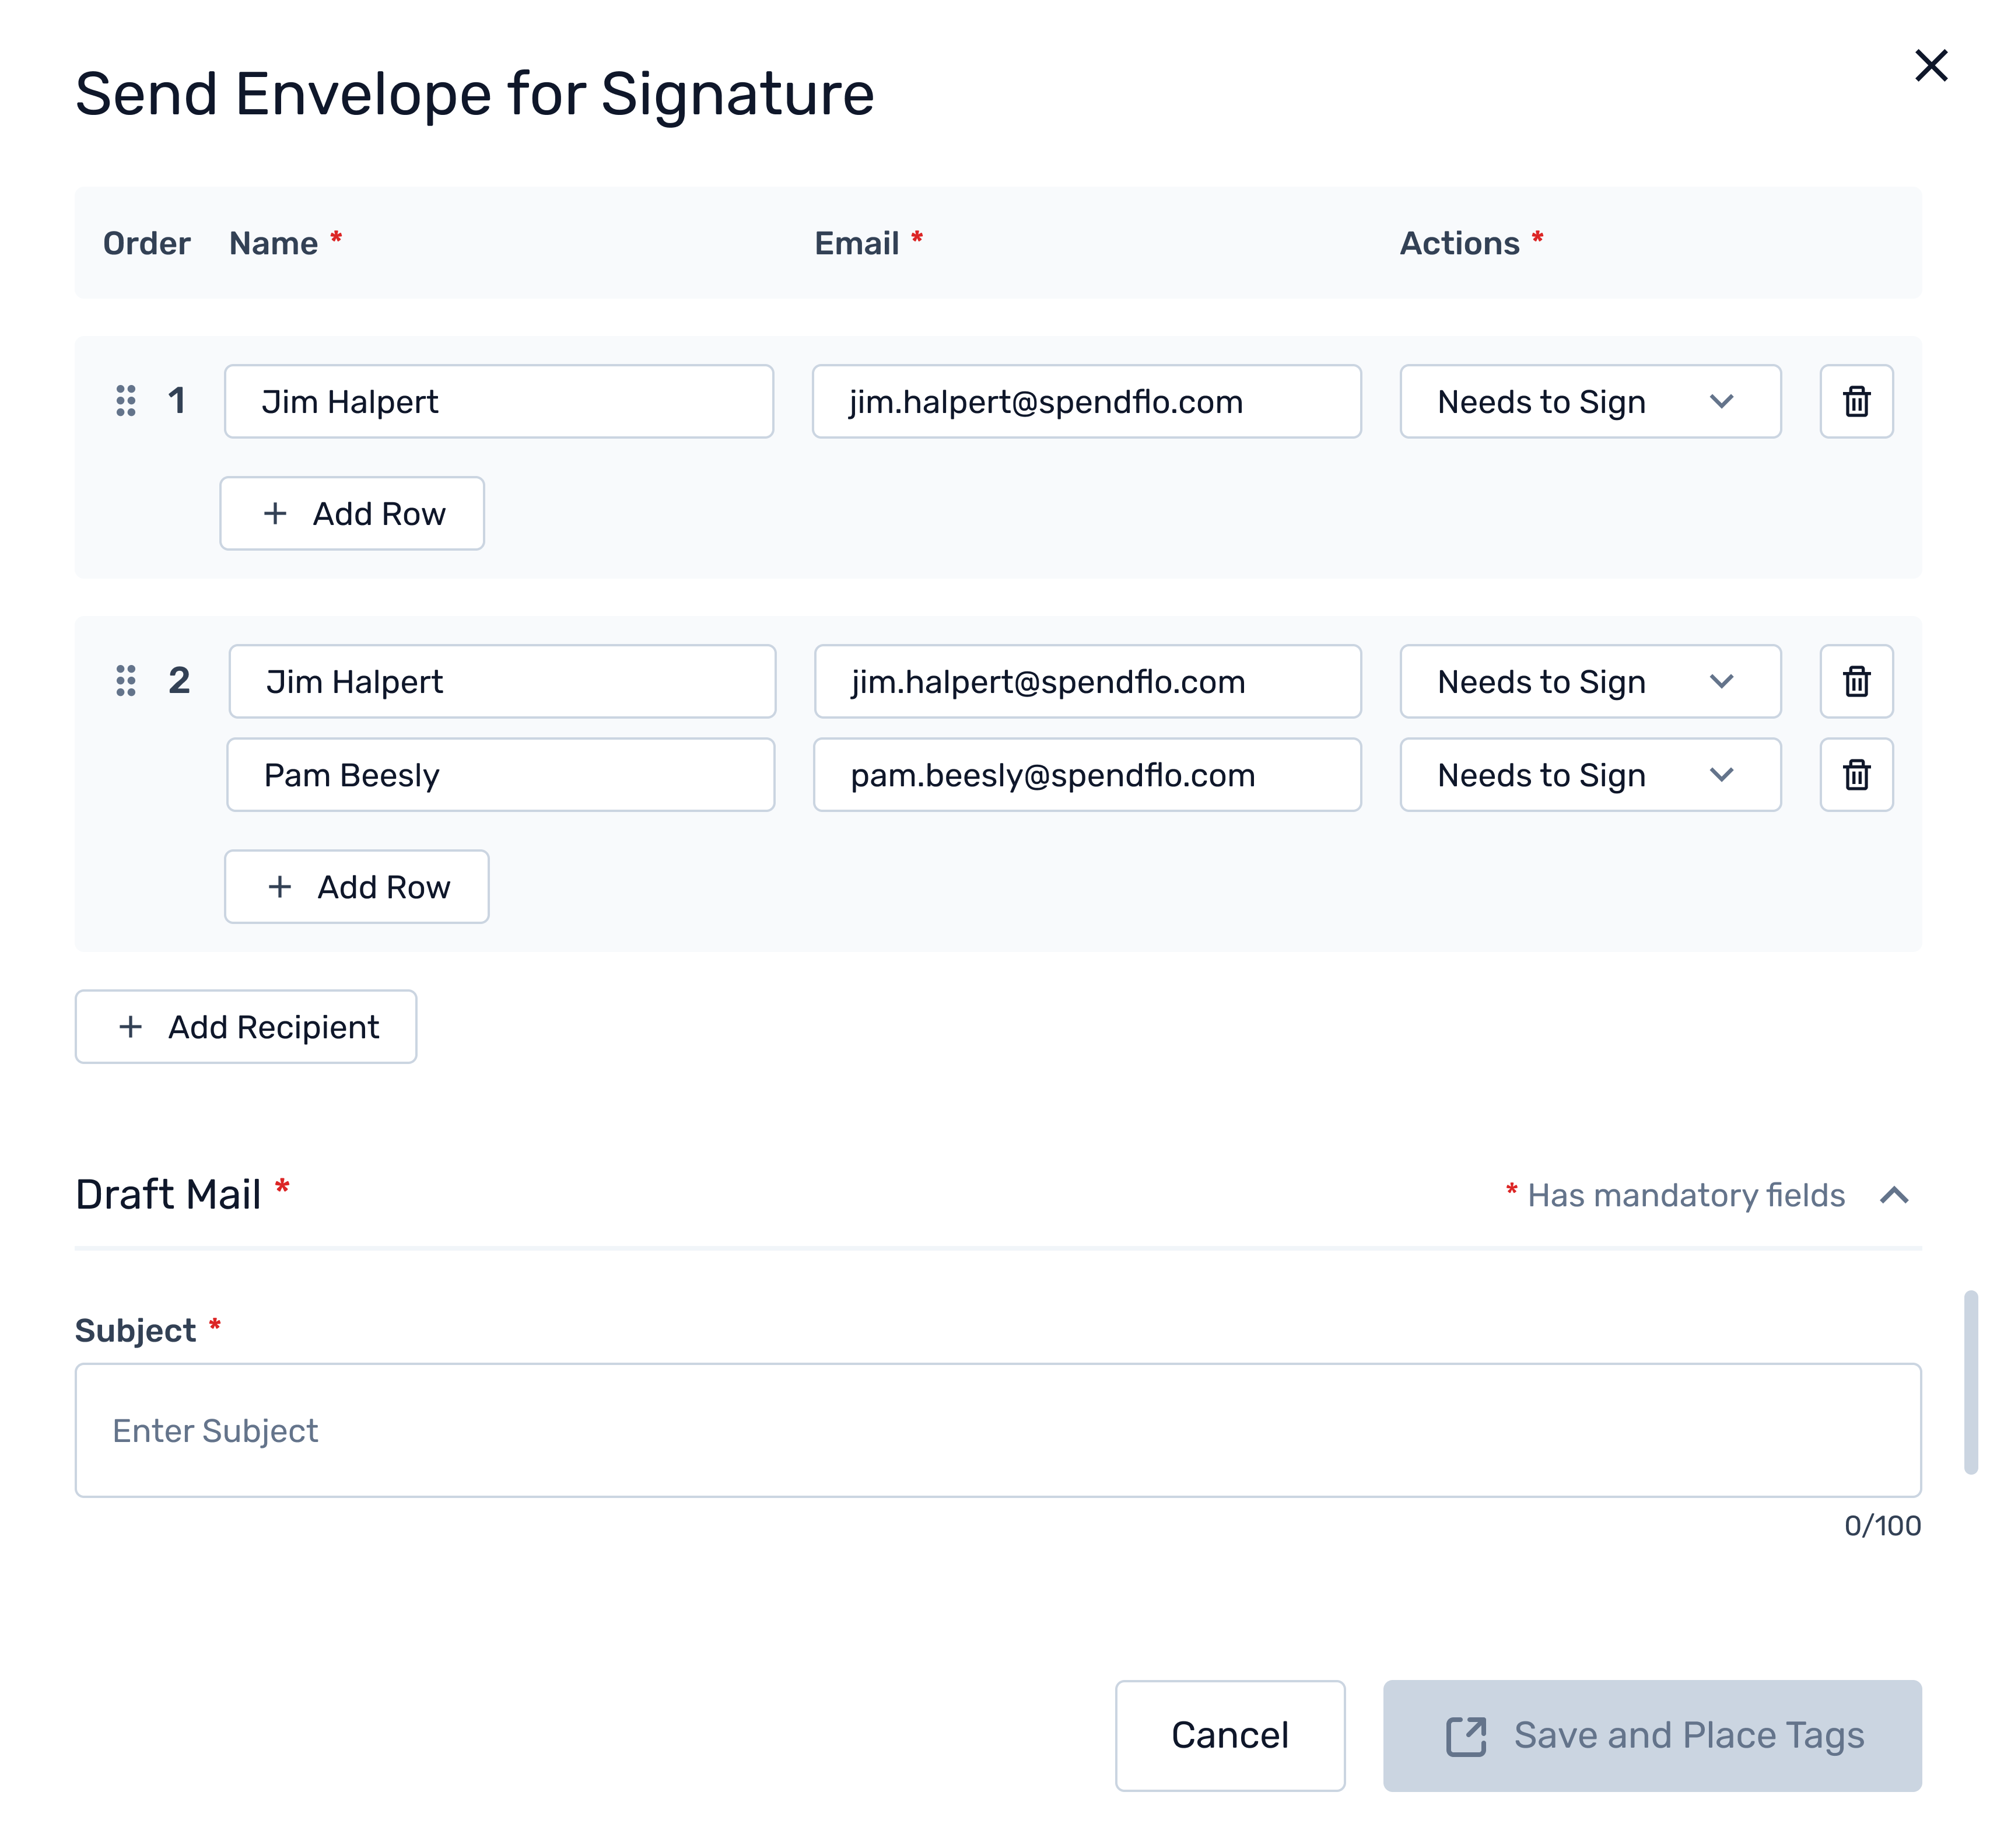
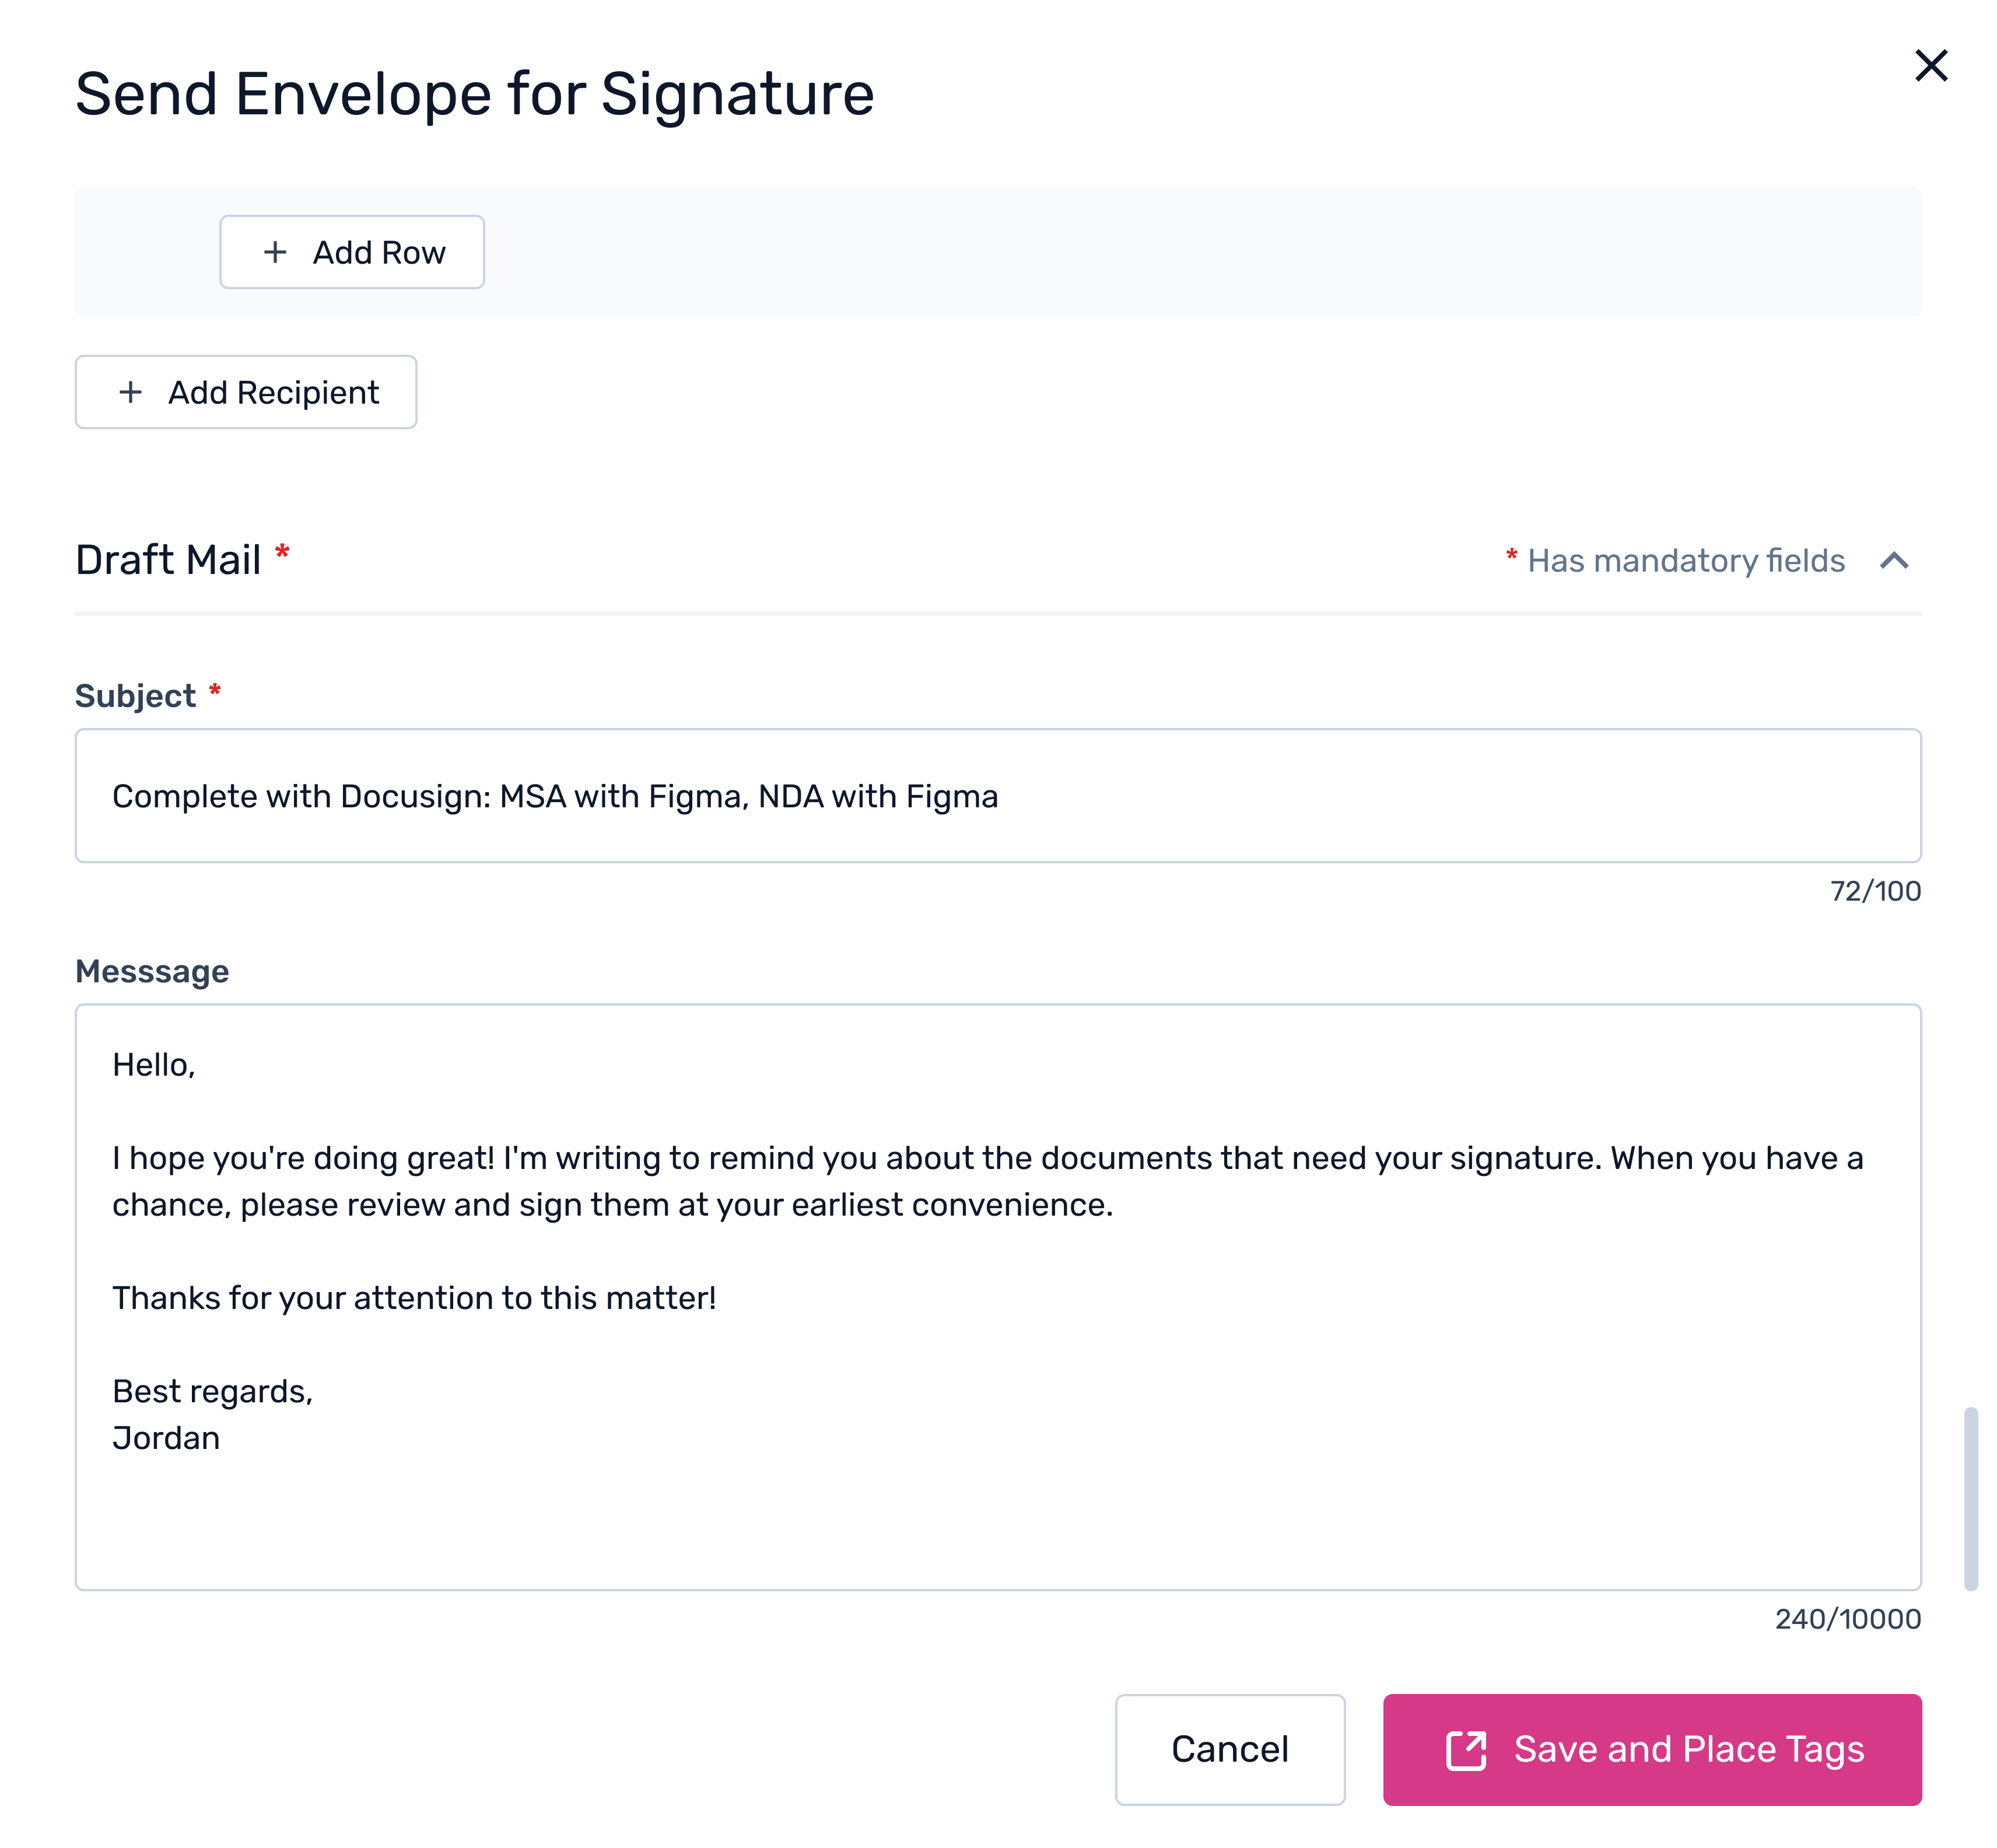
7. Review & Customize the Email
After adding recipients, you’ll see the Draft Mail section. Once the email content is finalized, click Save and Place Tags.
8. Redirect to DocuSign
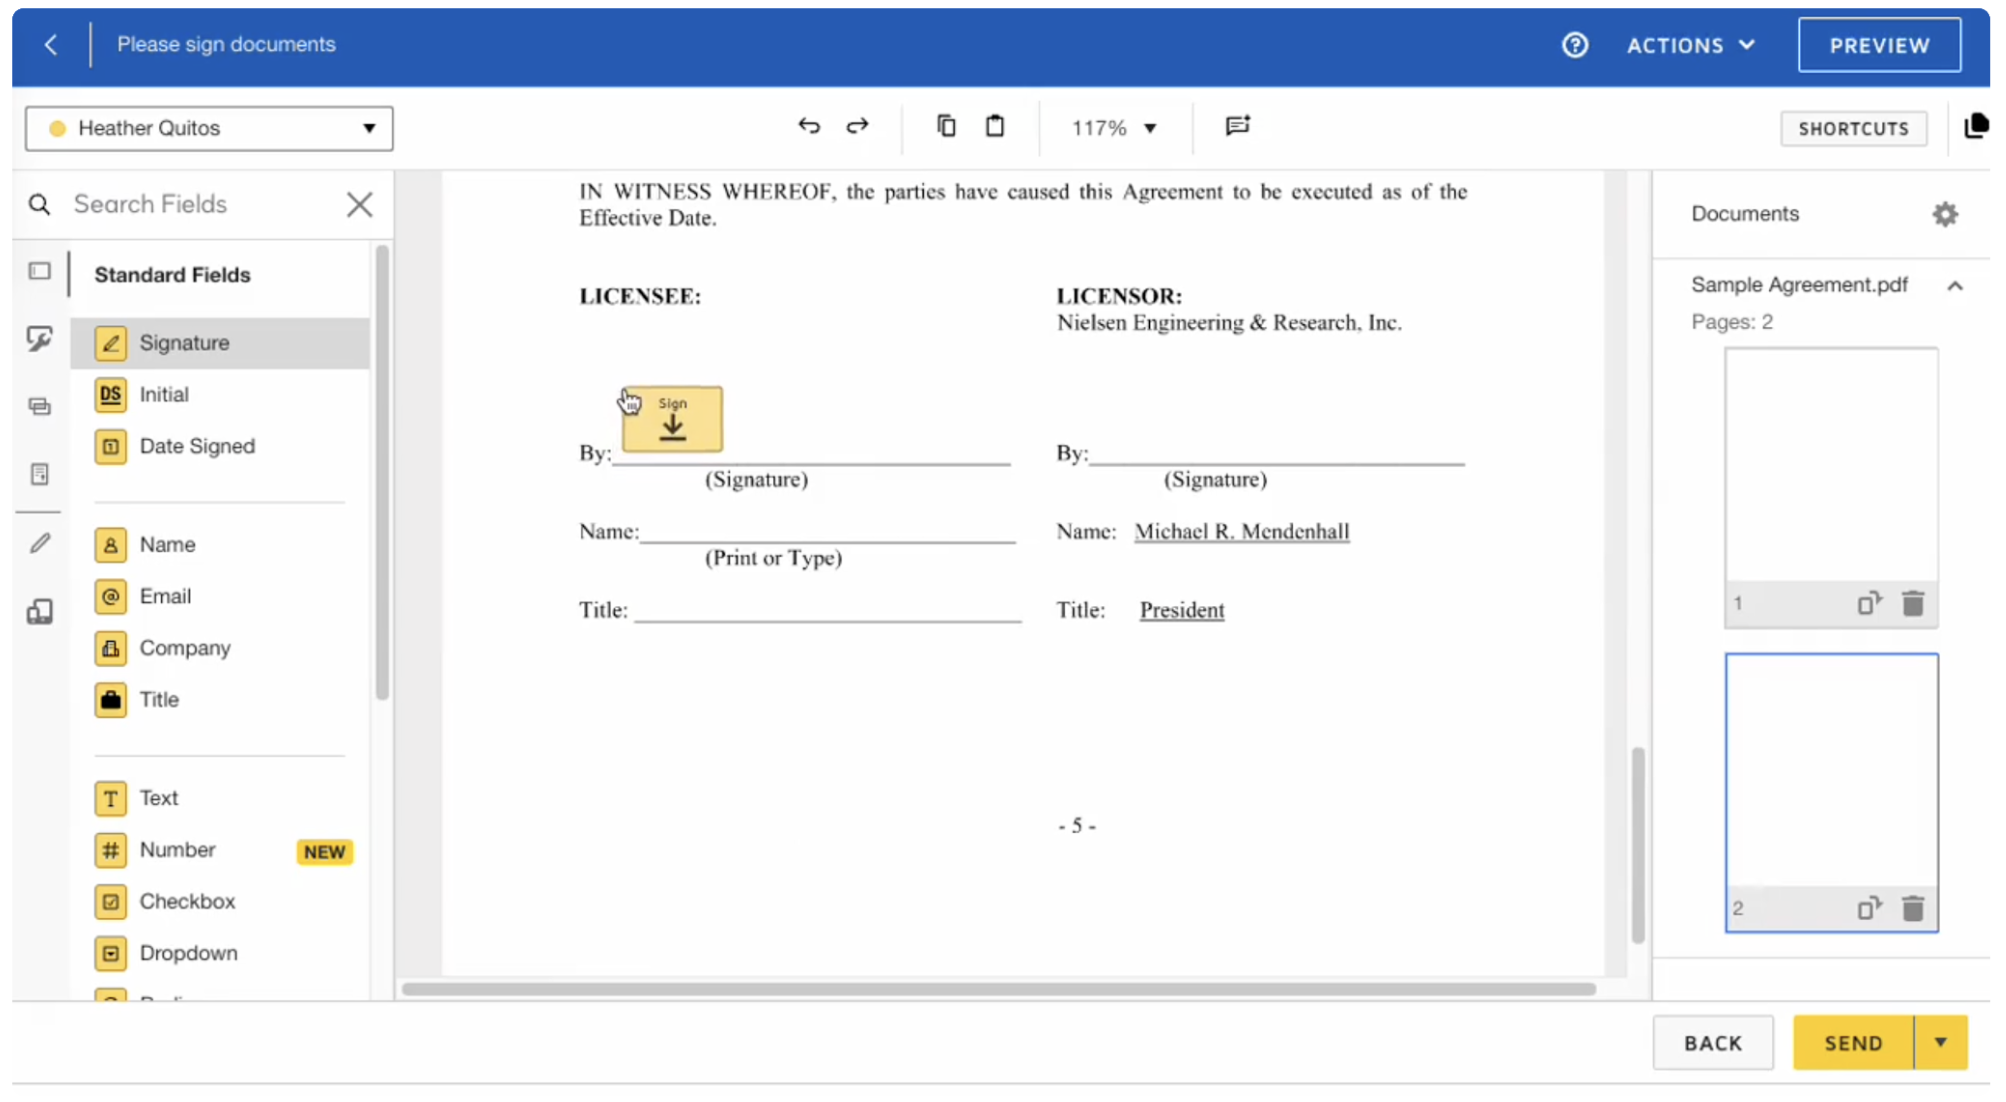
Next Steps
After the document is signed, the workflow will automatically move to the Completed status based on your configuration. The signed NDA will be stored in the Documents tab of the request for future reference.
Was this article helpful?
That’s Great!
Thank you for your feedback
Sorry! We couldn't be helpful
Thank you for your feedback
Feedback sent
We appreciate your effort and will try to fix the article